-
Blog
General
April 30, 2021
Best Exercises To Fix Neck Pain
What a Pain in the Neck!

If it’s not your boss with a last minute request on a Friday afternoon, or your in-laws showing up unexpectedly for the weekend, or even your dog shredding your couch cushions while you’re out on a hot date, then maybe the pain in the neck in your life is just that…pain in the neck.
If your neck is annoyingly sore, especially by the end of each day, let’s dive into why that is, and what you can do about it. This article shares a few simple tips, tricks, and the best exercises to fix neck pain.
Before following any of the suggestions in this article, please consult your physician if your neck pain:
- Is getting significantly worse.
- Exists for more than 6 weeks.
- Comes on sharp and quickly.
- Is accompanied by nausea.
Do You Really Have Rocks in Your Head?

One reason why your neck aches is that it may feel like your head is filled with rocks. Not necessarily true in most cases, but your head is HEAVY!
Weighing in between a whopping 10-12 pounds, your head not only affects your neck, but it also has a significant impact on the rest of your spine. Envision trying to balance a bowling ball at the top of your spine!
Seven small vertebrae in your neck, as well as, muscles, ligaments and tendons all working together support everything you do with your head. It’s a big job and something that most of us take for granted. So, making sure you maintain good posture is key to putting less torque on the neck.
The Impact!
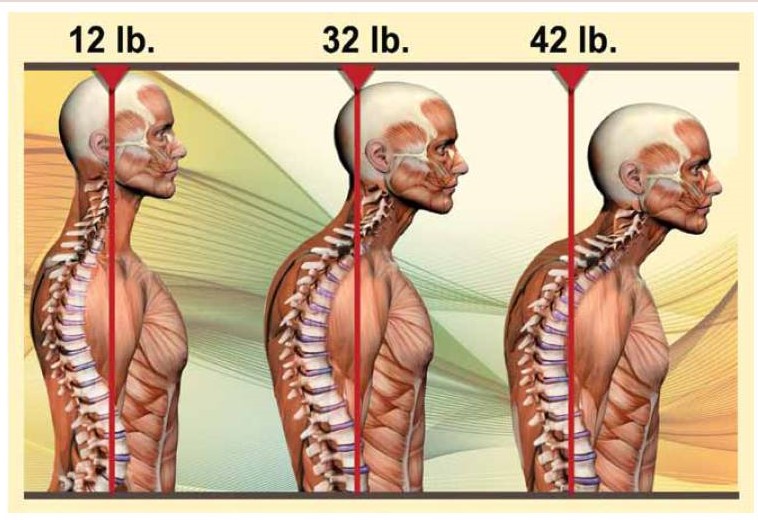
The position of your head impacts the pressure on your spine, meaning that for each inch your head moves forward, an additional 10 pounds of weight is felt on your spine.
So, for example, looking down at your phone (45 degrees) elevates the pressure on your spine from about 11 pounds (neutral) to 48 pounds. That’s huge!
If your neck and back are painful, what is happening at the top of your spine may be a contributor.
Let’s talk about perfect posture:
- Hold your phone up in front of your face instead of looking down
- Make sure you are looking straight at your computer monitor with your head neutral over your shoulders
- Ears over the shoulders by pulling chin in slightly and lengthening the back of the neck
- Shoulder blades pulled together and down slightly
- Chin parallel to the floor
Stretching Your Sore Neck Muscles

There are a variety of stretching exercises that you can do to alleviate and avoid neck pain. Here are some of my favorite:
Chin Tuck:
- Standing or sitting tall
- Chin parallel to the floor
- Pull chin in with ears over shoulders
- Hold 1-3 seconds
- Repeat for 10-15 repetitions
Wall Slides:
- Standing against a wall
- Pull chin in and lengthen the back of the neck
- Place arms laterally against the wall bending at the elbow for 90 degree angles
- Keeping your back against the wall by engaging your abs
- Extend arms directly over head by sliding arms up the wall to feel a stretch in your chest
- Return your arms to the starting point
- Repeat for 10-15 repetitions
Shoulder Blade Squeeze:
- Standing or sitting tall
- Ears aligned over your shoulders
- Squeeze shoulder blades together keeping shoulders down
- Hold for 1-3 seconds
- Repeat for 10-15 repetitions
Look Both Ways:
- Standing or sitting tall
- Ears aligned over your shoulders
- Slowly look directly left over your shoulder
- Return to center
- Slowly look directly right over your other shoulder
- Repeat for 5-10 repetitions each side
Beware of Traps!

Is your neck sore because you are holding a lot of tension in your trapezius muscle?
It’s the large triangle shaped muscle that runs from the base of your skull (occipital bone), down the center of your back (thoracic vertebrae), and laterally to your shoulders (scapula).
Simple Suggestions to follow to avoid being tripped by your traps are:
Shoulder shrugs:
- Hold arms down by your sides
- Lift shoulders up and back in a circular motion
- Repeat for about 10-15 repetitions
Trap stretch:
- Interlock fingers behind you and pull your fist to the left side of your waist
- Hold your left elbow out laterally away from your body
- Slowly lean your left ear to your left shoulder toward your elbow.
- Hold for 30 seconds
- Repeat on your right side
If interlocking fingers behind you is a challenge:
- Simply lean your left ear toward your shoulder
- Loop your left hand over your head
- Apply light pressure to the right side of your head, increasing the intensity of the stretch slightly
- Hold for 30 seconds
- Repeat on your right side
The above exercises not only help to increase neck strength and flexibility, but help improve posture, too!
Postural Kyphosis, Say What?

Postural kyphosis is curvature of the spine that forms a hump on the upper back. The hump can be located at the base of the neck, or slightly lower between the shoulder blades. Because of this, the hump is referred to as buffalo hump, round back, hunch back, as well as the outdated and offensive term dowager’s hump.
Accordingly, contributors to the formation of a back hump are:
- Carrying extra weight – extra pounds are a challenge for the skeletal structure of your whole body. However, fat also accumulates on the spine as protection and increases the presence of a hump
- Poor Posture – allowing your body to slouch can create physical misalignment
- Lack of Fitness – keeping your muscles strong and your limbs mobile allows your body to hold it’s frame properly
- Injury or vertebral compression fractures in which part of a vertebrae collapses
- Degeneration of the spine, a.k.a osteoarthritis, in which function and ability are impaired
How You Can Prevent or Correct Your Hump

You can prevent the formation of a back hump or decrease the hump you have by making some changes that involve more than just exercises for your neck and back, such as:
Sitting and standing tall, as well as sleeping with appropriate support – Your posture determines how your tissues support your bones in proper alignment – see the Hybrid Fitness posture article HERE
Stretching the pectoral muscles of your chest to allow the front of your torso to open, and your shoulders to move back and align with your hips. To do this:
-
- Stand in an average doorway
- Place arms at 90-degree angles on either side of the door frame
- Step one foot forward and lean forward with your sternum while relaxing the muscles of your chest
- Keep your head aligned with the spine, with ears over shoulders
- Increase the stretch by leaning forward a little at a time as you inhale and exhale
- If the doorway is too wide, do one side at a time
- If this stretch is easy, raise arms higher against the door frame
- Hold for 30 seconds
Stretching the muscles of your upper back to pull the shoulder blades together broadening the chest. To do this:
-
- Face a wall standing a few feet away with feet at least shoulder width apart
- Place both hands flat against the wall above head height
- Keep your neck and head aligned with your spine
- Slowly push your butt back as you lean into the wall
- Inhale and with each exhale sink a little deeper into the stretch
- Hold 30 seconds
Building strength in your back, shoulders and arms by doing a variation of a push-up.
*Note – before you discount this exercise thinking it’s too hard and no fun, see the Hybrid Fitness article on how to get your first push-up and variations of push-ups HERE.
The Miracle of Massage

Another option is to receive a massage from a licensed therapist in order to help target muscle “knots” specifically. It’s beneficial to relax as much as possible while the therapist is massaging the muscle. Slow inhales and exhales can help here.
In a pinch, an alternative to a massage:
- Place a tennis ball in a long sock and hang the ball over your shoulder
- Stand with your back to the wall with the ball between your body and the wall
- Locate the ball just below your neck to left side of your spine
- Bend your knees to roll your back over the ball in a vertical line between your shoulder blades on the left side of your spine.
- Then, move the ball to the right side of your spine and roll vertically again.
- Concentrate longer on areas where you have muscle soreness or pain until the muscle relaxes.
Be sure to hydrate with water after any massage in order to help your body flush toxins that have been released into your bloodstream. As if you needed another benefit to drinking more water!
The Next Step!
There you have it! The best exercises to fix neck pain.
These exercises will help you stretch parts that are sore, and build strength in your neck and back muscles to prevent the pain from returning.
You don’t need to large chunks our of your day to do these. Implement them slowly, and one at a time. Build a habit of doing them, and I promise, you’ll see relief!
I would even recommend adding them into your routine even if you don’t experience any pain currently. This will help prevent any soreness or pain from even starting!
If you found this article helpful, please check out the other articles from Hybrid Fitness coaches HERE
Hybrid Fitness YouTube Channel

Cathy grew up in NH surrounded by a large, loving family, where she learned generosity and hard work. She now models that for her two children. She was inspired to become a fitness coach when searching for ways to become more healthy herself after a life-threatening illness.
April 21, 2021
Top Tips for Beginner Weightlifters
The first time you step into a gym can be very intimidating and confusing. Free weights everywhere, Machines that look like death traps, and a lot of people with headphones in that obviously don’t want to be bothered.
Where do you start?
How do you do it safely?
How do you not look like a newbie?
These are questions that every person ponders when they first start weightlifting.
Looking back to when I first started lifting, I realize that there are a lot of things that make me shake my head at, and wonder to myself “What was I thinking!?”. Clearly, I wasn’t
I usually come to the same conclusion that I simply just didn’t know what I was doing. I made a lot of mistakes, and it makes me think of all the people that are starting out who may be making those same mistakes.
Below are my top tips for beginner weightlifters influenced by my mistakes as a beginner, and if I had a time machine, would go back and do differently.
Tip #1: Forget Everything You Think You Know

There are a lot of people in gyms who believe they have enough knowledge to do it for a living. Usually, they are wrong. Because of this, a lot of bad information tends to seep into peoples minds, and gets stuck there.
Over time it turns into concrete, and you find people all throughout gyms doing things they shouldn’t be. If you want to see changes in the gym, and become stronger and healthier, it’s sometimes best to forget everything you’ve been told, and seek advice from someone who has the knowledge and experience to help you reach your goals.
Always going into something new with an open mind is going to give you an advantage later on down the road. This is applicable to almost anything in life!
Tip #2: Learn the Basics and Progress Them Slowly

This has got to be the number one thing that keeps people from being consistent over a long period of time. If you are brand new to weightlifting, and are starting out with Barbell Back Squats, or Barbell Deadlifts like so many people do, then there is a massive problem here. While I am a huge advocate of the big barbell movements, they should only be performed after you’ve learned how to properly squat, hinge, and press.
There are great alternative exercises to all of the big barbell movements that will keep you safe, and lifting for a long time to come.
Below are just a few of my favorite moves to perfect before someone moves on to the barbells.
Back Squat: 4 Point Squat, Goblet Squat, Split Squats
Barbell Deadlift: Good Mornings, RDL, SL RDL
Barbell Bench Press: Push-Ups, Floor Press, Flat DB Press,
Tip #3: Forget about your Ego
This is a tough one for me personally, and really hits home. I was the biggest ego lifter out there. Each workout was about getting more and more weight on the bar.
After time, the extreme stress I was constantly putting my body under began taking its toll. This is because I was never giving my body the rest it required. As a result, all of my lifts started getting weaker and weaker, even though I was working harder and harder.
The human body is incredible at adapting to stress, but at a certain point it just can’t keep up. This is where intensity sometimes has to take a back seat in order to allow your body to recover properly. This is also when the risk of injury can be significantly higher than normal.
Deload!
The term “deload” gets tossed around a lot in training circles, but most people are either unsure how to properly program one, or they just don’t understand the importance of them.
Deloads give your body a chance to recover from the constant stress that working out places on it. A common mistake made while deloading is going too far in the other direction, and putting your body under almost no stress. They should still have a certain level of toughness.
An example of a good deload could simply be doing less sets than normal. If you normally do 4 sets of Squats per workout, do only three on your deloads. What you don’t want to do is something like 60% of your one rep max for 3 sets of 3-5 reps. Generally, 60% of one rep max can be completed for 10-15 reps per set.
Although, it may seem like good idea, you’re mostly just wasting time. A deload should still be challenging but not to the degree your typical workouts are.
Tip #4: Ask for Advice

One thing I have found in gyms is that most people don’t mind helping out. Even the “gym bros” I mentioned earlier who always have headphones in, generally don’t mind answering questions. Most people would prefer a “newbie” ask for advice instead of just going with what they think they know, and getting hurt.
The training community is generally very accepting and willing to help. Be careful who you take advice from, though. Just because someone may have a good physique doesn’t mean they necessarily should be giving advice to others.
And on the flip side, I’ve met casual gym goers who have more knowledge than professional trainers. Find people you trust, and soak in all the knowledge you can.
Take Action!
There are many things I wish I could go back and do differently. Learning these lessons earlier on in life would be one of my first do overs if I were given the chance. I could’ve avoided injuries, frustration, and wasted time.
If you are just starting out in the gym, or have been working out for years, these top tips for beginner weightlifters will aid you for many more years of training to come.
If you found this article helpful or informative, please check out our other articles HERE
For more fitness, health, and lifestyle tips, check out our YouTube channel HERE
And, as always…
Small steps, BIG results!

Brandon started working out as an athlete in high school, striving to push his limits and reach his full athletic potential. As he spent more and more time working on his own goals, he found a passion in the science of strength & conditioning, and using that new-found knowledge to help others. Brandon is exceptional at giving his clients the extra push to get stronger in a safe manner, while going above and beyond to making sure they feel comfortable and safe.
March 25, 2021
Top Women in Strength Sports
Strength training equipment and gyms started to gain in popularity in the 1960s with a big leap throughout the 1970s. It was in 1977 when the legendary Pumping Iron documentary was released following the training of legends such as Lou Ferrigno, Franco Columbo and of course Arnold Schwarzenegger, as well as other greats from the “Golden Age”.
But strength training dates back much further into history than just the 1960’s and 1970’s. The ancient Egyptians, Greeks, Chinese and Scottish, as well as others had some form of strength training for their warriors. Obviously strength training has evolved into much more than it was in ancient times.
A New Era
One thing that has grown in the strength world is the involvement of women. Women have been documented as exercising since the times of the ancient civilizations listed above, but real strength training wasn’t a popularized thing among women until the last 20-30 years, with a great influx over the past 10-15 years.
Today you can walk into just about any gym and find women throwing around chalk, and blasting Metallica. But, there is still a long way to go before women’s strength training and sports becomes as popular as it should.
Below are just a few of the top women in strength sports, and really pushed the boundaries for what we thought was possible.
Donna Moore
Donna Moore was the first strong woman I remember watching and my personal favorite strongwoman. She has won the 2016, 2017 and 2019 World’s Strongest Woman competition, as well as wins at the Arnold’s Strongwoman competitions in 2016, 2017 and 2018.
Donna has set numerous world records including an incredible 171kg (377lbs) Atlas Stone Over Bar record set back in September of 2020 at the age of 40. Donna is also one of the only women to ever successfully lift the legendary Dinnie Stones!
Andrea Thompson
2020 was a rough year for most people. Not Andrea Thompson, though. Andrea set three world records in 2020 which included:
- 281kg (621lbs) elephant bar deadlift
- 135kg (297.7lbs) log lift
- 290kg (638lb) deadlift for the strongwoman deadlift world record.
Andrea just turned 37 years old in 2020, but with fellow strongwoman Donna Moore staying strong in her 40’s, I expect a few more records from Andrea before her career is over.
Rhianon Lovelace
Rhianon Lovelace is a little bit of a unicorn. While small in stature she brings a very rare blend of strength, power and quickness that is completely unmatched in male or female strength sports today.
In September of 2020, Rhianon won the first ever Pound for Pound World’s Strongest Woman, and many believe (myself included) she is pound for pound the strongest person on planet Earth today regardless of gender. A few of Rhianon’s accomplishments in 2020 included:
- 600lb Deadlift
- Overhead axle press of 202lbs
- 312lb atlas stone
- 800lb silver dollar deadlift (traditional deadlift with bar being raised up 18 inches)
All four of these lifts were lightweight world records, and both deadlifts were also middleweight world records! She also completed those lifts while only weighing in at 138lbs!
We’ve already seen some remarkable feats of strength from Rhianon, but the best is yet to come as she is only 24 years old!
Jill Mills
Jill Mills was a bodybuilder who pivoted to the strength world. She dominated the sport for much of the late 1990’s and early 2000’s. Jill won back to back World’s Strongest Woman titles in 2001 and 2002. She undoubtedly would’ve won more, had she not stopped competing.
Jill was an all around great athlete. She could lift heavy on static lifts, was quick on all moving events, and seemed unbeatable on any overhead lifting events with her broad and perfectly sculpted shoulders.
Jill did an incredible job blending strength while keeping a physique with very low body fat. A lot of women in the sport today credit their love and desire for the sport to Jill Mills.
Rebecca Swanson
No list of strength athletes would be complete without Rebecca Swanson. Rebecca is simply the strongest woman to ever live. Even though she had a short but successful career in Strongman, most of her success came in Powerlifting where she holds records with:
- 854lb Squat
- 600lb Bench Press
- 683lb Deadlift
Arguably her most impressive moment came in 2006 when she squatted 804lbs while only weighing in at 197lbs! More than four times her bodyweight!
What’s Next?
Strength sports have grown in popularity, and continue to grow with increasing turnouts each year. But, the growth and acceptance of women in the sport is what really fires me up! Strength sports need to grow into something more than just a day of entertainment a couple times a year. In order for this to happen, women need to be encouraged and more accepted throughout the strength world.
Listed above are just a few of the incredible top women in strength sports that have, or continue to push the boundaries of the sport. If you are reading this and feel the fire in your belly to see what you can really push yourself to become then get into a gym, seek advice from others and be the best you can be!
If you enjoyed this article, please consider subscribing to the Hybrid Fitness YouTube channel, and be sure to check out all the other articles from our coaches.
Please check out our other fitness & health articles here – https://hybridfitnessgym.com/articles/
And remember…Small Steps, Big Results.
Brandon started working out as an athlete in high school, striving to push his limits and reach his full athletic potential. As he spent more and more time working on his own goals, he found a passion in the science of strength & conditioning, and using that new-found knowledge to help others. Brandon is exceptional at giving his clients the extra push to get stronger in a safe manner, while going above and beyond to making sure they feel comfortable and safe.
March 3, 2021
Easy Tips To Help Low-Back Pain
(From the Comfort of Your Own Home)
Are you in search of more easy tips to help low-back pain? Your requests for MORE tips prompted the creation of this article. And here at Hybrid Fitness, we give the people what they want!
Not only are we going to provide you with suggestions that will help alleviate low-back pain that are within your control, we’re also going to dive into the risk factors of low-back pain. Warm up those heating pads, here’s Part II!
DISCLAIMER: Before following any of these easy tips to help low-back pain, please refer out to a doctor or other medical professional.
When is Your Low-Back Pain Just Too Much to Address with Easy Tips at Home?
It’s probably time to seek the advice of a medical professional if you have:
- Low-back pain that comes on sharp and quick
- Pain that does not diminish within 6 weeks by performing strengthening and stretching exercises consistently
- Pain that flows down one or both legs
- Other symptoms that need medical attention that may be related to your low-back pain, such as if you have a fever accompanying back-pain that may indicate an infection of some kind in your body
- Experienced serious trauma from a fall or another kind of accident
- Any numbness or tingling
- Bouts with incontinence
- Pain at night that wakes you up from sleep
- Limbs not functioning properly
- Unexplained weight loss
- That feeling you get deep down in your center when your body tells you it’s trying to deal with something serious that needs professional medical attention.
What is Within My Control in Regards to Alleviating Low-Back Pain?
Your chance of having low-back pain at some point in your life is based on the following risk factors:
- Age – our strength and flexibility wanes as we get older
- Stress – our bodies physically hold stress, and give us signs that it needs to be addressed through pain
- Fitness level – as the saying goes, “use it or lose it”, a sedentary lifestyle is not your friend!
- Prolonged poor posture
- Disease, such as arthritis or cancer
- Pregnancy – carrying another human inside your body is nothing short of a miracle in more ways than one!
- Parenting – lugging not only young children, but all that goes along with them, can take its toll on your low-back
- Weight gain – it’s a big ask of your spine and hips to carry more weight than is healthy for your body frame
- Genetics – thank mom and dad for this one!
- Occupational risk factors – work demands, including heavy lifting and repetitive motion
- Smoking – People who smoke have more back pain as compared to those who do not smoke ~ maybe it’s from coughing?
- People who experience depression, anxiety, or other psychological conditions tend to have more back pain than those without these conditions
Obviously, some of these things listed are out of your control (genetics), but others you have the power to address in order to eradicate pain and discomfort in your low-back.
Here’s a few ways to alleviate that low back pain before even getting out of bed in the morning.
Remember ~ if any exercise increases your pain, dial back the exercise or stop entirely. Preferably, you want to challenge your body in a pain-free way to right itself.
Easy Tip #1 From the Comfort of Your Own Bed
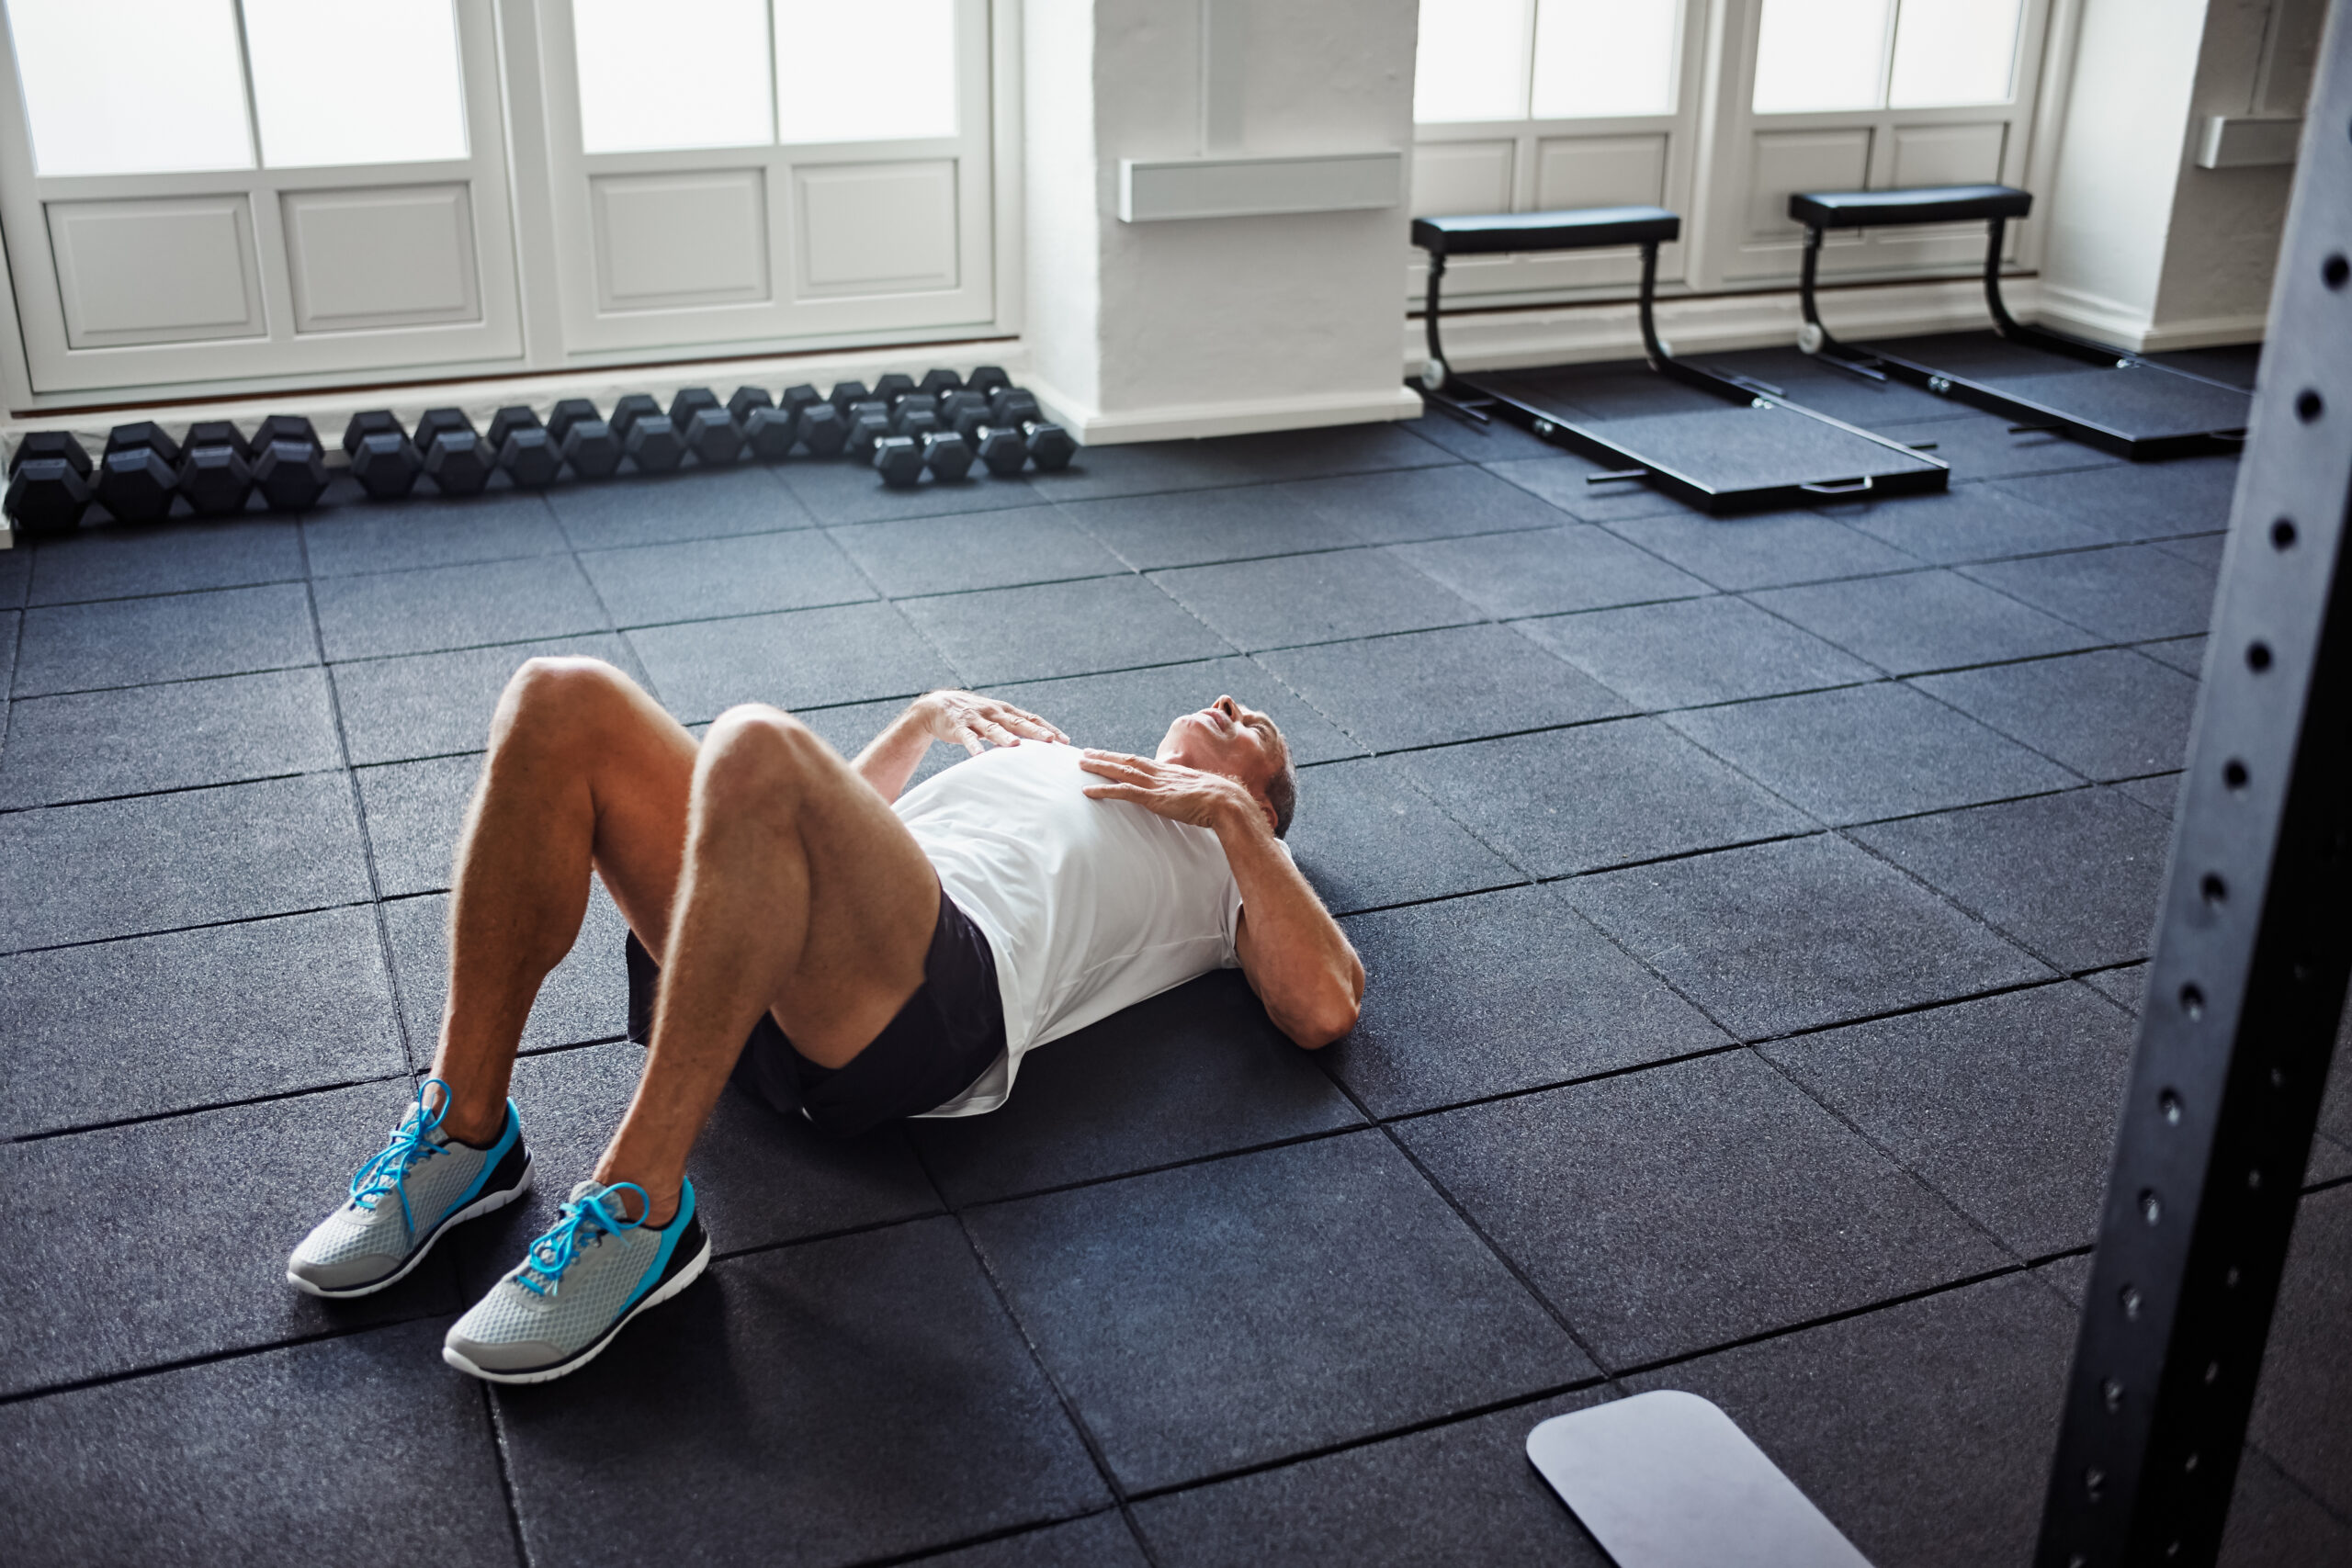
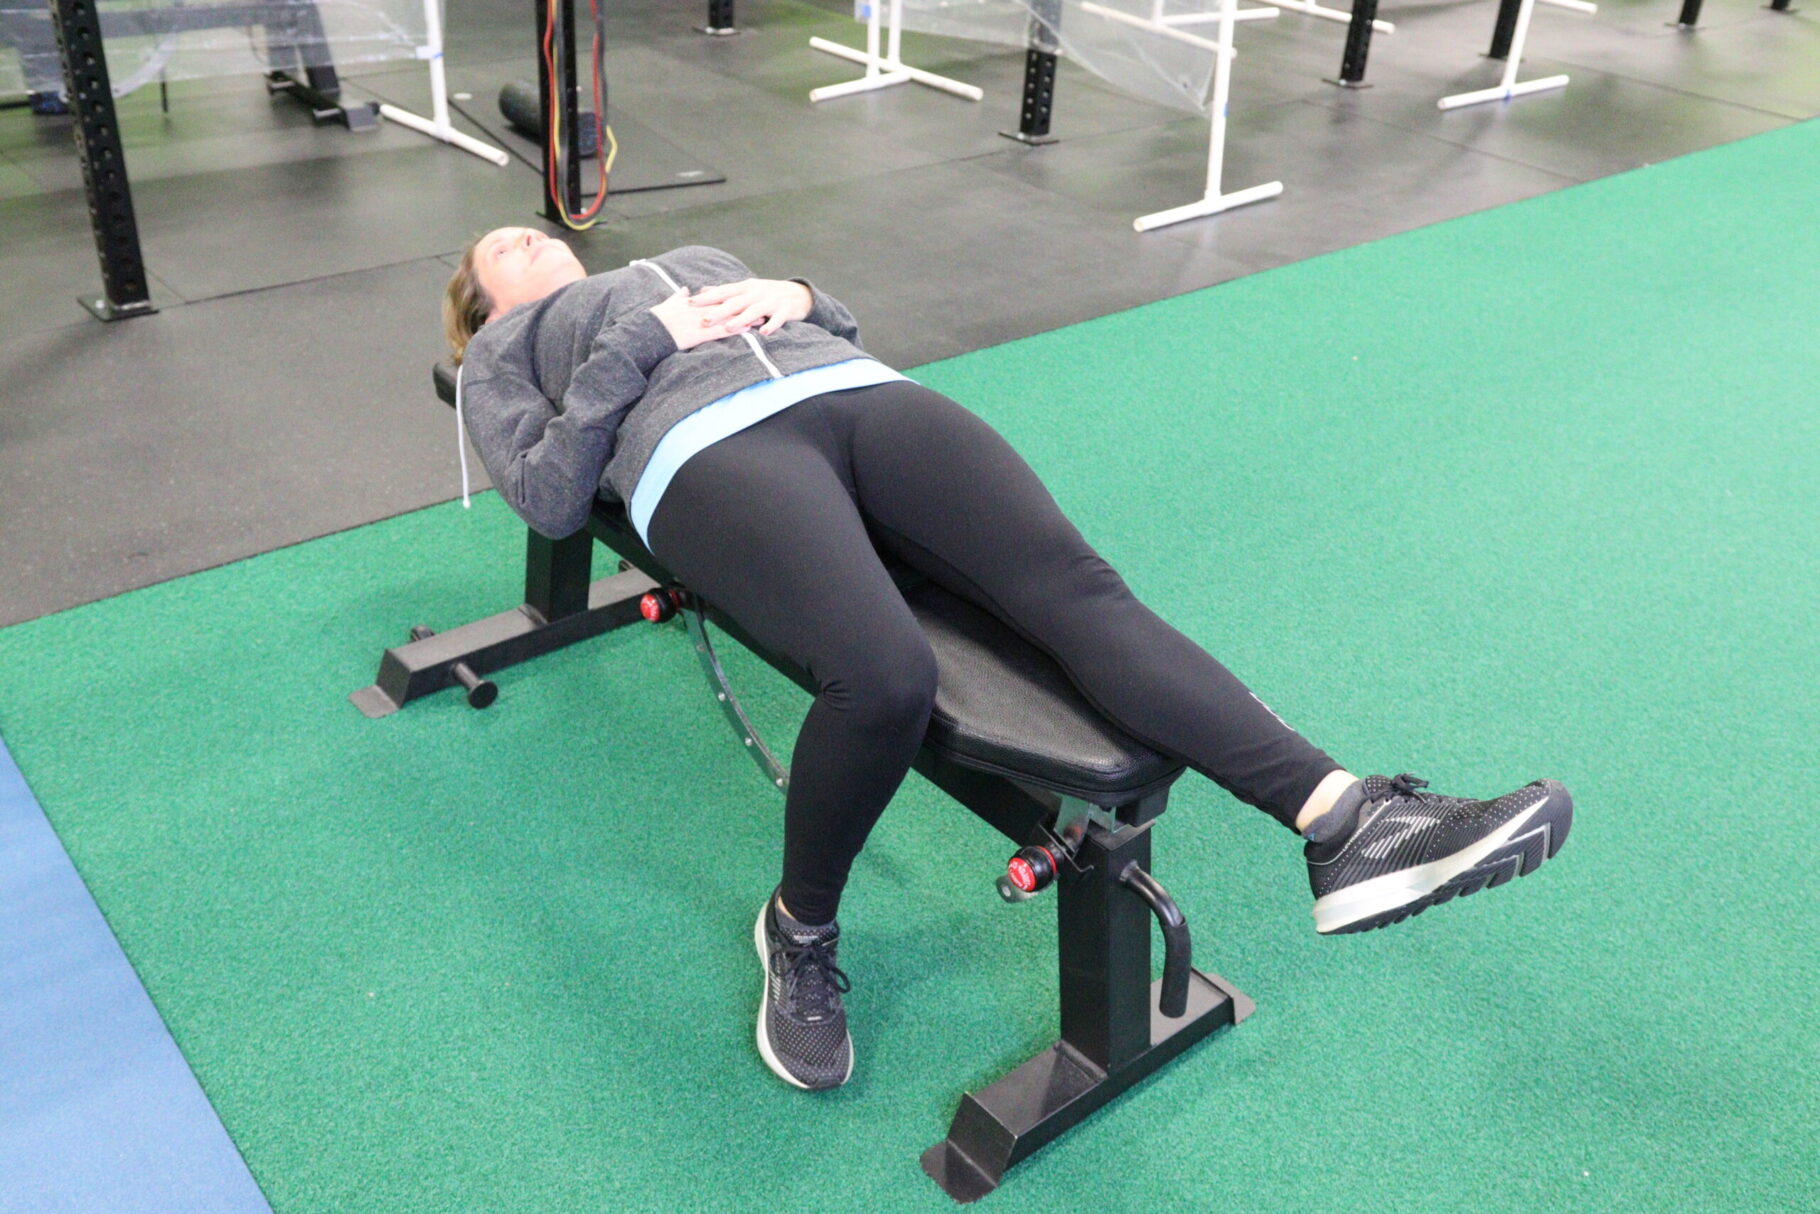
The “not-so-high” leg lift – To engage the abdominals for support of the low-back
- Lying on your back, bend one leg so the sole of the foot is on the bed
- Keep the other leg extended and muscles engaged
- Engage your abdominal muscles (Think laughing, or tensing up as if somebody is going to punch you in the stomach)
- Keep your back on the bed (no arching)
- Gently and slowly lift and lower the extended leg no higher than the knee of the bent leg
- Start with a few repetitions, and increase to 15
- Repeat with the other leg
If you can easily perform the above exercise, then try the next one. If not, stick with the one above, and check out the previous Hybrid Fitness article including easy tips to help low-back pain here – How To Improve Low-Back Pain
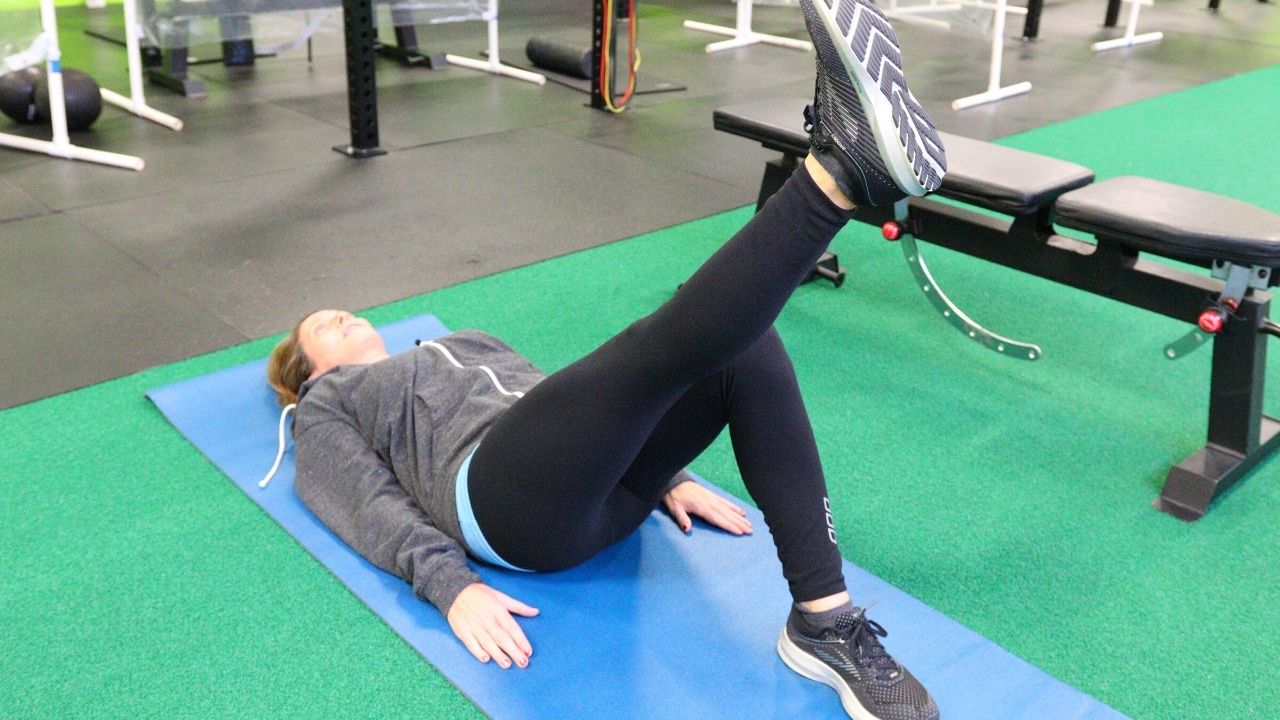
Heels to the Heavens – To stretch the hamstrings and calves on the back side of your leg
- Lying on your back, fully extend your legs
- Lift one leg toward the ceiling, while supporting with hands (other leg can be straight or bent with the sole of the foot on the bed)
- Try to pull the toes down toward your body
- Push through the heels toward the ceiling
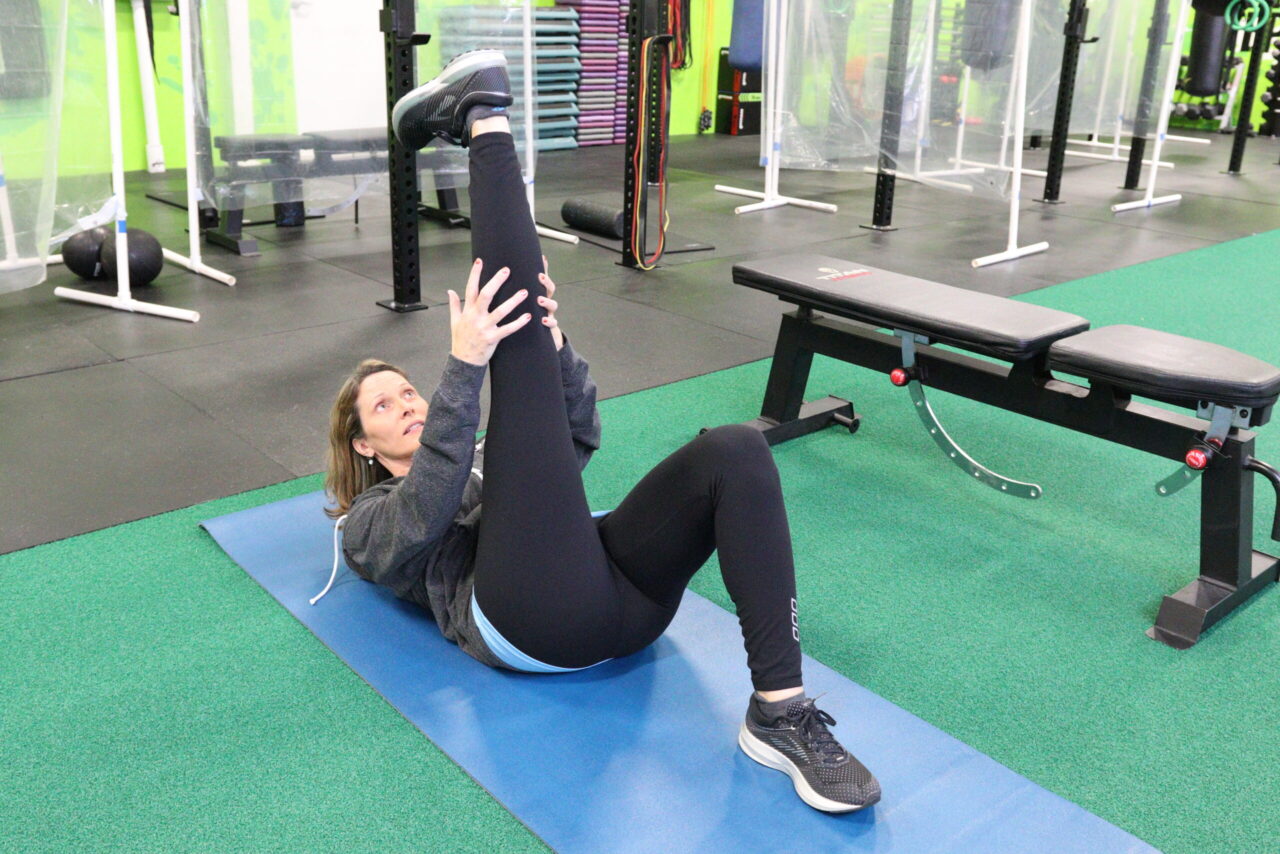
- For more flexible folks, you can either lift both legs together, or
- Using both hands on one leg at a time, slightly pull the leg toward the face
- Keep your back on the bed (again, no arching)
Keeping the Hip Flexors “Hip” – To decrease the pull on your pelvis in the front of your body
- Lying on your back on the edge of your bed
- Slide one leg off the edge so the lower leg and foot hang down
- Lift your other knee toward your chest and hold
- Start holding for even 10 seconds and ideally increasing up to 30 seconds based on your comfort level
- Repeat on the other side
Be patient with your body as you get up and move about your day. Here are a few more exercises to stretch a tiny but mighty muscle.
Easy Tip #2 – Priming Your Piriformis – The petite muscle that covers your sciatic nerve
The Figure 4 Stretch
This the most versatile and effective stretch for your piriformis, because there are 3 ways to perform the stretch depending on what works for your body.
Sitting
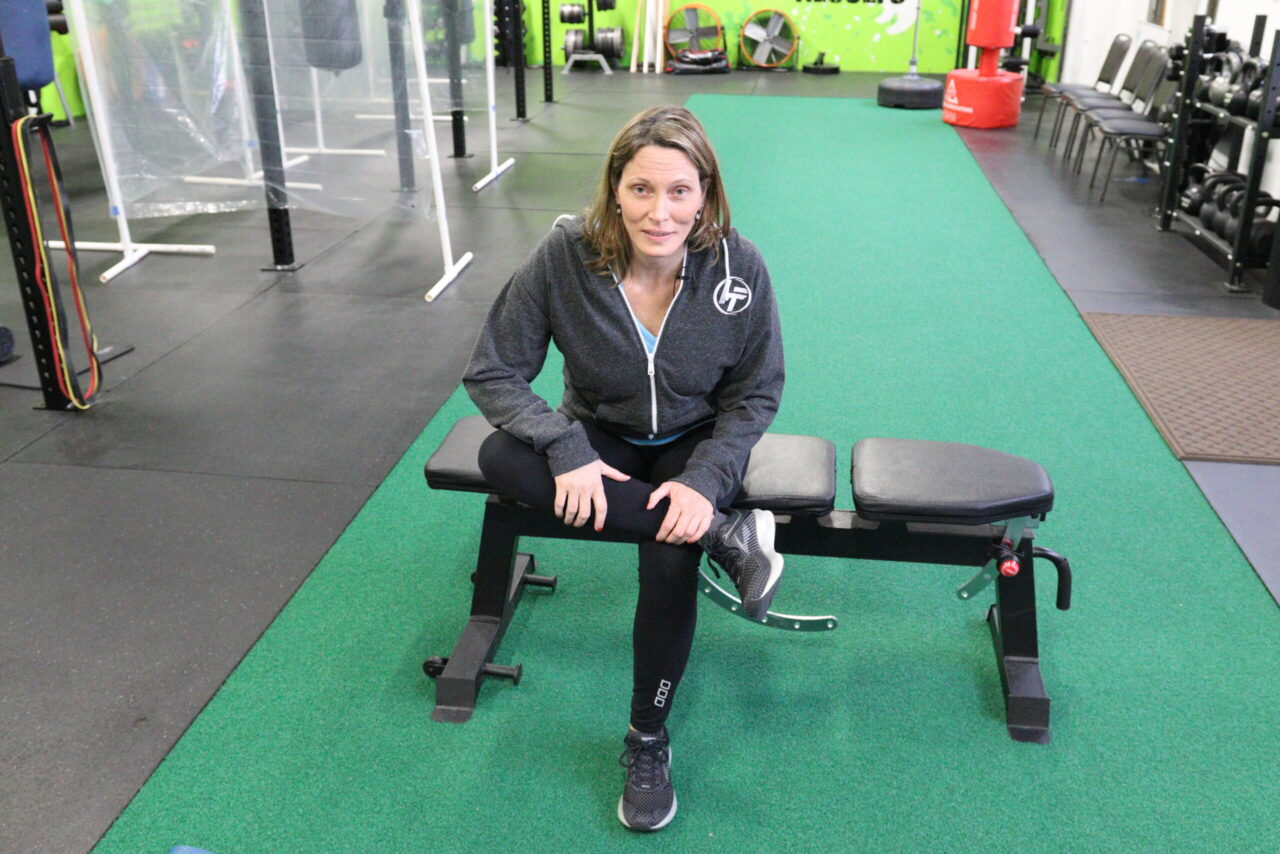
- Sit near the edge of your chair/bed/couch with a straight back
- Legs hip width apart and feet on the floor
- Cross one ankle over the opposite knee
- Be sure to have your shin aligned under your knee of the leg that is touching the floor
- Slowly lean forward slightly with a straight back toward your crossed leg
- Feel the stretch along the side of your crossed leg and in your hips and buttocks
- Hold for 30 seconds, rescind if painful
- Repeat on the other side
Lying
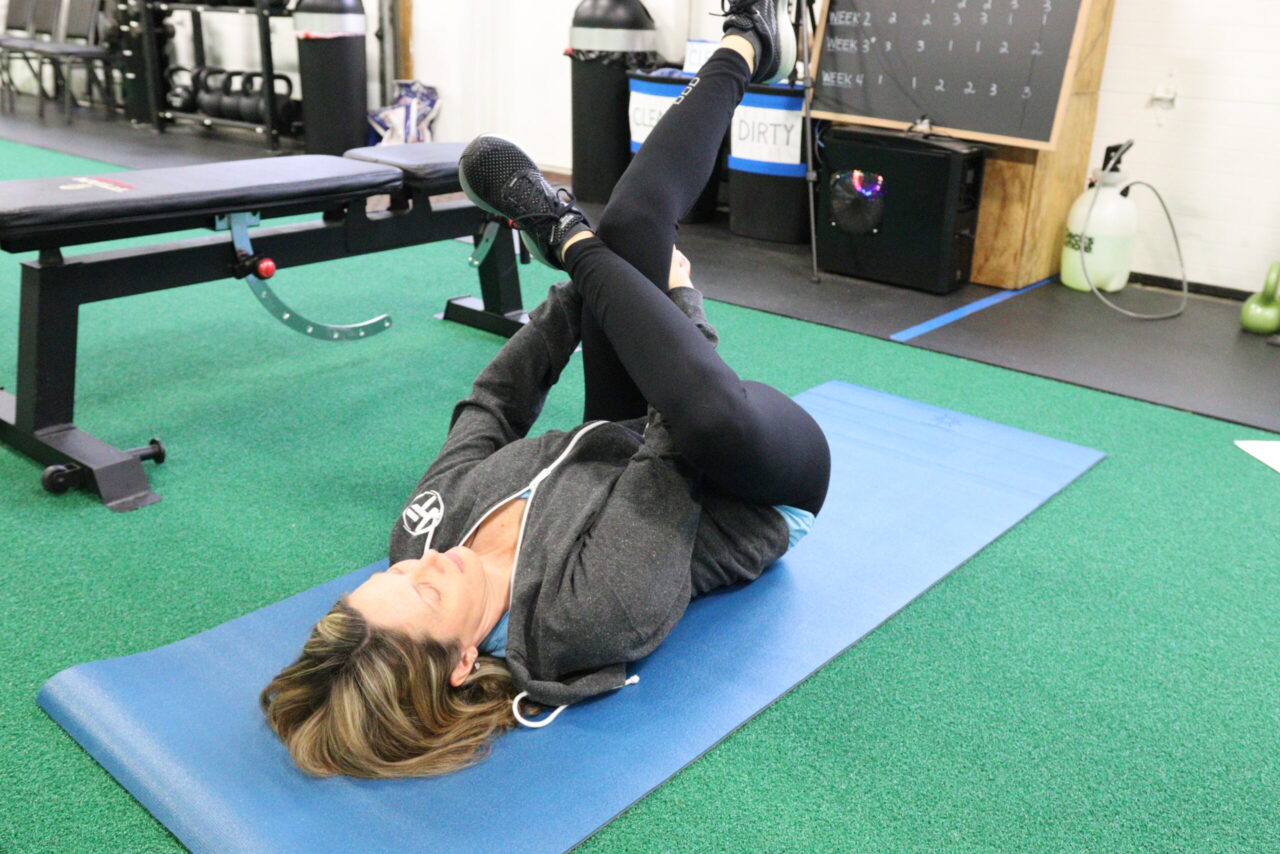
- Lay on your back on a mat or floor
- Bend one knee with the sole of the foot on the floor
- Bend the other knee and place ankle on top of opposite knee
- Gently grasp both hands behind the knee of the bottom leg
- Using arms lift the bottom leg towards your chest
- Feel the stretch in your glute of the top leg
- Hold for 30 seconds, rescind if painful
- Repeat on the other side
Standing
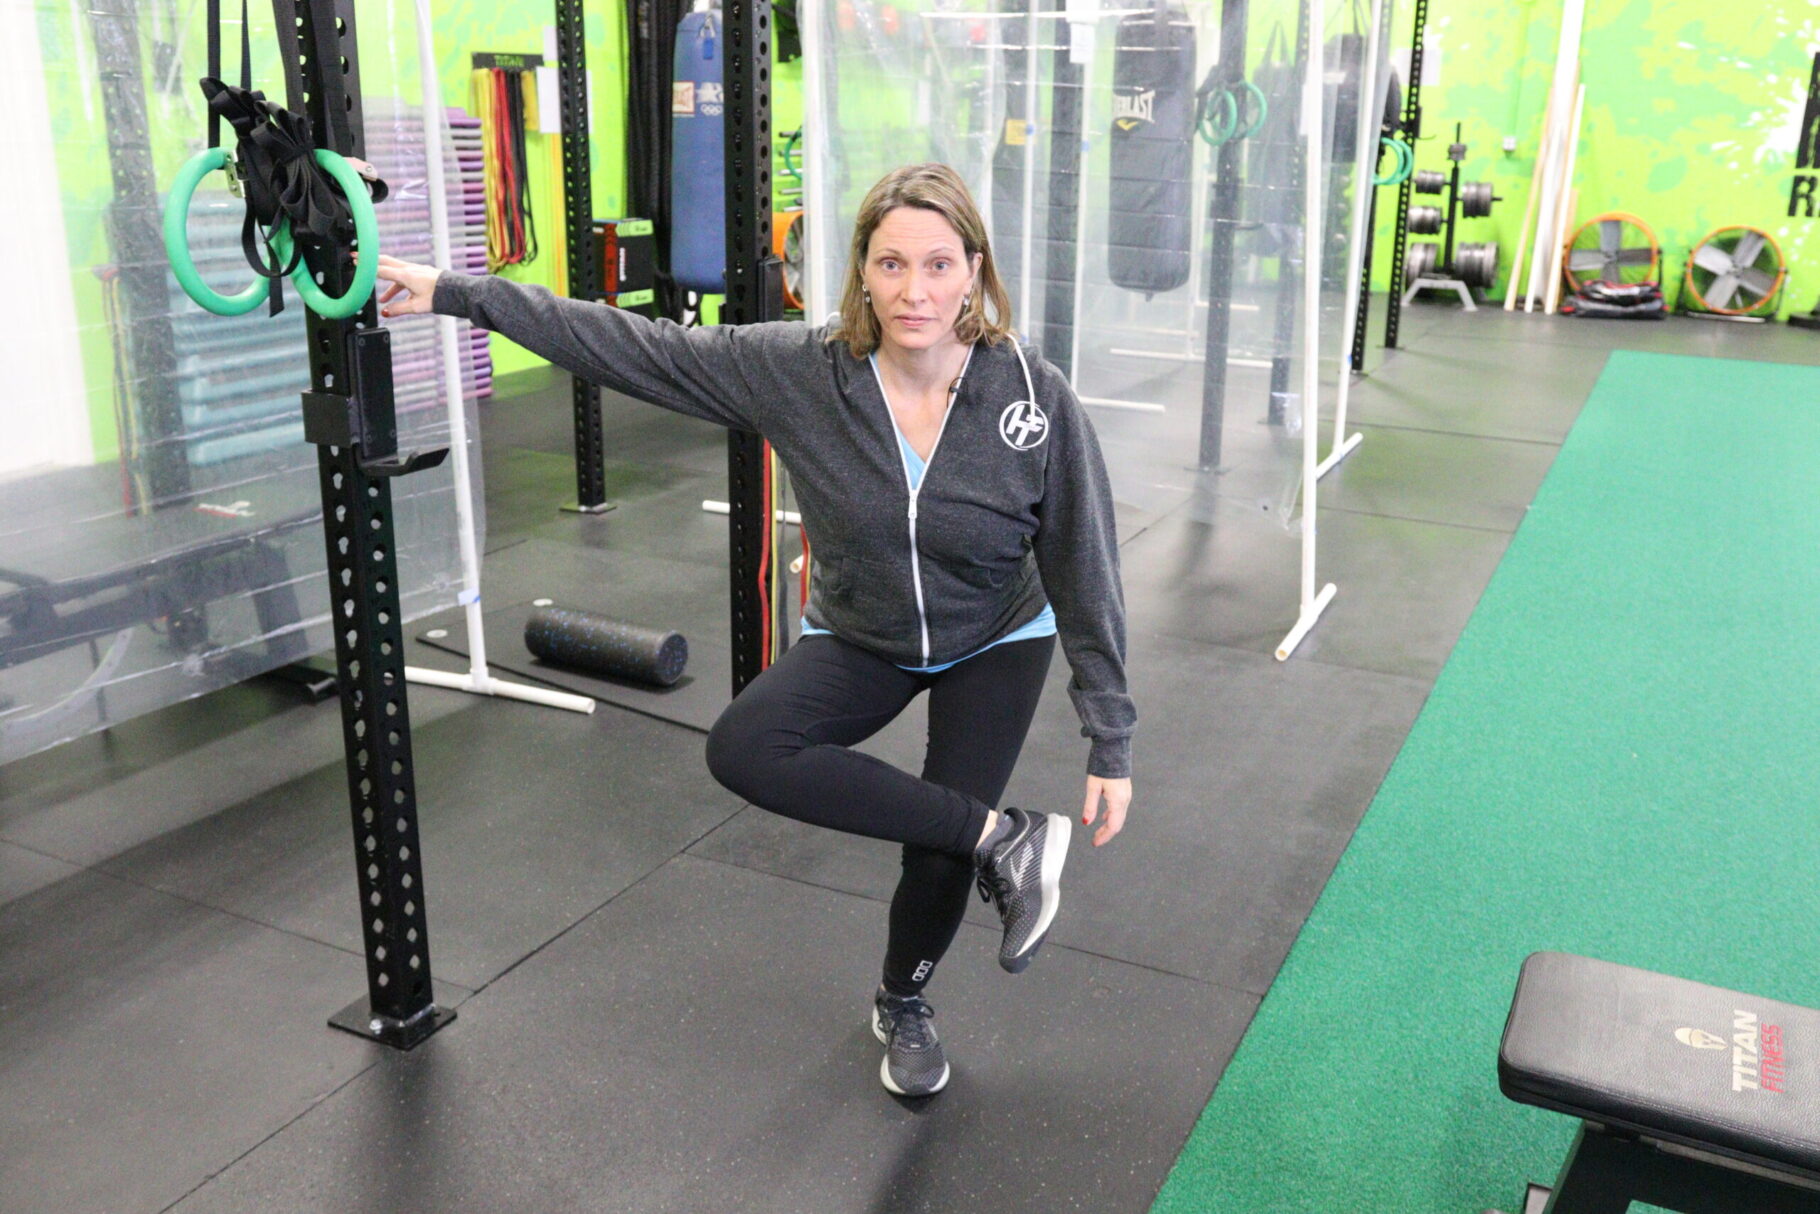
- Stand where you can hold onto something
- Place one ankle above the knee of the opposite leg
- Brace yourself on something with your hands for balance
- Try to keep your back straight and your chest upright while slowly lowering toward the floor by bending the grounded leg
- Bend down until you feel the stretch in the side of the leg and glute of the top leg
With any of these exercises make sure you are breathing. That’s right. Do NOT hold your breath. Your body needs fresh oxygen to move. Instead, start with an inhale and as you exhale try to increase the stretch.
Following one of these Figure 4 stretches can help stretch the piriformis so it doesn’t aggravate the sciatic nerve, and cause pain in your low back or down your legs.
Another option is to get a deep muscle massage from a qualified professional to help muscles release tension.
Easy Tip #3 – Breathe!
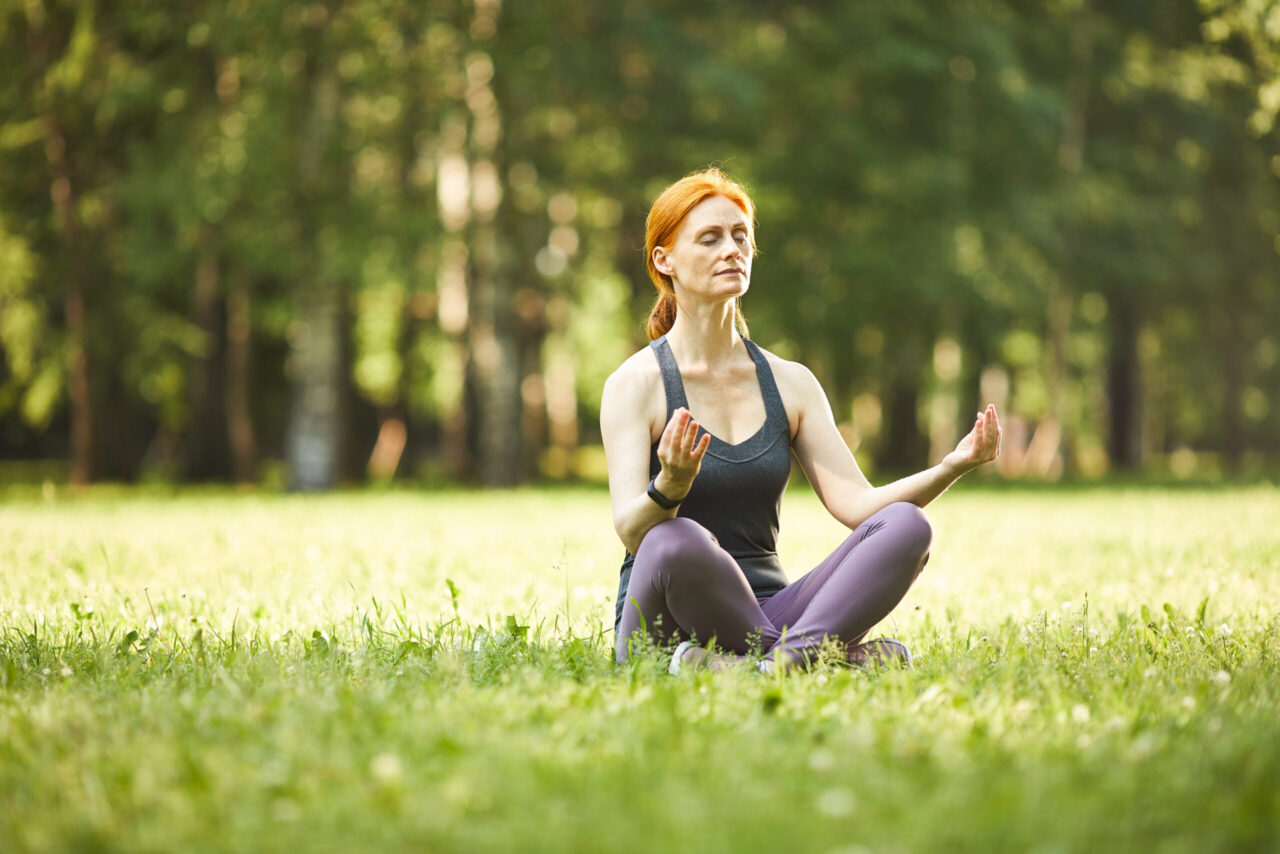
Yes, breathe to relax your body, including the tense muscles that may be contributing to your low-back pain. Believe it or not, a lot of us do not breathe fully, especially when stress is present. If we are not mindful of our breathing we tend to hold our breath or take shallow breaths.
To release stress, relax muscles and cleanse your body with essential oxygen you can:
- Focus on taking slow, deep breaths for a few minutes a few times per day wherever you are in those moments; the car, washing dishes, folding laundry, raking leaves, etc.
- Use a square breathing technique where you inhale to the count of 4 (or whatever # works for you), hold for a count of 4, exhale to the count of 4, hold for a count of 4 and repeat for a few minutes.
- Breathe from your diaphragm by placing your hand on your abdomen and taking slow, deep inhales focusing on your abdomen expanding followed by a longer exhale. This stimulates your parasympathetic nervous system to calm your body and reduce your heart rate and blood pressure.
- Meditate while focusing only on your breath. Be mindful of the oxygen entering your body and the carbon dioxide leaving your body. Closing your eyes can help you keep focus on your breath.
Commit to Relieve Your Low-back Pain
Physical therapists hear some of their patients say that they are not getting better by doing the exercises prescribed only to find out they weren’t really doing those exercises enough at home to make progress.
To recap, for a pain-free low-back keep these guidelines in mind:
- Do your exercises! Faithfully everyday, even more than once a day if prescribed by a medical professional.
- Whatever exercise you do for one side of your body make sure to do the same for the other side of your body. Don’t just lift one leg, unless there is a medical reason for doing so.
- Don’t sabotage your efforts with poor posture. Make sure your work space is ergonomically correct. View the Hybrid Fitness Posture article for tips – Good Posture is Your Partner For Mobility.
- Breathe! Handle your stress and get your lymph system flowing to cleanse your system. You can do that just by breathing properly and you will feel better. Lymph fluid that is stagnant is not your friend.
- Be social! Why? Because humans are social creatures and connecting with others makes us smile and increases our chances to see the bright side of any situation.
- Keep Going! Healing, recovery and realignment of your low-back takes time (weeks, months, and even years!). Be patient with yourself. Your body is doing the best it can with what it has to work with to relieve your low-back pain.
It’s Time
Now that you have all of the tools you need, it’s time to put them to work! Take 1 or 2 of these easy tips to help low-back pain, and implement them on a consistent basis! Once you’ve done that, you should start seeing progress, and can trickle in additional tips over time!
If you’re looking for more easy tips to help low-back pain, check out one of our most popular YouTube videos here.
If you found this helpful, please consider subscribing to the Hybrid Fitness YouTube channel, and be sure to check out all the other articles from our coaches.
And remember…Small Steps, Big Results.
Cathy grew up in NH surrounded by a large, loving family, where she learned generosity and hard work. She now models that for her two children. She was inspired to become a fitness coach when searching for ways to become more healthy herself after a life-threatening illness.
March 2, 2021
How To Stay Active With A Desk Job
The Covid pandemic has impacted everyone, including myself. Since November of 2020 I have been working remotely from home. Some will say “that’s great!”. However, with working from home comes long hours of sitting at a desk and being indoors. Sure, I’ll get up from the desk every now and then, but definitely not as much as I did when I went to the office. Finally, I decided that enough was enough, and I needed to find ways to stay active with a desk job.
So, if you’re working remotely like me, or if you are in an office all day, these 4 tips are for you. Make sure and read until the end! The last tip is one of the most important, and should be implemented inside and outside of the office!
Put It In Motion

When we sit for long periods of time it can cause tightness in the hips, back pain, and a general feeling of tiredness from being in the same position.
The tips below will give you more energy, increased productivity, and better concentration. They are super simple to follow, and are guaranteed to make you feel more active throughout your work day.
Without further ado, let’s MOVE on to the tips! (see what I did there?)
Tip # 1: Move On The Hour
Take a walk to the water cooler or the break room, grab some coffee or a snack. Go over and talk to your coworker in the next cubicle or office. Wherever you choose to go, be sure to do it every hour.
Set a timer on your phone as a reminder to get up from your chair and away from your desk for even 5 minutes. You will come back refreshed and ready to keep working.
When we move our bodies, it helps to get our circulation going, increases our heart rate, and stretches out our muscles.
When we sit for long periods of time our bodies will feel it! Being too sedentary can come with aches and pains, feelings of fatigue, and it can even pose a risk of blood clots.
So, make moving throughout the day a priority for yourself and stick to it by doing the following:
- Make movement a daily habit
- Set a timer for every hour
- Commit to staying active
Tip # 2: Do Chair Exercises & Stretches
Although you’re in a chair and at a desk all day, there are still exercises and stretches that you can do that are not only beneficial, but simple, and don’t take a lot of time. This is a great way to get your heart rate up, and to stretch out your legs and hips!
Chair Marches
- Bring one knee slowly towards chest
- Slowly lower leg back down
- Repeat with the other side
- Complete 20-30 times total
Elevated Push-ups
- Place your hands on a chair or desk and get into a high plank position
- Don’t let your hips sag
- Lower body by bending at the elbows and bring chest to desk
Standing Toe Touch
- Take a deep breath in while you bring your arms straight overhead
- Exhale and slowly try to touch your toes while keeping your legs straight
- Repeat 10-15 times
Correct Posture
- Sit with a straight back, shoulders down
- Feet flat on the floor
- Knees at a ninety degree angle
For more on posture, check out coach Cathy’s article here – Why Good Posture is Your Friend For Mobility
Tip # 3: Walk During Your Lunch Break
Get outside and soak up some vitamin D! Bring a coworker with you for some company. 15 minutes of brisk walking a day will help you stay alert and focused for the remainder of the work day.
Studies have shown that walking during a lunch break can boost concentration, productivity, and happiness. So go ahead and get outside! You won’t regret it.
Vitamin D is so beneficial, and can help promote better mood, helps to regulate the absorption of calcium, and assists with reducing the risks of heart disease.
Getting outside during your lunch break will help break up the monotony of the work day, as well. You will return to your desk refreshed and renewed!
Speaking of walking, let’s talk about my next tip for staying active with a desk job.
Tip # 4: Take The Long Way
When you get to work, park in the furthest spot from the building.. This will help you get those steps in before you get to work, and once the work day is done. It’s an easy way to burn extra calories, and can really add up! You can burn an extra 10 calories every time you walk from your car to the office.
Another way to add in steps throughout the work day, is to use the bathroom that is furthest away from your desk. Think of how many times you use the restroom in a day!
In fact, anytime you get up from your desk, whether it’s to go to the printer, get supplies, or going to a meeting, take the long way. If there are stairs in your office, even better. Keep on moving and keep on adding steps.
There you have it, four tools to throw in your toolbox to help you stay active with a desk job. Implementing these will make all the difference! To recap: :
- Move away from your desk frequently
- Do some exercises and stretching at different times of the day
- Get outside during your lunch break for some sun and fresh air
- Take the long way, and easily burn some extra calories.
Following these tips will help you to experience increased mental clarity and more energy, while decreasing feelings of fatigue. Who knows, maybe your work day will go by a lot quicker!
And remember…
Small Steps, Big Results!
If you enjoyed this article, swing over to our YouTube channel to check out our latest videos here – Hybrid Fitness YouTube Channel
Danielle lives in mid-coast Maine after growing up in Boston, MA. She’s a nursing school graduate, and is currently working towards becoming a certified grief counselor. She also has her personal training certification through ASFA.
Danielle has run multiple half marathons, and has even completed 2 full marathons, including the Boston and Des Moines marathons.
Danielle loves to create a comfortable, fun, and relaxed environment in the gym, and is dedicated to making a positive impact on others, and helping people feel good about themselves while reaching their goals.
February 22, 2021
Weight Loss Meal Tips That Require “Zero Effort”
(For Busy Adults with Little Free Time or Leftover Willpower)
If you’re ready to lose weight, but struggle to eat the proper portions in order to make your weight loss and health goals a reality, well boy do I have a special treat for you…
Because, with almost zero additional effort, you can increase your calorie deficit, lose weight, AND lose inches faster, without the extra cravings or hunger to go along with it.
Presenting: My 3 favorite weight loss *and general health* meal tips.
Hint: Pleeease make sure you read to tip #3, and I’ll share with you why I use it 5/7 days a week, almost Every. Single. Week. Time to pull back the curtains to show you how simple & easy these weight loss meal tips are!
Tip #1: Substitute Olive Oils with Olive Oil Spray

Let’s be honest. Olive oil is good. Really good. And, you’re probably thinking – “Hunter, if you make me get rid of olive oil, I’m going drop kick you with my fist.”
Woahhh, let’s not get violent now. No, I won’t make you get rid of your olive oil… not completely, anyways. 😈
“But Hunter, isn’t olive oil healthy?”
Sure it is! There’s a lot of “good stuff” in olive oil… BUT:
If not used sparingly, those olive oil calories will add up like 7 inches of snow in Texas. We’re talking 120 calories per tablespoon. YIKES!
So, I’ve found you a 85%-as-good alternative.
Introducing – Olive Oil spray. *angels singing*
It’s olive oil, but you spray it. AND, even more fantastical, the nutrition label says ZERO calories.
Now, don’t be fooled, because olive oil spray does have calories *arghhh pesky food marketers*. But, it does have a lot less calories than olive oil – and will still make your food taste extra tasty.
In fact, olive oil spray has ~8 calories per second sprayed, so you’d have to spray 15 seconds just to match the calories on olive oil.
No thank you.
Tip #2: Almond Milk Over Dairy Milk
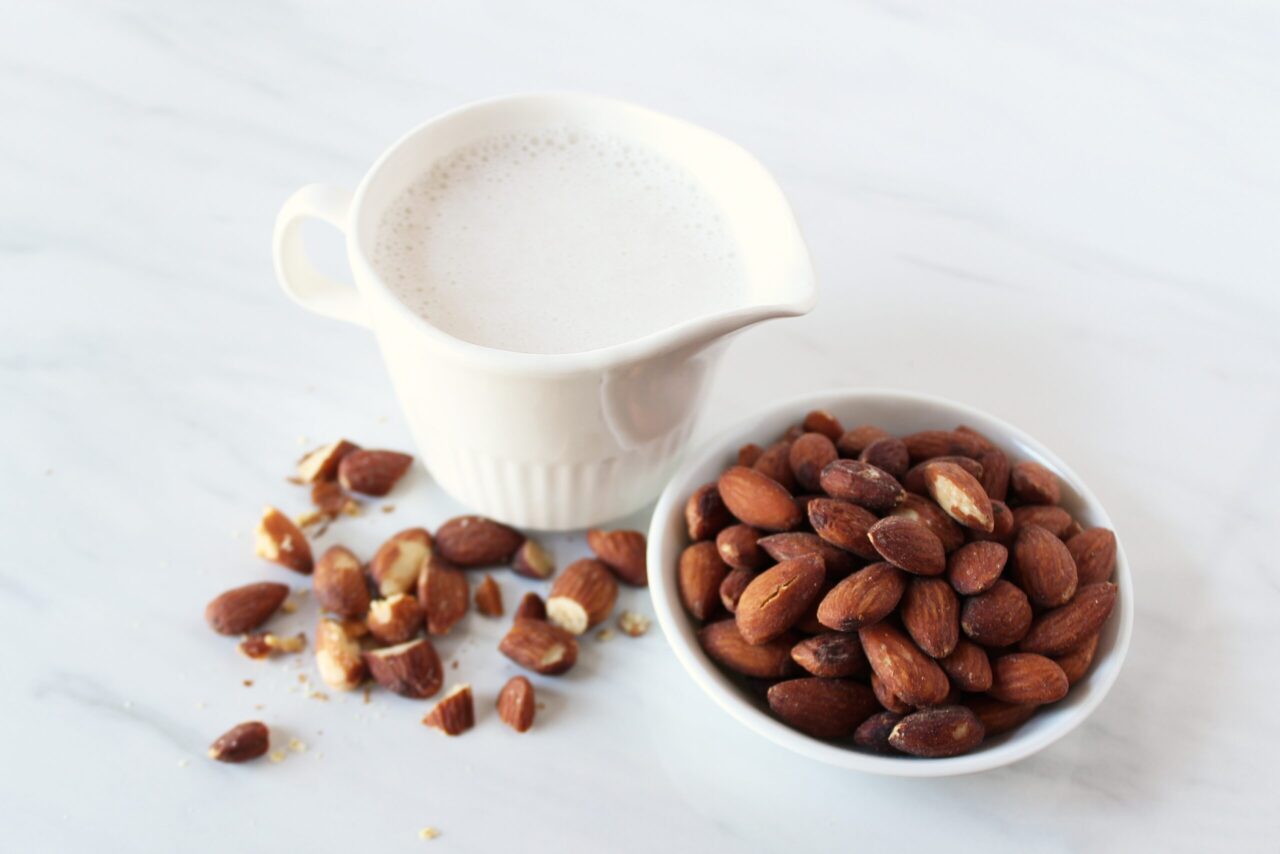
A single cup of whole milk clocks in at around a whopping 150 calories! And, a cup of 1% reduced-fat dairy milk even tips the scale at over 100 calories.
A cup of unsweetened vanilla almond milk, though, is 30 calories. And, If opinions count, mine is that the almond milk tastes much better – and, as a bonus – you save 70 calories per cup.
The average American drinks ~1.5 cups a day, so there’s at least 105 calories per day that you’re saving (or 775 a week!)
Yes, dairy is a main source of calcium for most people, but did you know…
Silk Almond Milk packs a whopping 450mg of calcium per cup, where the average dairy milk contains ~300mg!
Tip #3: Eat Slaw Salads

My biggest nutrition hack of 2020 was discovering Fresh Express Premium Slaw Salad Kits.
They are satisfying, delicious (I actually crave on a daily basis), and are reasonable on the calories.
For example, the Honey Pecan Salad is 110 calories per serving (275 calories total) and takes about 10 seconds to make.
I’ll eat an entire salad in one sitting, but Melissa, my fiancé will eat it in two (Or I’ll just eat her other half, too 😂)
If you want to lose weight, and have more energy, you want to eat low calorie, high nutrient dense foods as often as possible.
These types of foods promote well-being, and keep you satiated throughout your day.
These salads are a perfect example.
The…The…Tha…Thaat…That’s All Folks!
There you have it! Combining all three of these little-to-no-effort tips will have you eating less total calories, while feeling more full on a daily basis. Follow these tips consistently and you’ll be one step closer to looking and feeling your best!

If you enjoyed this article, swing over to our YouTube channel to check out our latest videos here – Hybrid Fitness YouTube Channel

Hunter grew up using fitness as a way to boost his low self-esteem. This led him to later found Hybrid Fitness in 2014, where him and his team create a fun, safe training environment for busy adults looking to better their health without doing crazy crash diets or excessive burpees.
February 11, 2021
3 Exercises to Increase Your Push-Ups
Why Push-ups?!
If you’ve ever been in a gym or watched a Rocky movie, you’ve definitely seen someone doing push-ups, and for very good reason. Push-ups not only increase core strength, but shoulder strength, stability, and pressing power of the pectorals and triceps, as well! All without having to load the movement with added resistance, making it more joint-friendly!
In hindsight, push-ups appear like a pretty straightforward thing to do. Simply just lower your body to the floor and push back up, right? Well if you’re one of the countless people who have tried and failed at this, then push-ups can quickly become frustrating, and far more difficult than expected.
Push it to the Next Level
If you’re reading this in hopes of completing your first push-up, then head over and check out our article on how to get your first push-up -CLICK HERE-. BUT, If you’ve already mastered the art of achieving your first push-up, and want to start repping out multiple at a time, you’ve come to the right place!
In this article, I’m giving you my top three exercises to increase your push-ups. Let’s go!
The Exercises
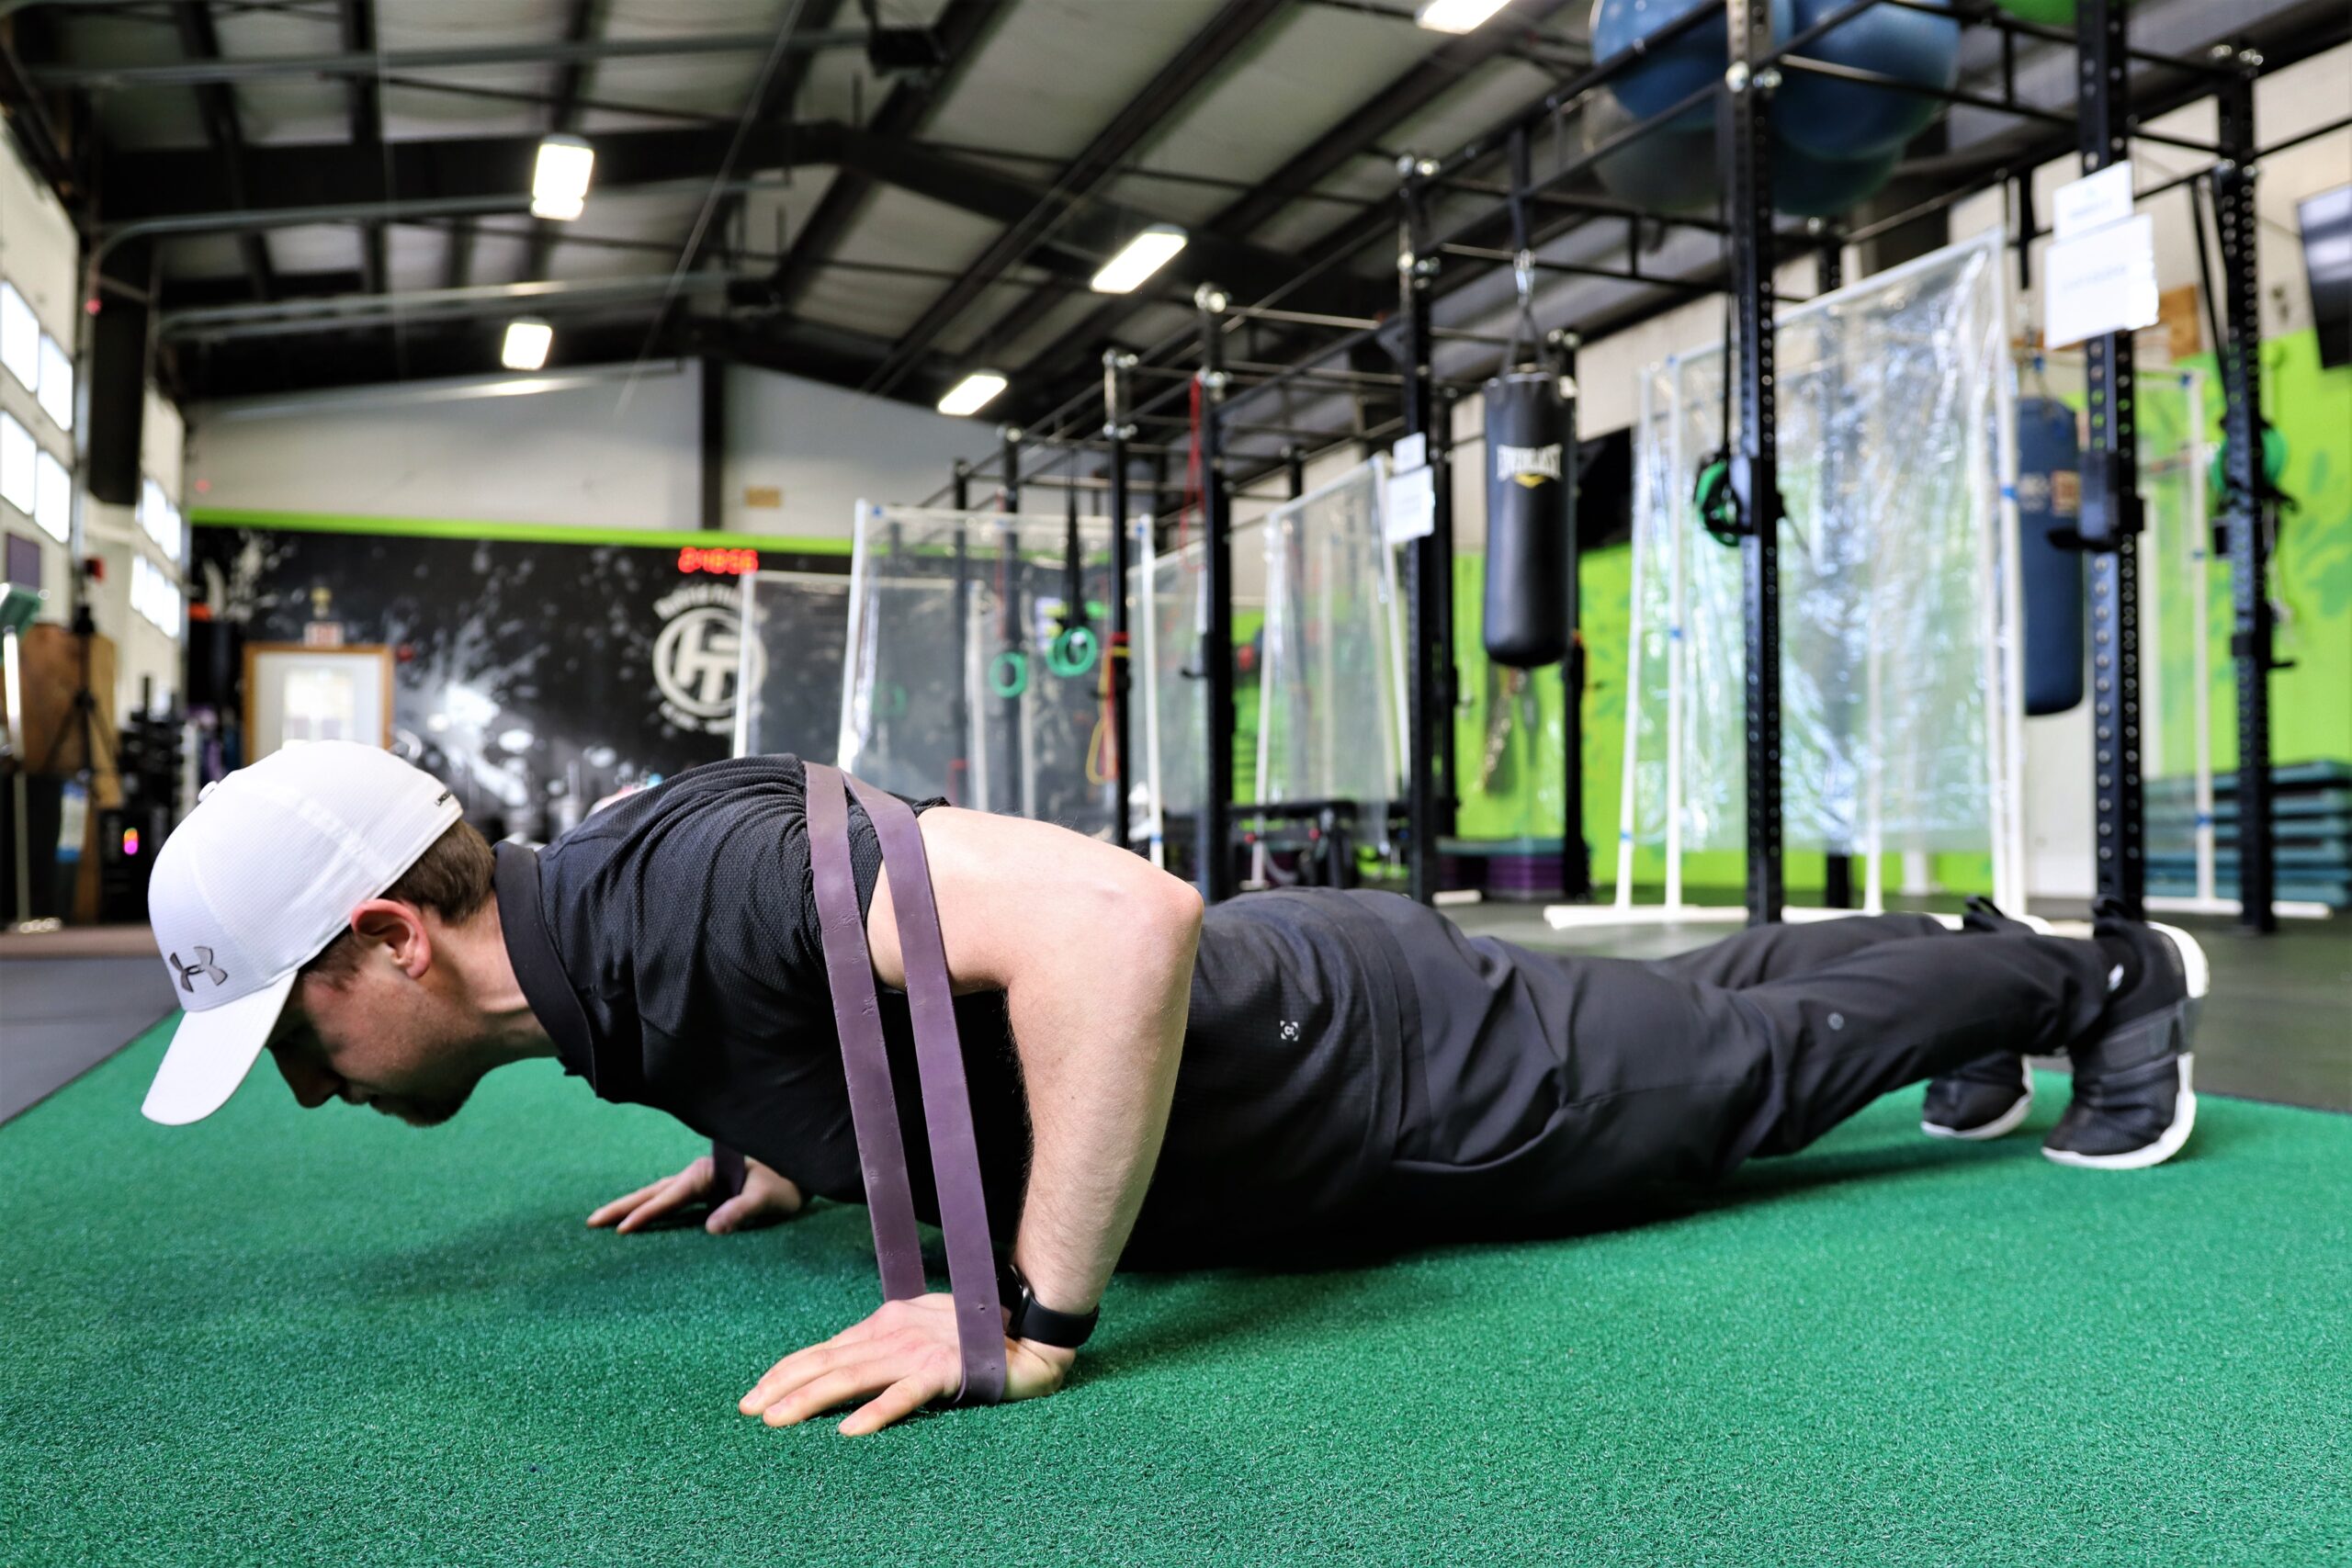
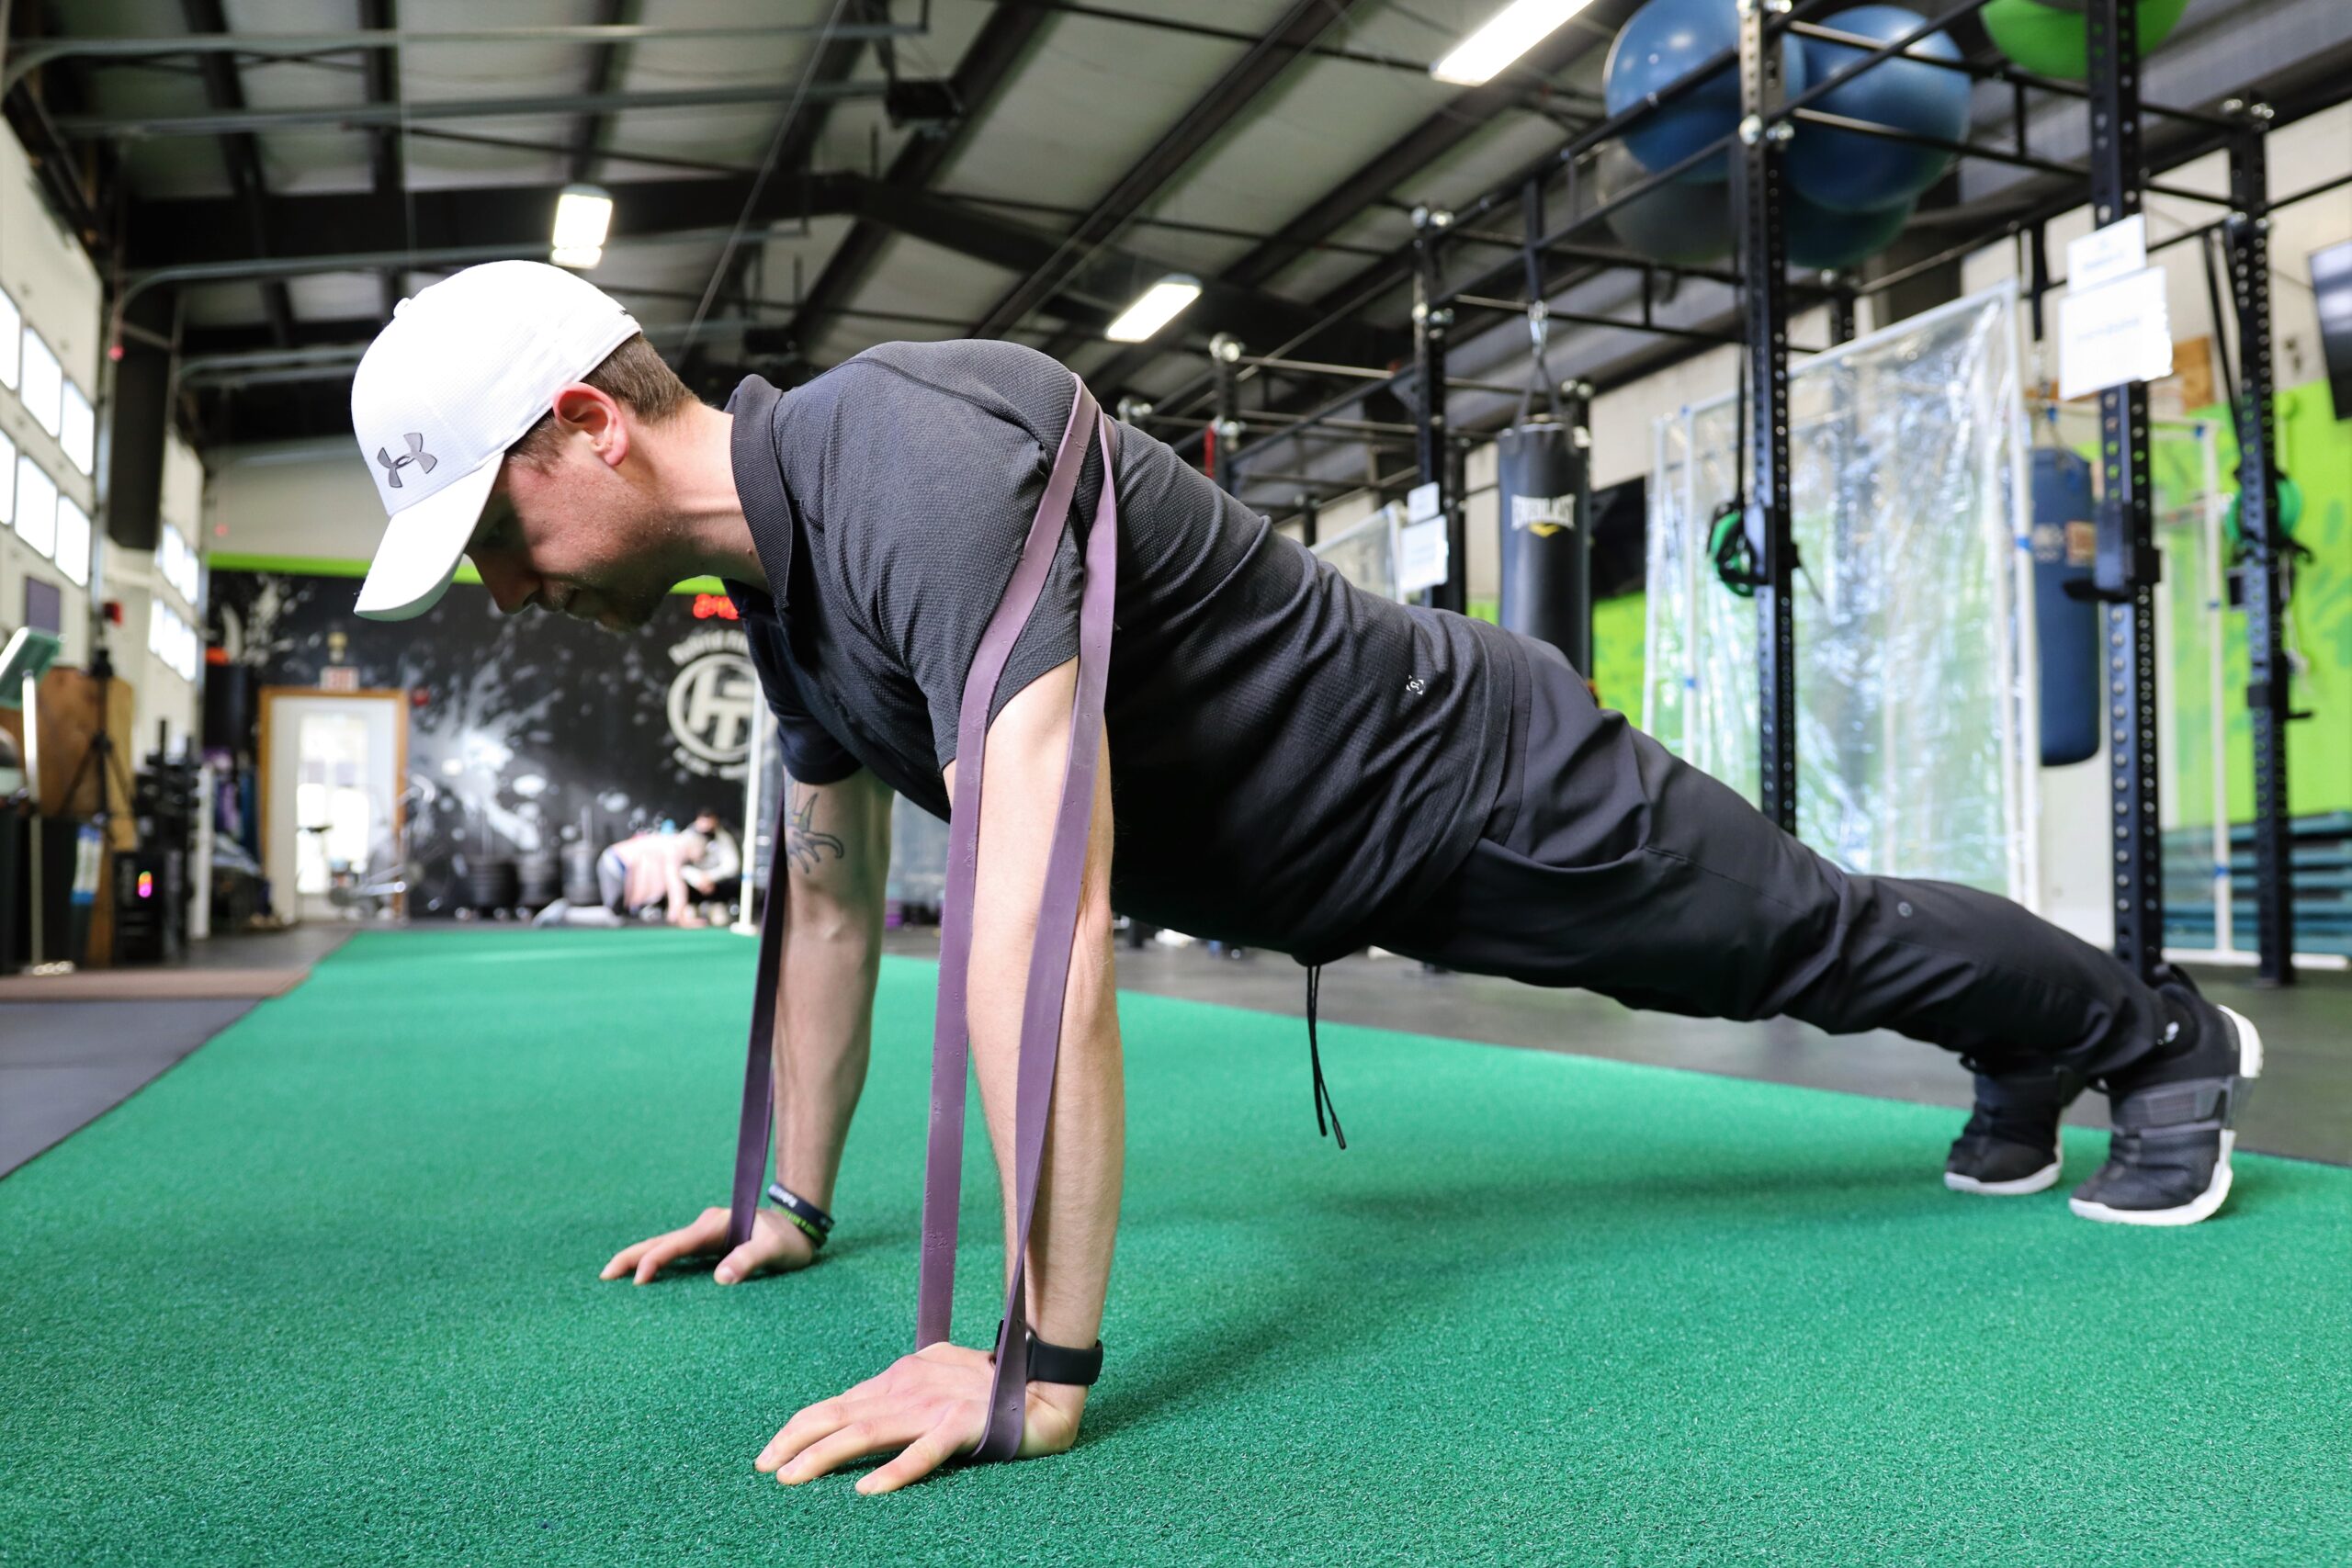
Resistance Band Push-Ups
Another great way to assist push-up production is by adding some resistance to the Push-Ups already being done. To do this simply grab a resistance band with each hand and loop it across your upper back. Then get into the high Plank position and remember these few Push-Up techniques
- Hands are underneath your shoulders
- Body is in a straight line (no sagging in the hips)
- Lower your chest to the floor slowly
- Return to the starting position by pushing yourself back up
To begin, start with a light resistance band and perform as many reps as you can before your form begins to break down. Also, be aware that the added tension across your upper back can cause the lower back and hips to sag quicker once you start to fatigue.
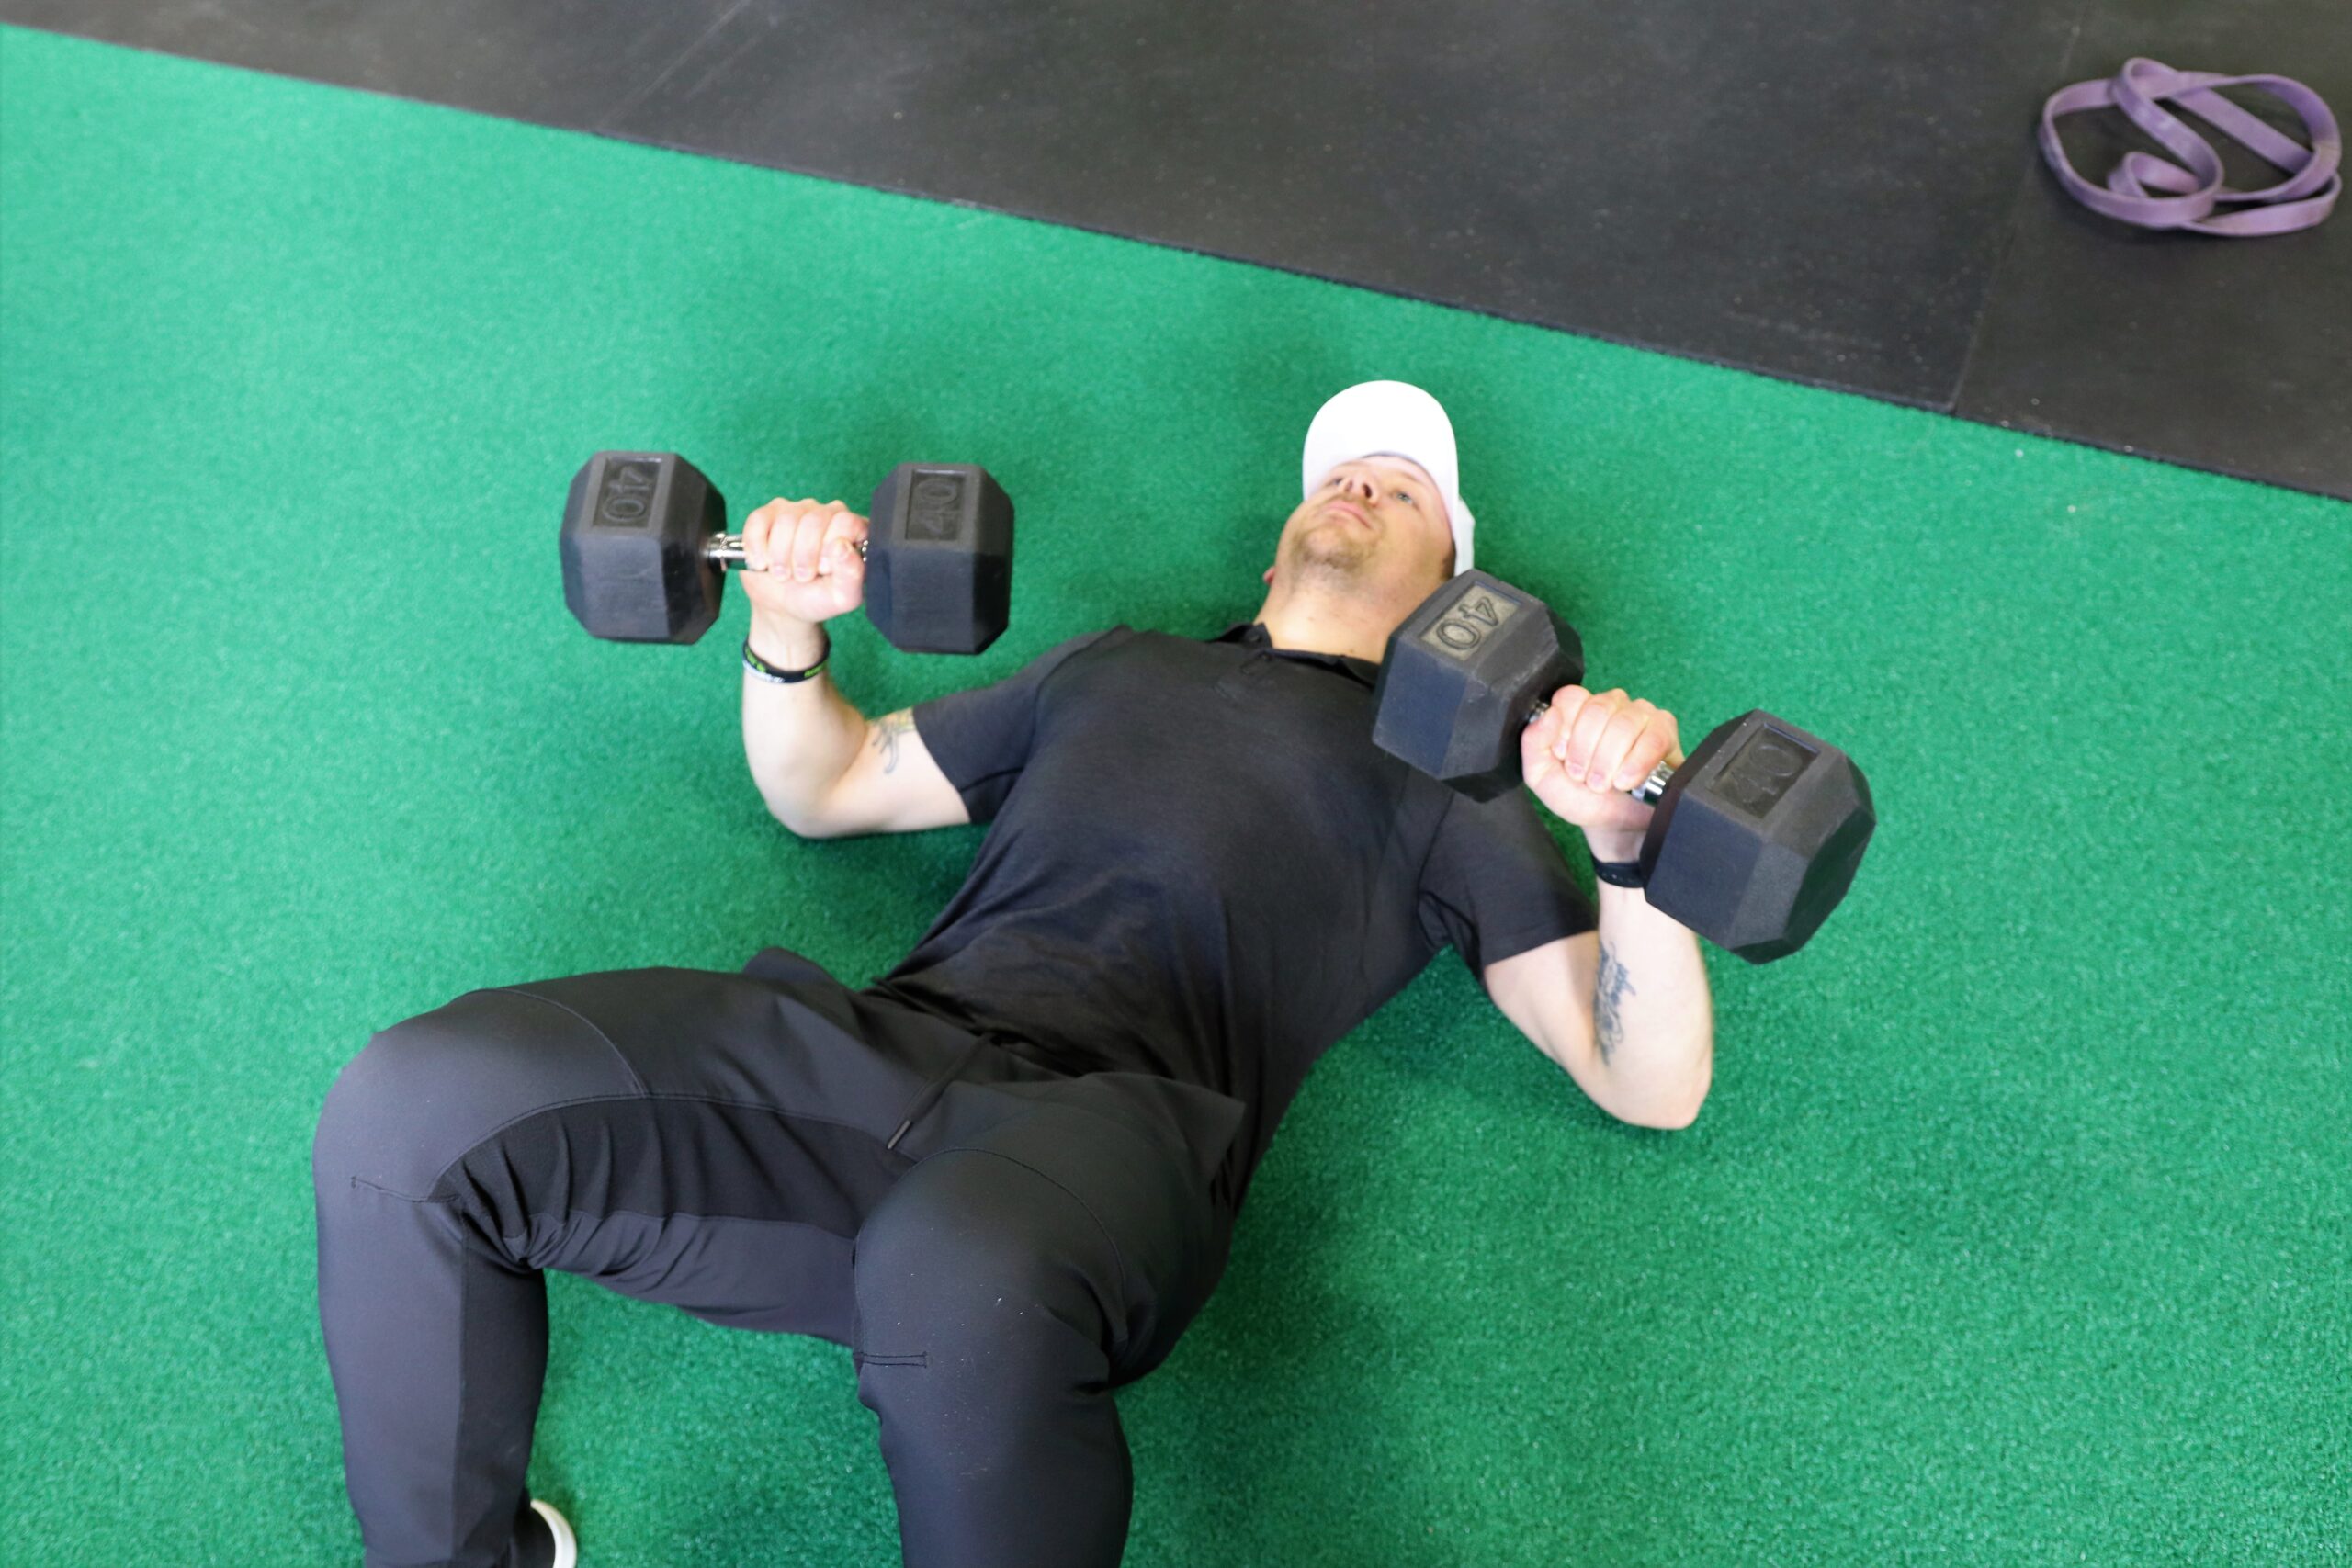
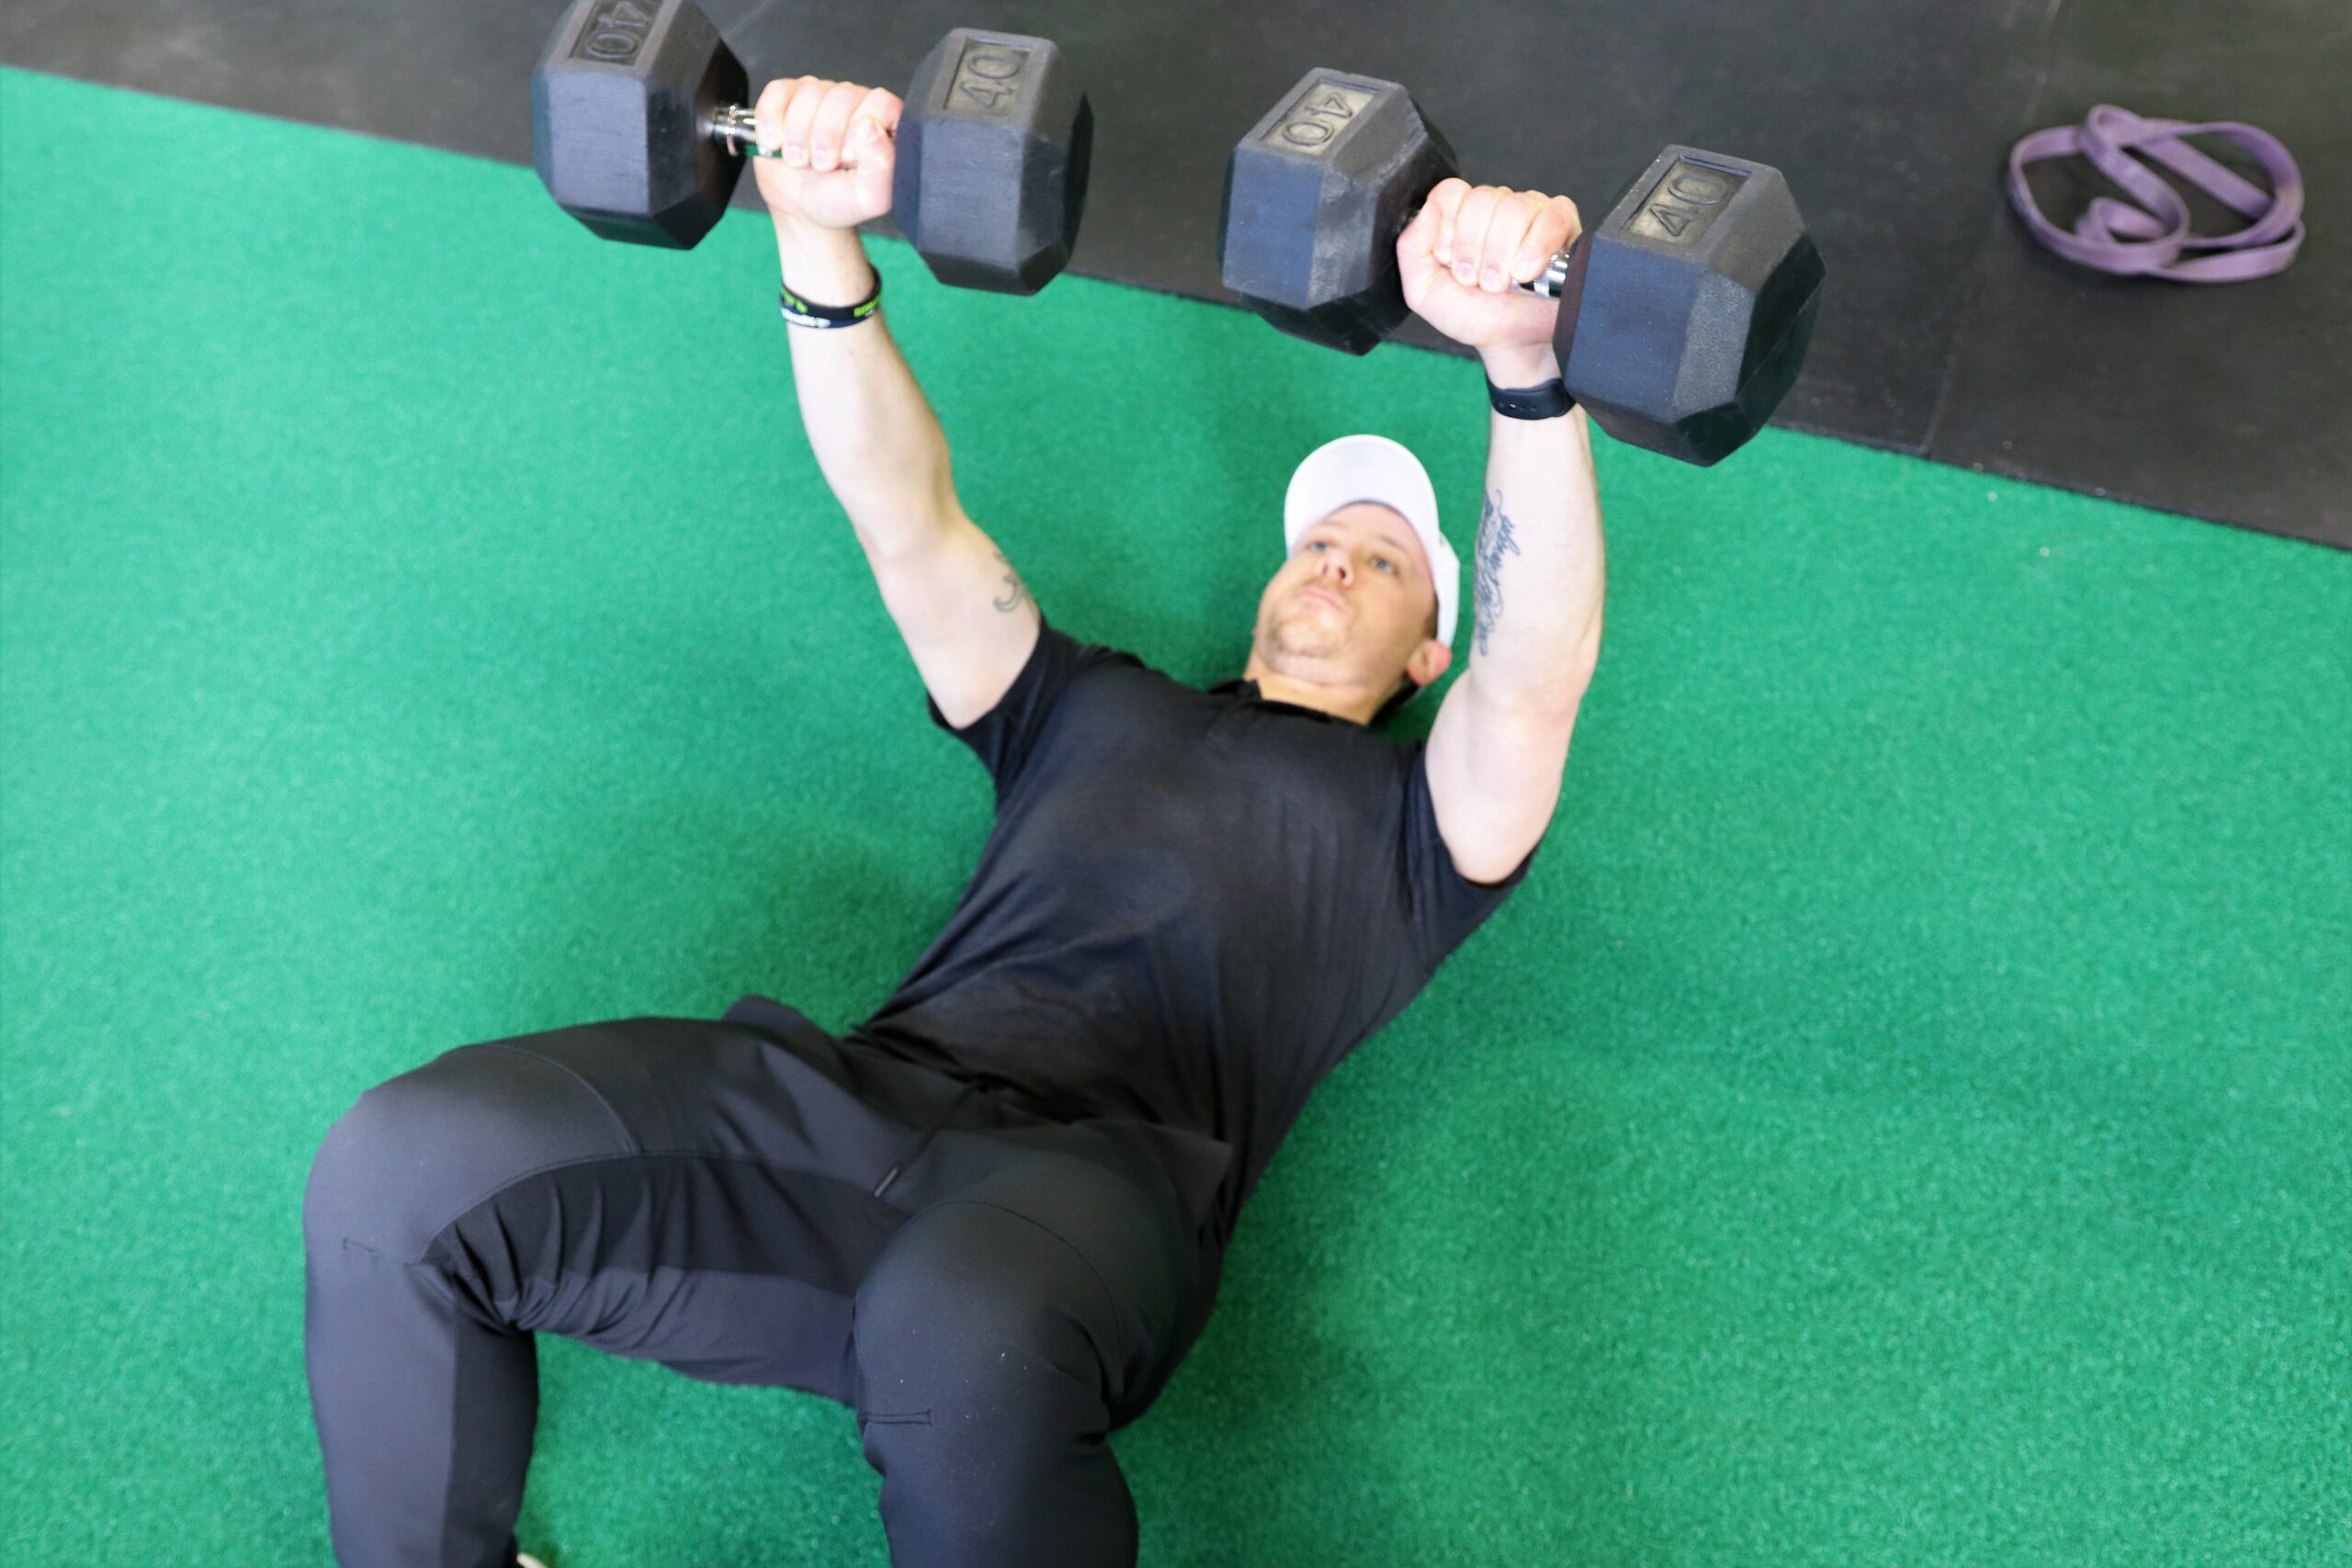
DB Floor Press
DB floor presses are high on my list of not just exercises to help with push-ups, but high on the list for almost any kind of pressing exercises. To do a DB floor press, lay with your back on the floor with a DB in each hand. Then press both DBs towards the ceiling. Lower your elbows back to the floor in a slow and controlled manner. There are a couple things to keep in mind while doing this pressing exercise:
- Keep elbows at a 30-45 degree angle off your body
- Keep shoulders and lower back against the floor
- Inhale on the way down and exhale on the way back up
- Use a weight you can control
This exercise will do a great job at increasing lockout power in the triceps which is where most people will fail on Push-Ups.
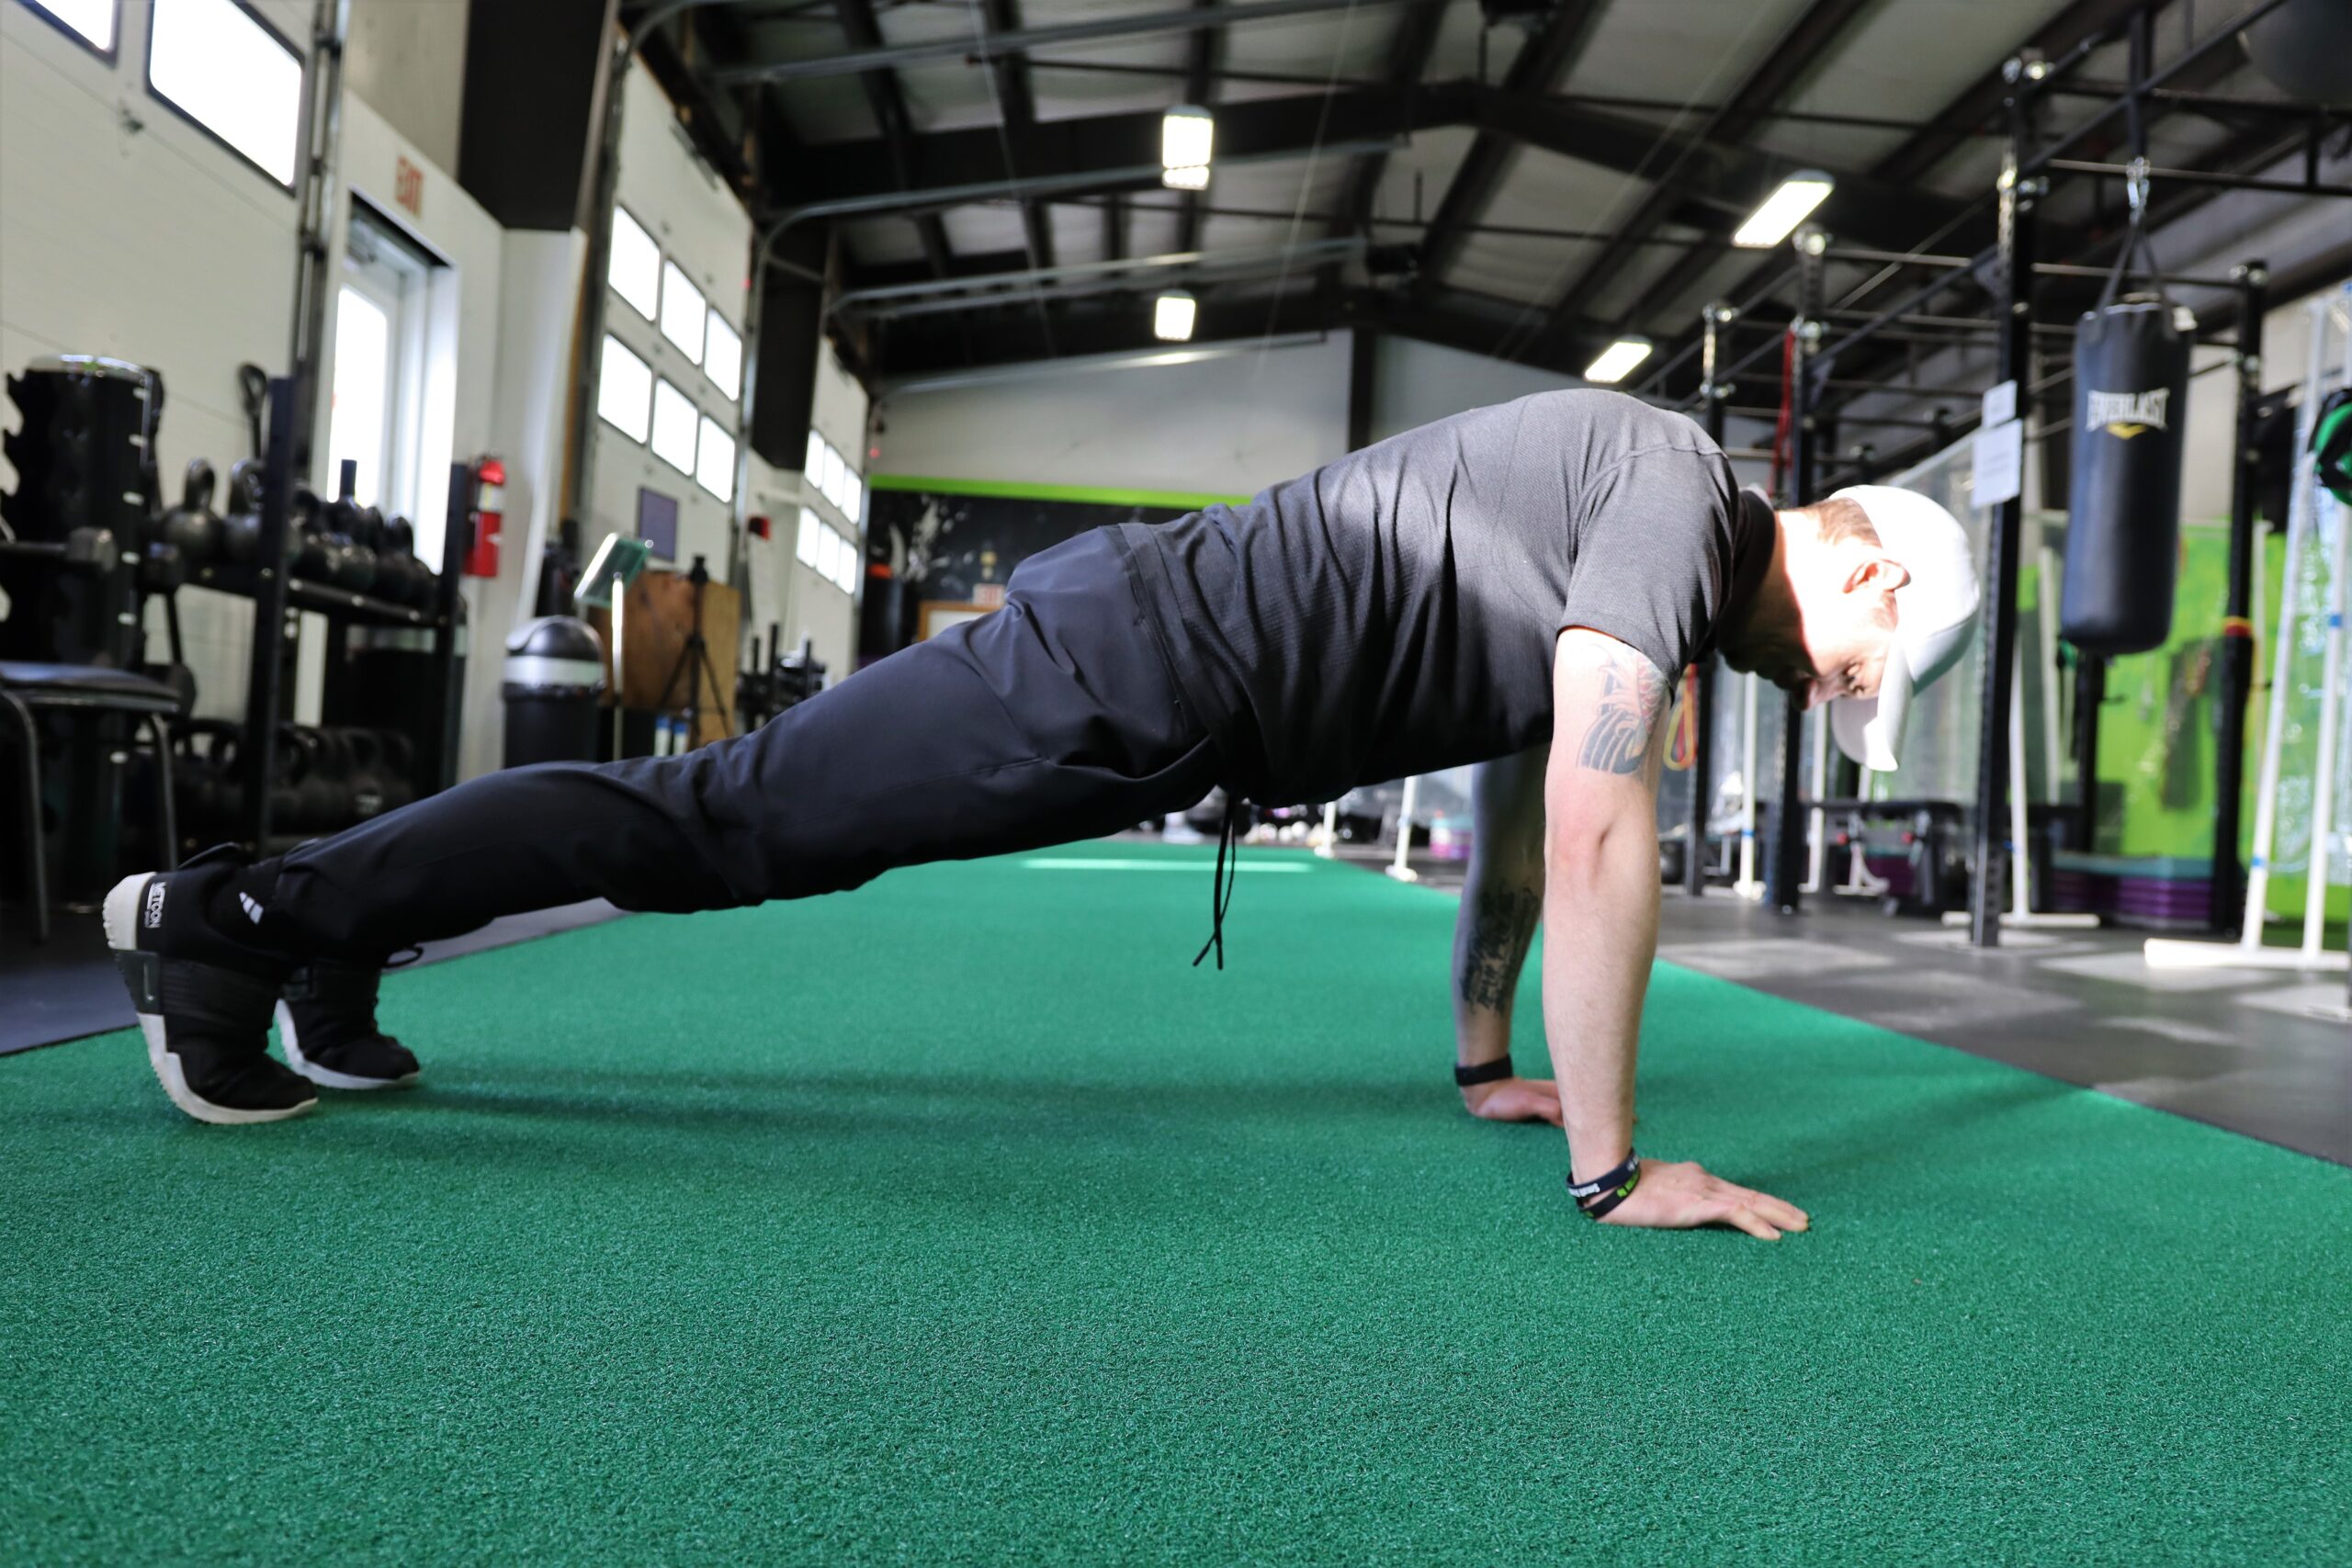
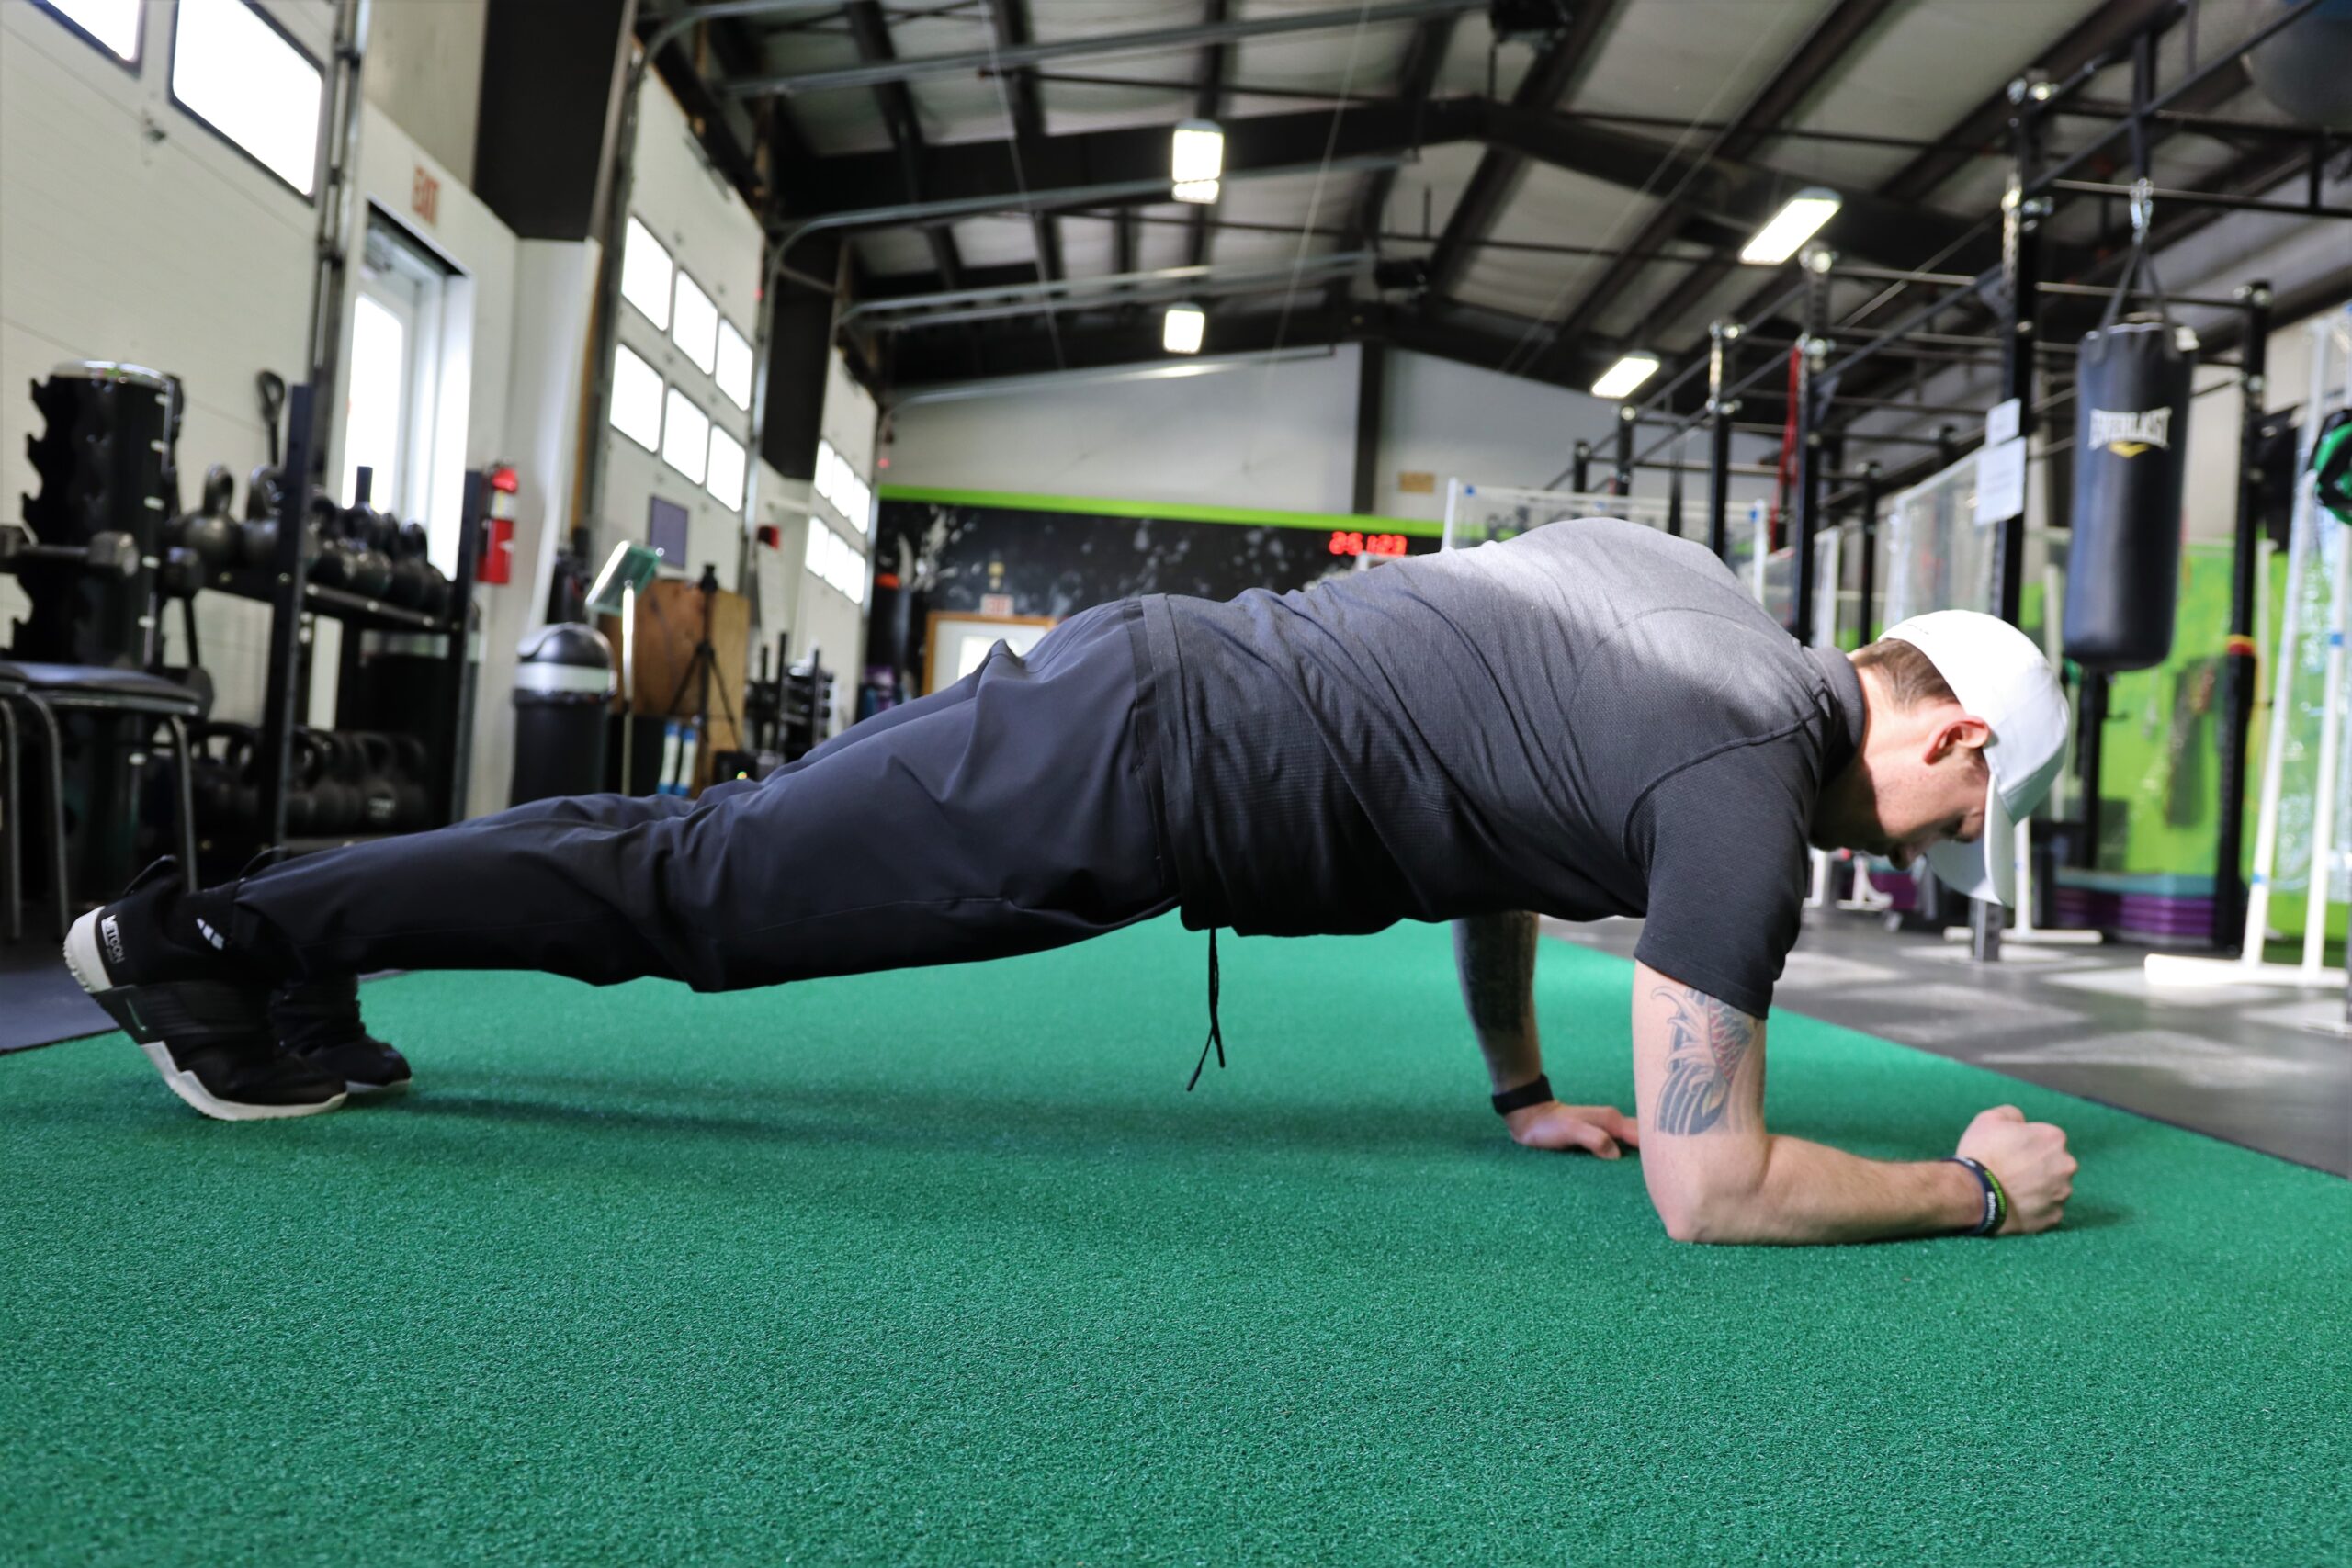
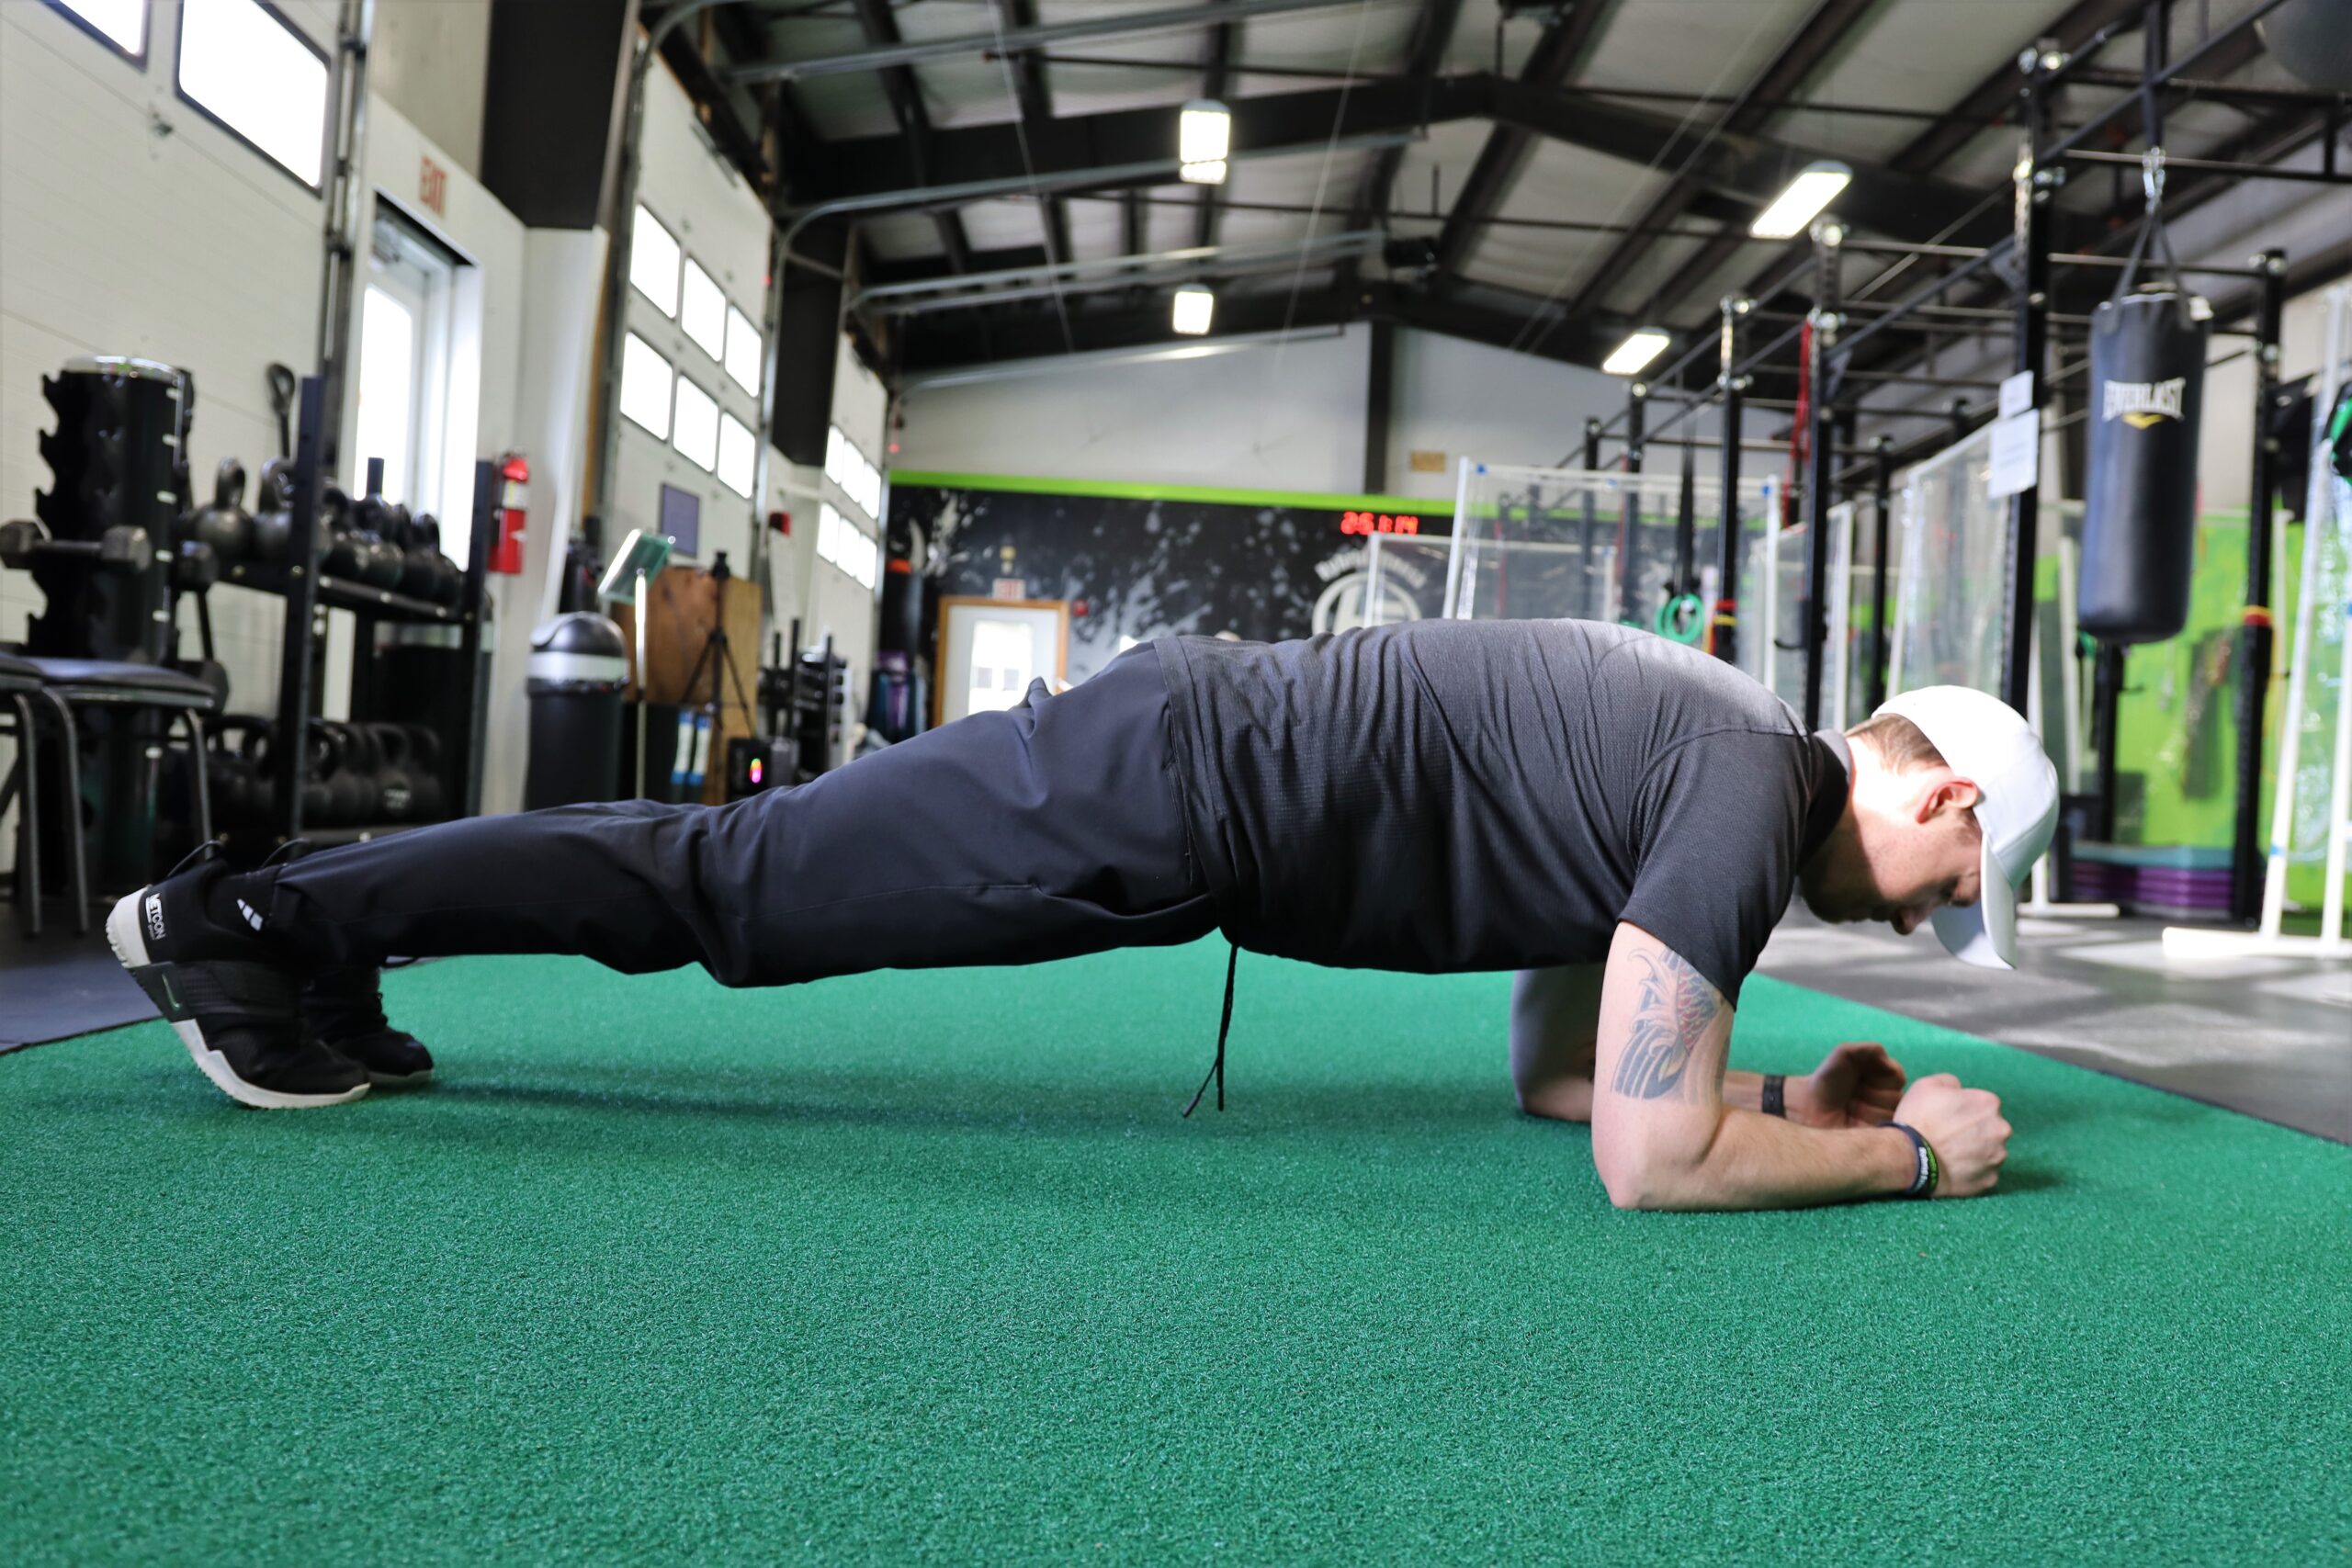
Plank
Something often overlooked when it comes to push-ups is core strength. Having a strong core will help protect your back when doing push-ups. To begin kneel onto the floor and place hands directly underneath your shoulders. Move onto your toes and remember the couple golden rules of planks below:
- Brace your core to keep your hips from sagging towards the floor.
- Keep hands directly underneath your shoulders
- Breathing! Don’t hold your breath. Continue breathing at a controlled rate
Hold this position for 20-30 seconds while starting out. Once you can hold this for a full minute move from being on your hands down onto your forearms and begin again at 20-30 seconds.
Bonus Tip!
To further intensify the plank and further assist your push-up goals, mix in some plank up-downs. To do this start in the high plank position form earlier and slowly lower yourself to the low plank and then return to the high plank by extending one arm at a time. Repeat this as many times as you can before your form begins to digress.
Wrap-Up
Gaining the strength to increase your push-ups can be just as frustrating as getting your very first push-up. The exercises above will assist any push-up goals you may have, but always remember that consistency is key. Get into the gym, stay consistent, and be patient. With determined and consistent effort you WILL improve!
If you enjoyed this article, swing over to our YouTube channel to check out our latest videos here – Hybrid Fitness YouTube Channel
Brandon started working out as an athlete in high school, striving to push his limits and reach his full athletic potential. As he spent more and more time working on his own goals, he found a passion in the science of strength & conditioning, and using that new-found knowledge to help others. Brandon is exceptional at giving his clients the extra push to get stronger in a safe manner, while going above and beyond to making sure they feel comfortable and safe.
February 9, 2021
Ways To Improve Sleep
Do you wake up feeling sluggish and tired? Not getting the recommended 7-9 hours of sleep/night? And what about “monkey brain”? That endless racing of the mind that begins right when you want to fall asleep?
If you are like so many others, and cannot get to sleep, or have trouble sleeping through the night, then this article is for you. Read to the end as I share my 5 tips on ways to improve sleep.
Sleep is so important to us as humans. It is essential to our existence, and has many benefits. When we get adequate sleep we feel refreshed, focused, and energized. Our concentration is improved, we feel great!
But on the contrary, when sleep is compromised, we feel pretty bad overall; sluggish, non productive, headaches, and nausea. Just to name a few.
The long term effects of inadequate sleep include high blood pressure, depression, diabetes, weakened immunity, and anxiety. How do we combat these? Let’s dive into those 5 tips, and find out!
TIP # 1: Make your bedroom sleep friendly

Start by removing clutter. Having a clutter free space will help with undisturbed sleep. The room should be organized and comfortable.
You also want to keep the room as dark as possible. Streetlights, room lights, and even the illumination from an alarm clock can certainly compromise sleep. A couple of things you can do to really enhance the darkness is to get some blackout curtains, or even a fashionable eye mask.
Your bedroom should be for one thing, and one thing only…
Sleep!
In order to do that, you need to separate everything else from it. Make sure and remove any work materials from your bedroom. Don’t keep laptops, phones, or files in your sleeping quarters, especially since a lot of people are working remotely from home.
One of the best things you can do to make your bedroom more sleep friendly is by adding in a little aromatherapy. Use soothing scents like lavender to help you relax, and create a calming space.
TIP #2: Shut down electronics, and decrease screen time

Have you heard of blue light?
Blue light is used in electronic devices such as computer screens and cell phones. During daylight hours it can boost attention and focus.
However, it can affect and interrupt sleep patterns. In a nutshell, blue light is exactly what it sounds like; light on the blue wavelength. Great to keep us focused and help with mood but not so great for nighttime use.
Studies have shown that using electronic devices before bed can interfere with sleep by suppressing melatonin, which can then also reduce the amount of time we spend in REM; otherwise known as rapid eye movement which are the hours we spend dreaming, and in deep sleep. This is the most important part of sleep that helps us feel most rested.
One of the best ways to improve sleep is to eliminate as much blue light before bed as possible. That means shutting the tv off, putting away the laptop, and hanging up the phone about one hour prior to getting in bed. The National Sleep Foundation recommends stopping the use of electronic devices at least 30 minutes before bedtime.
If you’re unable to completely eliminate all sources of blue light at night, you could utilize blue light blocking glasses. It’s definitely not the same as shutting down the electronics, but it’s an improvement!
TIP #3: Use white noise

Have you ever tried sleeping in a room that was completely dead silent? It can be extremely difficult!
You know what they say, “silence is deafening”.
White noise is a great solution. Especially if you’re a light sleeper. It can even help to drown out noise that can be bothersome.
You can use a fan, or something as simple as a noise machine. Whether you like the sound of rain or ocean, a noise machine can be a huge help.
TIP #4: Get ready for bed earlier than usual

Try to stop answering emails, watching tv, or perusing through social media at least one hour before hitting the sack. Do your nighttime routine or chores earlier in the evening, that way it’s off your list of things to do.
Having a simple routine in the evening before bed will decrease stress and promote feelings of relaxation. Create a consistent routine and stick to it. Maybe a cup of chamomile tea and a good book. The simpler the routine is, the less there will be to stress about once in bed. Doing this will help you to unwind and put your mind at ease.
Which brings us to the next tip…
TIP #5: Meditate and breathe

Meditation and deep breathing can reduce anxiety, sharpen memory, and promote restful sleep.
Meditate for 10 minutes in a quiet space with eyes closed. Let thoughts come, acknowledge them, then simply let them go.
Take a nice deep breath in, hold for 1,2,3 and then let it out slowly. This will help to calm your mind, as well as your body.
Your thoughts will slow, and your body will start to relax. Focus on your breath by inhaling through the nose and exhaling through the nose. Let your thoughts come, acknowledge them, and simply let them go.
Meditation may be difficult at first, but I promise it will get better! There are many guided meditation apps to assist you on gaining better skills. I started using headspace a few years ago and it has really helped me with improving my meditation technique.
Don’t sleep on these tips!
There you have it! My 5 simple ways to improve sleep!
Let’s recap!
- Make your bedroom sleep friendly to make it your sanctuary.
- Shut down electronics, and decrease screen time to prevent blue light.
- Use white noise to lull you into dreamland; whether it’s a constant noise like a fan, or a machine that makes you feel like you’re in a rainforest.
- Get your chores out of the way, and get ready for bed earlier.
- Meditate and breathe.
Now that you obtain all of the tools you need in order to defeat your nemesis that is poor sleep, it’s time to put them to good use!
Start by just implementing one at a time, making it a routine, and slowly adding to it. You’ll be a professional sleeper in no time!
If you found this helpful, please consider subscribing to the Hybrid Fitness YouTube channel, and be sure to check out all the other articles from our coaches.
And remember…Small Steps, Big Results.
Danielle lives in mid-coast Maine after growing up in Boston, MA. She’s a nursing school graduate, and is currently working towards becoming a certified grief counselor. She also has her personal training certification through ASFA.
Danielle has run multiple half marathons, and has even completed 2 full marathons, including the Boston and Des Moines marathons.
Danielle loves to create a comfortable, fun, and relaxed environment in the gym, and is dedicated to making a positive impact on others, and helping people feel good about themselves while reaching their goals.
February 5, 2021
The Perfect Boxing Stance – Boxing Basics
Perfecting the Boxing Stance
When boxing, establishing the perfect stance is one of the most crucial aspects to becoming fluent in the sport. In this article, I’m going to cover everything that you need to know in order to be comfortable in your stance, and dominate one of the most fun workouts you’ll ever have.
Boxing Stance Fundamentals
Although there are numerous stances and variations, the two most common stances in boxing are orthodox and southpaw. I recommend starting with one of these if you’re a beginner, but once a little more advanced, you can vary your stance for what’s most optimal for you. You can’t beat the basics of a perfect boxing stance!
Orthodox
Orthodox is typically for someone who is right-hand dominant. To set up in this stance, your left foot will be leading, with your right foot behind you.
Southpaw
Southpaw is usually utilized by left-handed individuals. This stance is a mirror image of Orthodox, except we’re just flipping it around. Here, you’ll lead with your right foot, and your left foot will be the trailing foot.
Most people feel comfortable with their given stance based on hand dominance, but use whichever feels most comfortable to you!
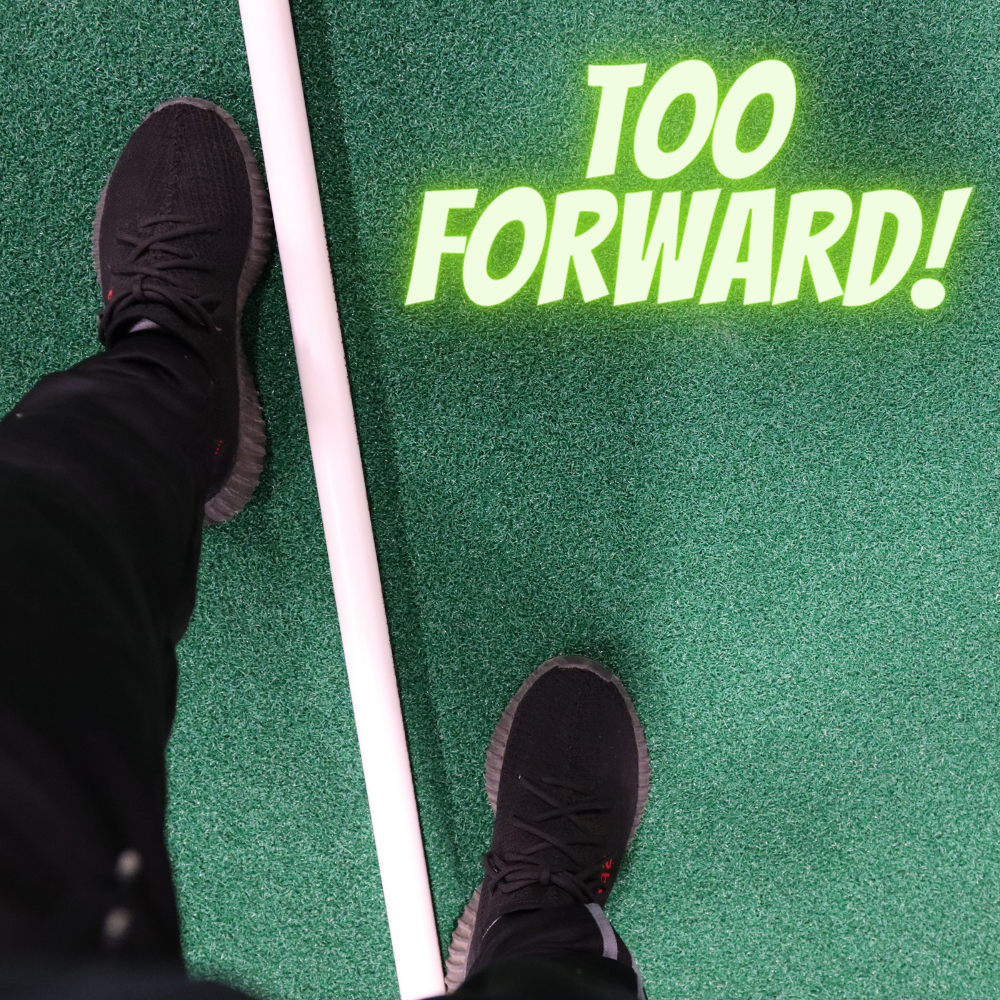
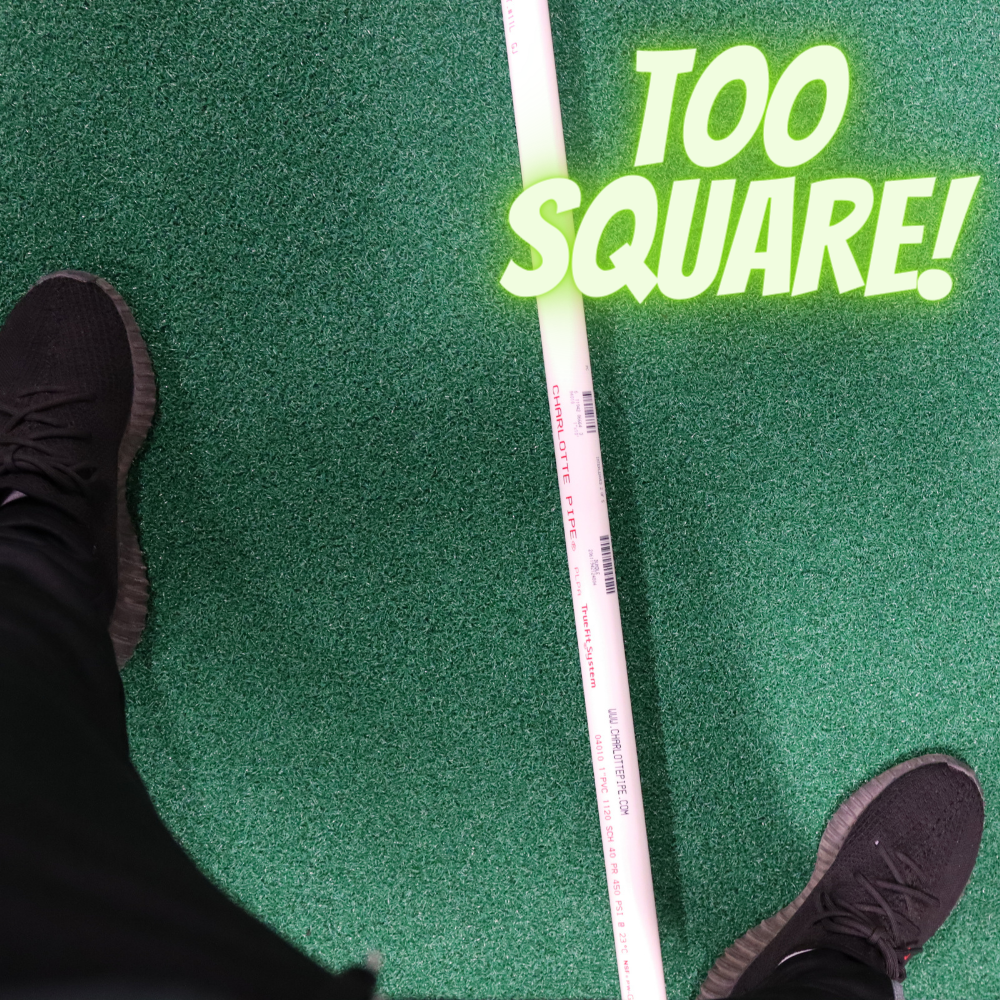
Foot Placement
Feet should be about shoulder width apart, and in a triangle stance; angled open towards the direction they’re facing (see diagrams below). Make sure your bodyweight is dispersed equally over both feet (don’t lean forward, or back).
Good foot placement allows for both solid balance and mobility. You’ll have great power and reach with both hands without leaving yourself too easily exposed for your opponent.
- A stance that is too forward will provide less power and mobility, all while leaving you head and body more exposed
- Too square of a stance will leave the head and body exposed in the center, have less reach on your jab, give you poor mobility, and make it easier to fall backwards
- A stance that is too straight will make it easy for you to be pushed off balance, and limit your reach with your cross
- Too wide of a stance will make it easier for you to be pushed off balance, give you poor mobility, and limit your reach with your cross.


Lower Body Position
There should be a slight bend in your knees with your weight equally dispersed between both feet. The heel of your rear foot should be lifted slightly, and especially when moving around, you should be on the ball of your foot (area just below the toes, but towards the forward portion of foot).
This stance is optimal by allowing for quicker movement on both offense and defense. As long as you’re not moving, the lead foot can be planted flat on the ground.
Common Mistakes:
- Knees too bent
- Not enough bend in knees
- Feet too wide, square, straight or forwards (shown above).
Upper Body Position
Your torso should remain upright, and your head should not be over or past your front knee. Relax your shoulders, pull them down and back, and keep your elbows tucked in at your sides. Your elbows are actually your protection for your ribs, so make sure they stay in tight.
Keep your chin tucked down towards your chest and not sticking out. The chin is something you do not want to leave open and accessible to your opponent.
Position your hands up in front of your chin, with your lead hand (jab hand) 6-8 inches out in front. This is so it doesn’t block your vision, allows for quick jabs, as well as blocks to your opponent’s rear hand.
The rear hand (cross hand) should be directly on the chin. This hand will be responsible for parrying jabs, and blocking hooks from the opponent.
Common Mistakes:
- Leaning too far forward/backward (throws off balance)
- Leaving your lead hand too low (leaves your head vulnerable, unless used as a decoy)
- Dropping your rear guard hand (leaves head very vulnerable)
Benefits of This Stance
This is the perfect boxing stance that allows you to move quickly to attack, as well as to get into a defensive position if necessary. You’ll have great mobility, and be able to move well around your opponent without sacrificing from the defensive side.
It also gives you the ability to fire out punches quickly, but also with great power. Being in this ideal stance also allows for proper balance. You don’t want to get knocked backwards or fall forward if you miss a punch!
Conclusion
The boxing stance is essential to becoming a great boxer, and is the first thing you should get down if you’d like to improve your craft. All of the greatest boxers have spent countless hours mastering their positioning before working on punching harder, defending better, etc. It’s the foundation to dominating your opponent. And here at Hybrid, to dominating the heavy bags while being one of the most fun, high energy workout classes around.
Check out our article on how to properly wrap your wrists for boxing:
Swing over to our YouTube channel to check out our latest videos here:
Hybrid Fitness YouTube Channel
Mike grew up as a multi-sport athlete and received his Bachelors in Kinesiology (Exercise Science) and also received his Personal Training Certification from the American Council of Sports Medicine.
Mike has worked with a wide range of ages and abilities and is an expert at working around injuries and helping those individuals reach their health goals.
In his time in college, he also worked with D1 Athletes (specifically the UMASS Amherst Men and Women’s Basketball teams) helping them get stronger, faster, and more athletic.
January 28, 2021
How To Improve Low-Back Pain
Let’s be honest, if you’ve got lower back pain, you’re probably missing out on a lot of fun in life. Fortunately, here are a few simple tricks you can do at home, without any equipment, to improve, and hopefully, eliminate your low-back pain.
DISCLAIMER: Before following any advice given here, please refer out to a doctor or other medical professional.
What Causes Low-Back Pain?
Aggravation of the low-back usually occurs due to improper alignment, or if our mobility has been disrupted. Usually misalignment is caused by a previous injury, or by improper repetitive movement over time. As many of you know, it takes only one vertebra to be out of alignment to experience pain.
Discomfort also occurs if two or more vertebrae are stuck together. Consider that each vertebra has 4 joints/facets that are held together with tiny ligaments. That’s 20 joints that can be sprained or fixated potentially leading to aches and pains!
3 Tips to Reduce or Eliminate Low-Back Pain
You can resolve low-back pain at home by taking the proper steps. First, you’ll want to reduce any inflammation, if possible. This is beneficial to remedy joints, nerves, and soft tissue that are irritated, raw, and swollen, causing discomfort and/or aggravation. In particular, your doctor or chiropractor may recommend oral anti-inflammatory medication, applying ice and/or stretching.
Here are 3 tips that you can do in the comfort of your own home to try and remedy that pesky low-back pain!
Tip #1 – Your Low-back Wake-up Call

How you start your morning contributes to the flow of the rest of your day. Your initial actions when you wake up prepare your body for sitting, standing and moving about your day.
Here’s an example of how to stretch your low-back before you even get out of bed each morning:
- Lying on your back with legs bent, gently pull one knee toward your chest
- Relax your low-back muscles while holding this position for 3-5 seconds, or longer if desired.
- Slowly switch legs.
- Now, do the same thing, but bring both knees toward your chest.
- Repeat 5-10 times to wiggle free from stiffness
Tip #2 – Your Core is Key to Resolve Low-back Pain
Strengthening your back is obviously important, but it’s just as important to strengthen your entire core. All the muscles extending from your head to your pelvis deep within your trunk provide support for your spine.
Exercises to aid with low-back pain are those that provide simple, low-impact movement of the whole body. The more you move, the more your lymph and circulatory systems flow. This increases the delivery of oxygen and nutrients to the joints keeping them healthy and removes waste products from your body.
Examples of Exercises for Mobility:
- Walking
- Swimming
- Biking
Specific Exercises for Building Core Strength:
- Pelvic tilts to create movement in the pelvis.
- Partial abdominal crunches lifting the head and shoulder blades off the mat.
- Crisscross, also referred to as Bicycles to strengthen the obliques
Give the core a hand by strengthening the glutes, quads and hamstrings with these exercises:
- Glute bridges to activate the glutes & hamstrings.
- Step-ups
- Walking lunges
- Single leg deadlift
- Elevated split squat
On the other hand, if lying on your back to exercise is not comfortable, then perhaps getting down on all fours for:
- Cat-cows
- Bird-dogs
- Planks, either low planks on your forearms or high planks with arms extended
Many exercises are beneficial and improve low-back pain but only if they are performed properly. Please be mindful when involved in the following to make sure your form is correct. If an exercise is too difficult to hold proper form, then modify the exercise appropriately.
Here are some exercises & behaviors you may want to be cautious of when dealing with low-back pain:
Planks
I know this may sound contradictory since I mentioned planks as a beneficial strengthening exercise above, however, ensure that you have proper plank form. To do this, align your body in a straight line from your head to your toes. If your low back sags or if you experience pain, try planks on your knees, elevated on a bench/chair or against a wall.
Prone positions
Although prone positions are beneficial for building core muscles, please use caution. Prone positions, such as Superman, can compress the spine by lifting your upper body and lower body too high off the floor. Instead, focus on making your body as long as possible by reaching with your fingertips and toes or lift only the upper body or lower body independently.
Excessive bending
Exercises that pull on the low-back such as, trying to pick something up off the floor without bending your knees. This movement can strain your low-back, especially if you cannot comfortably touch your toes with straight legs and/or if your hamstrings are tight. In other words, the low-back tries to provide the slack necessary to bend farther and could increase the chance of injury.
Quick twisting movements
Remind yourself to engage your core to support the low-back before slowly rotating the torso.
Contact or high-impact sports
Even though these sports may be fun, there is a risk of injury to your low-back if your core is weak. Low-impact exercises where there is always a grounded body part (whether it be a hand, foot or even a behind) can build muscle for more strenuous activities.
Heavy lifting that compresses the spine
Lifting heavy weight can increase the chance of low-back injury, even with proper precautions. In fact, it is possible to build muscle using body weight or light weight exercises.
Tip #3 – Strike a Pose to Relieve low-back pain

Posture! Posture! Posture!
Be mindful of your posture whether sitting, standing or lying down by:
- Engaging the core to support the low-back
- Aligning your head with your spine by lengthening through the back of the neck and pulling your chin back so your ears are over your shoulders
- Slightly pulling your shoulders back and shoulder blades together
- Using lumbar support when needed
Granted, nobody enjoys a moment of “Ouch! My back!”, as it impacts our enjoyment of life. Starting with the wake-up call exercise above and following through with these simple tips will help improve your low-back pain by keeping your joints mobile and your core strong.
For more on posture, check out this article!
If you found this article helpful, please consider sharing it with someone suffering from low-back pain.
Swing over to our YouTube channel to check out our latest videos here:
Hybrid Fitness YouTube Channel
And remember…small steps, big results.
Cathy grew up in NH surrounded by a large, loving family, where she learned generosity and hard work. She now models that for her two children. She was inspired to become a fitness coach when searching for ways to become more healthy herself after a life-threatening illness.