-
Blog
November 22, 2022
I Don’t Hike by Coach Cathy
 Last fall, I set out for a two-week adventure of a lifetime! I was officially in my fifties and felt there was no time like the present to push my boundaries and step outside of my comfort zone. You know, physical exertion, mental mind-bending, temperature changes, in-your-face nature, potentially suspicious food, and anything that makes you wonder later why you agreed to be that uncomfortable in every way.
After months of planning, prepping, and purchasing the needed gear, I was hesitant, to say the least, because I was about to hike 26 miles to get to Machu Picchu in Peru. You see, I don’t hike. Ever. I live at sea level in a beautiful place with many easily accessible hiking spots, but I don’t hike. No excuses. I sort of like hiking. I mean, I like the idea of hiking. I don’t ever make it happen.
What do you do when you are about to push your limits? You lean on a friend, right? Surround yourself with support and inspiration, which is one of the things I love about Hybrid Fitness. In my case, one of my grade school besties, Tammy, was going with me. Tam is the epitome of a spirited go-getter. Just what I needed! After 45 years, Tam knows me inside and out and has my back. However, she hikes. Like really hikes. Like all-the-mountains-in-New-England-every-weekend hikes. She was beyond ecstatic about this adventure.
I love to travel and have been all over the world. As I get older, I am less willing to suffer for the experience. I envisioned myself trudging along, far behind my friend if I wasn’t sitting on rocks or the wet ground, gasping for breath and sobbing periodically. Later wringing the sweat out of my clothes when we finally reached our nightly campsite only to find in the morning that my muscles would be so sore I’d have to forever live on the mountain in Peru with the alpacas for company.
I am a Hybrid Fitness Coach. Coach is the keyword. I help others get the exercise they need. In the past, I wasn’t as consistent with my exercise schedule. My nutrition was inadequate, at best. I tended to overschedule myself and skip meals. Once I realized what I had signed up for with this moderate-level Sacred Valley quest, I questioned whether I was fit enough to check this off the bucket list.
I have not been backcountry tent camping since b.k. (before kids). I was worried about my back after lying on the ground all night. I imagined tripping on the rock-strewn jaunt to the makeshift bathroom in the middle of the night in the blackest of black darkness. The temperature was a concern because I could only carry so much in my pack. Freezing after sweating in the cold weather from the exertion had me thinking there could be a possibility of never being warm again. I had no concept of what the food and drink would be like, including coca leaf tea, sacred to the Incas, which has enough caffeine to ignite my heart into a full gallop giving a whole new meaning to Elvis’s Burning Love. I was purposely not pondering the chances for any up close and personal conversations with unexpected critters as we intruded into their living spaces.
Despite all of these thoughts running through my head, I did gasp for breath but took more photos than anyone else because I stopped to take in my surroundings. I was slow but steady and arrived at camp whole and happy each evening, except when the toe of my shoe caught the step and sent me tumbling down stone steps. I don’t think I’ve seen that color purple in a bruise before. Sobbing was non-existent, smiling and laughing taking its place. My gear kept me dry in the downpours and shaded my fair skin from the sun. The thin sleeping pad did save my back from complete agony. My muscles were sore but in a why-don’t-I-hike-more kind of way. The food was pleasingly on the edge of gourmet with the now welcomed coca leaf tea because I didn’t bring enough layers for the evenings and needed the warmth. On a trip to the privy one evening, I made a deal with a tarantula to stay on our respective sides of the stall. Coach Brandon would have loved that. Overall, everything went well, but that didn’t mean it was easy. It was hard. Definitely not a vacation. It was what the brochure stated, an adventure hike.
As Coach Beth of Beth Feraco Fitness says, we can do hard things. We certainly can because I have signed up to hike in Nepal for two weeks in December. No, not Everest. I am not that crazy. As you probably know by now, I hate being cold, but I will be able to see Everest from my hike. I am going with a friend from college who runs adventure tours (Far Xplorer) in Nepal. Far Xplorer supports organizations that install clean drinking water in villages. Incredibly cool all the way around.
To prepare for this adventure, I have scheduled myself more time to be consistent in my workouts and not skip meals by doing some food prep. Sure, I’ve gained a few pounds with the increase in calories but, I feel better, heartier, stronger, and more prepared this time.
Wish me luck and stay tuned.


January 24, 2022
Cuddling Up In a Blanket with Ramen Noodles
The blowing cold wind off of the harbor is biting the uncovered skin on my face.
Snow, shooting downward from the sky, is accumulating into “dip n dots” on my mittens.
The year is 1999, I just turned 5, and I’m outside with my parents sledding down the small hill in our front yard.
Up and down the hill I go; my parents laughing and cheering to me.
“Wow! Good job Hunter!”
“Way to go! Want to go again”?
I repeat the cycle, tired by restricted movement of my snow suit… But determined to slide down the hill and go as far as I possibly can.
I will go farther than last time.
But, the longer we are outside, the cold starts to take it’s toll.
What started as so much fun, starts to slowly fade.
The chill of the cold is beginning to leak through my boots, and my fingers are going numb through my mittens.
It’s time to go inside and get warm.
My dad drags me on my sled by the thin rope attached to the long plastic blue sled he got me for my birthday.
I take off my boots outside of our door so I don’t track snow through the house, and run inside as quickly as I can to keep my toes from getting cold.
Squeezing out of my snow suit, I sprint to the the living room couch and throw my Winnie The Pooh Bed Cover All Around Me.
AHHH, finally warm again. I quickly transform into a human burrito, and poke my eyes out to see what journey Ash, Brock, and Misty are foregoing today on the television.
Before I know it, mom brings me a warm cup of Ramen, with one icecube in it to keep me from getting burnt.
Life is good again.
2 hours later, I BEG my parents to bring me back out.
Sometimes, all we need is a break and a warm cup of Ramen to be ready to give it our all again.
Time away from the “grind” and rat race is not being lazy, it is being productive.
Step away from your regular routine, and you will find clarity…
…and realize the cold wind and snow (the stresses of life) are more easily solvable than you thought when you were in the midst of the storm.
Have a great day,
Love,
Coach Hunter
#SmallStepsBigResults
If you can’t take a day or two away from your normal routine, even an hour can help you find clarity and slow things down. Yoga helps me do that. We just added 12 new yoga classes at Hybrid Fitness -> Check them out here! https://joinhybridfitness.com/yoga-and-pilates
January 18, 2022
Why I love Planet Fitness (but wouldn’t send my Mom there)
It’s been 6 weeks now since my workout partner, Dusty, and I have been hitting our workouts at Planet Fitness…
It’s been comical because I keep seeing people I know who look at me confused and ask:
“Wait, you own Hybrid Fitness, but you’re here? Why? Is Everything alright?”
And the answer is “YES!”
Everything is alright!
In fact, I have actually loved going to Planet Fitness, and here is why!
I love Planet Fitness because It’s everything that Hybrid Fitness isn’t.
– At Planet Fitness you do everything on your own – at Hybrid everything is guided by an experienced coach
– I got my Planet membership 4 months ago. When I didn’t go for an entire month, no one ever reached out to me to see why or how I was doing. If you miss consistent sessions at Hybrid Fitness, we text or call you to check in!
– At Planet, there’s a good percentage of young adults wearing very revealing clothing. At Hybrid, we rarely ever see that.
For me personally, I like those features because I enjoy doing my own workouts (And feel confident I can do them safely and effectively). I’m also motivated by seeing others’ physiques because it inspires me to work harder – I don’t get discouraged by it!
So why did Hybrid Fitness end up the way it is?
It’s that way because I didn’t create Hybrid Fitness for me (a 26 yr old, mildly ego driven ex-athlete)
I created it for my sister, my mother, and my father.
I created it for those who haven’t felt welcomed at a gym before (or even felt left out!).
I created it for those who need and want a little extra accountability to help them succeed!
And I created it for those who do better with instruction and coaching, and don’t have time to get injured!
If that’s what you value, too, I highly recommend you check out Hybrid Fitness! (We’ve got a brand new 6 week challenge going on now -> click here to learn more!)
But if you don’t as much and are like me… then Planet Fitness is the right fit for you!
Neither is right or wrong, it’s just preference!
And by the way – we have a handful of members to go to both, and I think that is awesome!
So anyways, this is why I love Planet Fitness, but would never send my mom there.
Have a great day,
Love,
Coach Hunter
#SmallStepsBigResults
Brand New 6-Week Challenge >> https://joinhybridfitness.com/application-form
January 10, 2022
Pain Free in 3 Months (New Yoga Classes!)
My back was completely smoked.
Sharp pains shooting down my right leg…
The fear of getting out of bed knowing one wrong move could ruin the entire day.
Stretching always helped (especially since I couldn’t even touch my toes!)…
…but I never was disciplined enough to stretch on my own.
Then one day, I decided to sign up for a yoga class one time a week.
After a few weeks, I saw almost immediate relief.
It was actually crazy how much it helped me.
Try your first yoga class with Hybrid Fitness today!
I wasn’t very flexible to start, but the instructor was very helpful in helping me modify some exercises so it worked for me!
I continued on for 3 months, and for several years the pain was minimal or non-existent.
I can’t say it would do the same for you… but this was just my experience.
Try Yoga for yourself! <<Brand New Classes in Warren, ME!
I had others who took the class beside me who weren’t in pain at all!
They were just looking for a way to have more energy, build strength, & keep themselves in good shape!
Yoga is a fantastic, low impact way to do that!
We want to offer a very individualized program in our new yoga sessions, so we are limiting them to 8 people a class!
You won’t have to worry about getting lost in a big group!
Try Hybrid Yoga out for (1) Month!
Click here to sign up: https://joinhybridfitness.com/yoga
Have a great day,
Love,
Coach Hunter
#SmallStepsBigResults
January 7, 2022
How to Not Suck at Your New Years Resolution
If you want to reach your goal of weight loss (despite the time of year it is), there are a few simple rules you need to follow! Also, I am the utmost expert on reaching goals by any means, but this is what I have found to be true for me and my experiences, so I hope this helps!
1. Understand the difference between Action Goals and Outcome goals
The gold at the end of the rainbow. Millions of dollars. 6 Pack abs. These are all common “outcome goals” that we look to bring into our lives. This differs from what I call “action goals”, the frequent habits or daily actions you chose to do in order to reach that outcome. It’s important to have both.
Set an outcome goal worth going after… something that excites you!
Then, find someone who is an expert in that field (someone who has already achieved the thing you want) via personal relationships, books, courses, trainings, etc…
and break that goal down into daily actions, or action goals.
2. Factor of 3
Let’s say your goal was lose 75lbs in 9 months. Take that 9 months and multiply it by 3 to 27 months.
Here’s why. When you finally do lay out the “perfect daily action goals” to reach your outcome, you aren’t going to be perfect. It’s going to take you time to have great adherence, 90%+, on those actions.
You’ll also have to change your plan. There will be bumps in the road and adjustments that you can’t account for ahead of time. Give yourself time.
3. Understand it won’t be easy.
No matter what path you go down in life, you will always have problems. The path you chose will determine the problems you have. So, take a second to introspect on what problems you want to have. For example, you can chose to be a bit more tired because you lose a little bit extra sleep to make breakfast and get your workout in VS feeling tired because you are out of shape and not taking care of yourself.
4. Watch this podcast
Coach Dusty and I did a podcast episode on this exact topic, and go much more into depth on how to stick to your daily goals and achieve your dream outcome! This is great to listen to in the car or in the shower when your mind isn’t occupied by anything else!
You can watch the podcast here:
I hope you found this helpful!
Love,
Coach Hunter
#SmallStepsBigResults
P.S – If you need a little more help with your nutrition and workouts – or just need a little accountability… I have an Online Coaching Program that helps just with that. Email me at Hunter@HybridFitnessGym.com if you’re interested and we can talk to see if it could be a good fit for you!.
January 6, 2022
Can’t Stay Consistent? Read This.
5 years.
For 5 years the so-called “Best of the Best personal trainer of the Mid-Coast was inconsistent with workouts.
At first, it was easy to ignore.
But as time went on, the feeling of an “imposter” began to set in.
This “imposter” was me.
A dozen times, I started and stopped.
I’d go for walks. I’d strength train. I’d count my calories. But no attempt lasted over 30 days.
But finally, one day, something clicked.
I started scheduling sessions with Coach Brandon.
We started with 2 days a week (which didn’t seem like enough – 3 and 4x a week would obviously be better, right?!)
I felt like a wimp. I used to do so much more.
But I just kept showing up, because Brandon was there waiting for me.
A month later, we moved to 3x a week.
Several months later, 4x a week.
We’re now at ~9 months of consistent workouts.
THIS FITNESS THING ISN’T EASY!
But, you can do it.
If you’re struggling to get some momentum going in this nutrition thing…
Try just starting with just 1 thing!
No, you aren’t wimpy for not doing 3 things daily.
Just master 1, and eventually, do 2!
Then, do 3.
All that matters is you do a little better than the day before!
You can do this 😀
August 2, 2021
Pelvic Floor Rehabilitation: The Nitty Gritty with Lee Ann Dinofrio, PT
Afraid to do jumping jacks at the gym?
Scared to sneeze or cough in public?
Always scouting for a restroom?
If having a weak pelvic floor is preventing you from having fun and getting the exercise your body needs, then this article is for you.
This interview with Lee Ann Dinofrio will clear up questions about pelvic floor dysfunction that you are too timid to ask.
Time to Share the Best Kept Secret in Midcoast Maine

Lee Ann Dinofrio is a physical therapist at Pen Bay Medical Center in Rockport, Maine. She specializes in pelvic floor rehabilitation.
Lee Ann is known as the best kept secret in Midcoast Maine because most people do not know that there is this kind of valuable help available for those suffering with pelvic floor dysfunction.
First, your pelvic floor is often referred to as the bowl or sling that holds the bladder, vaginal cavity, uterus (women), prostate (men), and rectum, which is the end of the large intestine that stores feces.
Lee Ann explained that pelvic floor rehabilitation is a treatment plan to strengthen the three layers of pelvic floor muscles to address issues such as, urine and fecal leakage, pelvic pain and postpartum issues.
Yes, you read that correctly. There are not one, not two, but three layers of muscle that make up your pelvic floor whether you are female or male. That anatomy is the same.
All three layers need to be strong for easy daily function to prevent embarrassing, inconvenient and possibly even painful incidents.
Disclaimer: If you feel you are in need of pelvic floor rehabilitation, please seek professional advice before following the information provided here to address your particular issues.
Visits with a Pelvic Floor Therapist

The first step to rehabilitation is evaluation. The evaluation visit is about 90 minutes and is an intimate procedure to assess the pelvic floor issue.
We say intimate because the only way to assess pelvic floor issues is vaginally or rectally.
Visits following the evaluations are about 45 minutes once per week for approximately 6 weeks. If more time is needed, then a patient’s health insurance is contacted for an extension.
Be ready for some homework

For progress to occur patients need to do their homework. Maybe you thought you were done with school, but now you are given what may be the most important homework ever to help you function easily in daily life.
Fortunately, this homework is very different than the high school algebra you speculated never using in “real” life.
This homework will help you EVERY day and involves exercises to strengthen, or even relax in some cases, the muscles of your pelvic floor.
Contracting these muscles with specific exercises for your pelvic floor are essential for addressing pelvic floor dysfunction. It works just like if you perform bicep curls to strengthen the bicep muscles of your arms only it’s muscles you cannot see.
Pulling the Drawstring

You may have already guessed that Kegels are the go-to exercise for pelvic floor strengthening and you’d be right for most cases.
Think of it as using your pelvic floor muscles to pull up and in as if lifting a drawstring bag in your abdomen.
What’s marvelous about Kegels is that you can do them anywhere at any time because nobody can tell if you are doing them. The muscles are internal. Nobody notices.
There are many variations to contracting your pelvic floor muscles.
1) Your therapist may suggest doing what is known as quick flicks, which are contracting your pelvic floor muscles quickly and letting them relax without holding them contracted.
2) Another option is to contract the muscles and hold for a few to several seconds before relaxing.
An A+ pelvic floor student
Lee Ann and other pelvic floor therapists prescribe exercises that benefit each patient depending on their specific needs.
To get on the honor roll with your therapist and benefit yourself the most, it’s imperative that you perform your therapist’s prescribed exercises correctly and consistently.
For Lee Ann’s recommendations for exercises fill out the form below!
No Squatting Allowed?

Some exercises may have to be put on the back burner for a while. Your therapist may suggest being careful with squatting because your pelvic floor muscles relax when performing a squat.
You may be thinking, “How am I going to build my quads and lift anything if I’m not supposed to squat?”.
Well, to be more precise, if you can contract your pelvic floor by performing a Kegel while simultaneously squatting, then you may be good to go.
Until then, working on strengthening the pelvic floor muscles needs to happen before squatting in the gym. In lieu of squats, consider wall sits and glute bridges.
Check out how to do proper glute bridges in our free guide (just fill out the form at THIS LINK to gain Instant Access)
Why do you have a weak pelvic floor?

You can experience a weak pelvic floor for a multitude of reasons.
Is it in your genes?
There isn’t significant research to support that having a weak pelvic floor is genetic. However, Lee Ann has seen in the history of her patients that there does seem to be a connection, such as a daughter, sister, mother, aunt, grandmother, etc. who all have suffered in some way from weak pelvic floor muscles.
Have you housed a human?
Pregnancy certainly can take its toll on pelvic floor muscles while carrying a child and whatever happens during the birth, either vaginally or cesarian section.
Muscles that are torn, cut or damaged in some way can mean that those muscles are not as strong as they were prior to pregnancy.
Retired muscles?
Our age may be another factor contributing to a weak pelvic floor. As we age our muscles get weaker due to wear and tear and overwork.
How is your fitness level?
Similar to all other muscles in our bodies, muscles that we do not use and do not continue to strengthen get weak and cannot perform their responsibilities appropriately.
Sufficient exercise each day is important for the muscles of your pelvic floor and your overall health.
What can I do to prevent weak pelvic floor muscles?
Exercise can make a significant difference in how well your pelvic floor muscles perform. The phrase “use it or lose it” comes to mind. If you do not exercise the muscles in your body, including your pelvic floor muscles, then the strength of those muscles can decline over time.
An option for preventing severe issues as a result of a weak pelvic floor is to seek out a therapist before the situation interrupts your daily living activities. Maintenance and consistency are key to keeping the pelvic floor strong.
I want results today!

Once patients take the leap and initiate a visit with Lee Ann, they tend to want results on the first visit. However, pelvic floor issues take time and dedication to remedy.
That said, most patients feel better emotionally and mentally after the first visit because they now know what the issue is and that there are steps to follow to strengthen their pelvic floor.
Many patients haven’t confided in anyone about how they are suffering in their daily lives with their weak pelvic floor. Once in Lee Ann’s office, the flood gates open through sharing their experiences and asking a plethora of questions.
Do not be nervous to ask any question of your therapist. It’s best to throw it all on the table, so to speak.
Yes, but I’m a man…

We associate weak pelvic floor conditions with women, but, as mentioned above, all the pelvic floor muscles are the same for both women and men.
For the most part, men seek Lee Ann’s help for incontinence and issues that may be related to their prostate.
Again, Lee Ann and other pelvic floor therapists have heard it all. They can provide the answers you seek or refer you to a specialist in another area that can help.
It Depends

Clothing and other products to help with weak pelvic floor issues are not necessarily helpful. Let me explain.
Lee Ann revealed that even though there are items that work very well and provide an element of confidence for going out in public, they may not instill the urgency necessary to remedy the underlying concern of weak pelvic floors in a timely manner.
Some folks tend to rely on these products, such as incontinence pads and underwear, and this can decrease the incentive to do their homework to improve the primary problem.
Understandably, you need to function in public life with confidence. It depends on how much you rely on using these products.
Going under the knife

There are scenarios when Lee Ann recommends a consultation with a surgeon.
However, before seeking out a surgeon to address your weak pelvic floor, please see a pelvic floor therapist. Take their advice to heart and give their recommendations your best effort.
In Summary
If you have any issues related to your pelvic floor that affect your daily living…
1) Please see Lee Ann Dinofrio at Pen Bay Medical Center or a therapist near you that specializes in pelvic floor rehabilitation. It can change your life for the better!
2) Do your pelvic floor homework EVERY day
3) Eat a balanced diet with fiber, exercise, attain adequate sleep and enjoy life
There is hope and help to address pelvic floor dysfunctions. You do not have to constantly worry about embarrassing situations, finding a restroom in public or jumping jacks at the gym.
Lee Ann Dinofrio currently practices at Pen Bay Medical Center in Rockport, Maine and has over 36 years of experience as a physical therapist. She received her training to specialize in pelvic floor therapy at the Herman & Wallace Pelvic Rehabilitation Institute and has been practicing pelvic floor rehabilitation since 2014.
She addresses urinary and bowel issues, pelvic pain and postpartum pelvic issues. Lee Ann helps women AND men and includes any necessary orthopedic steps in her treatment plans, as well.
Lee Ann is also certified in Integrative Dry Needling and finds this to be a very useful tool in the treatment of pelvic floor dysfunctions. (please note, no “private parts” are needled!).
To see Lee Ann, all patients need to be referred by their primary care physician, certified nurse practitioner or certified midwife.
June 8, 2021
Top Beginner Boxing Mistakes!
5 TOP BEGINNER MISTAKES WHEN BOXING!
If you’re new to boxing, or you just want to clean up your form and prevent yourself from injury, then this article is for you!
I’ve taught beginners boxing for several years now, and I see the same small mistakes with almost everyone. When punching a 70-100lb bag, form is very important. Proper form and technique ensure that you don’t injure yourself, and you get the most out of your workout.
Let’s take a look at the top 5 beginner mistakes when boxing!
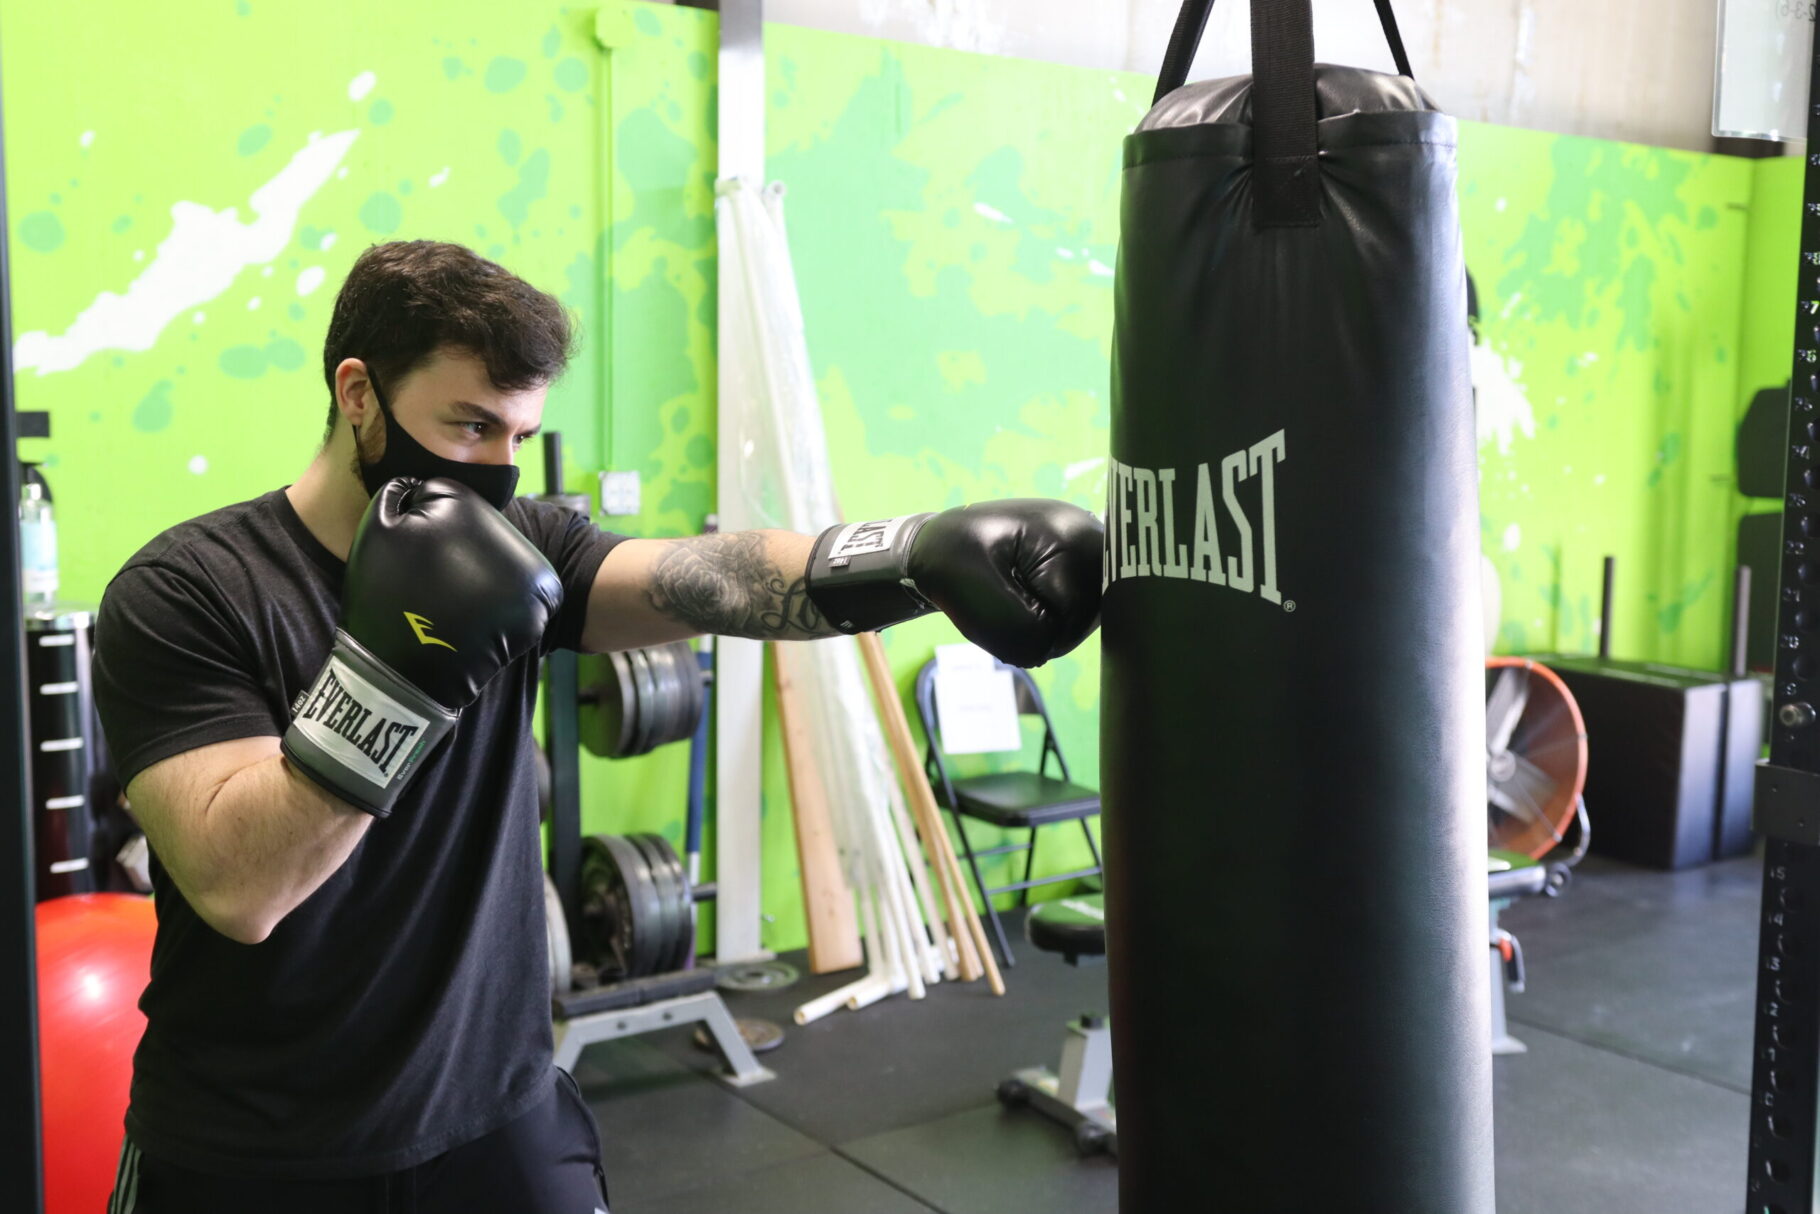
MISTAKE #1: OVEREXTENDING THE ELBOWS!
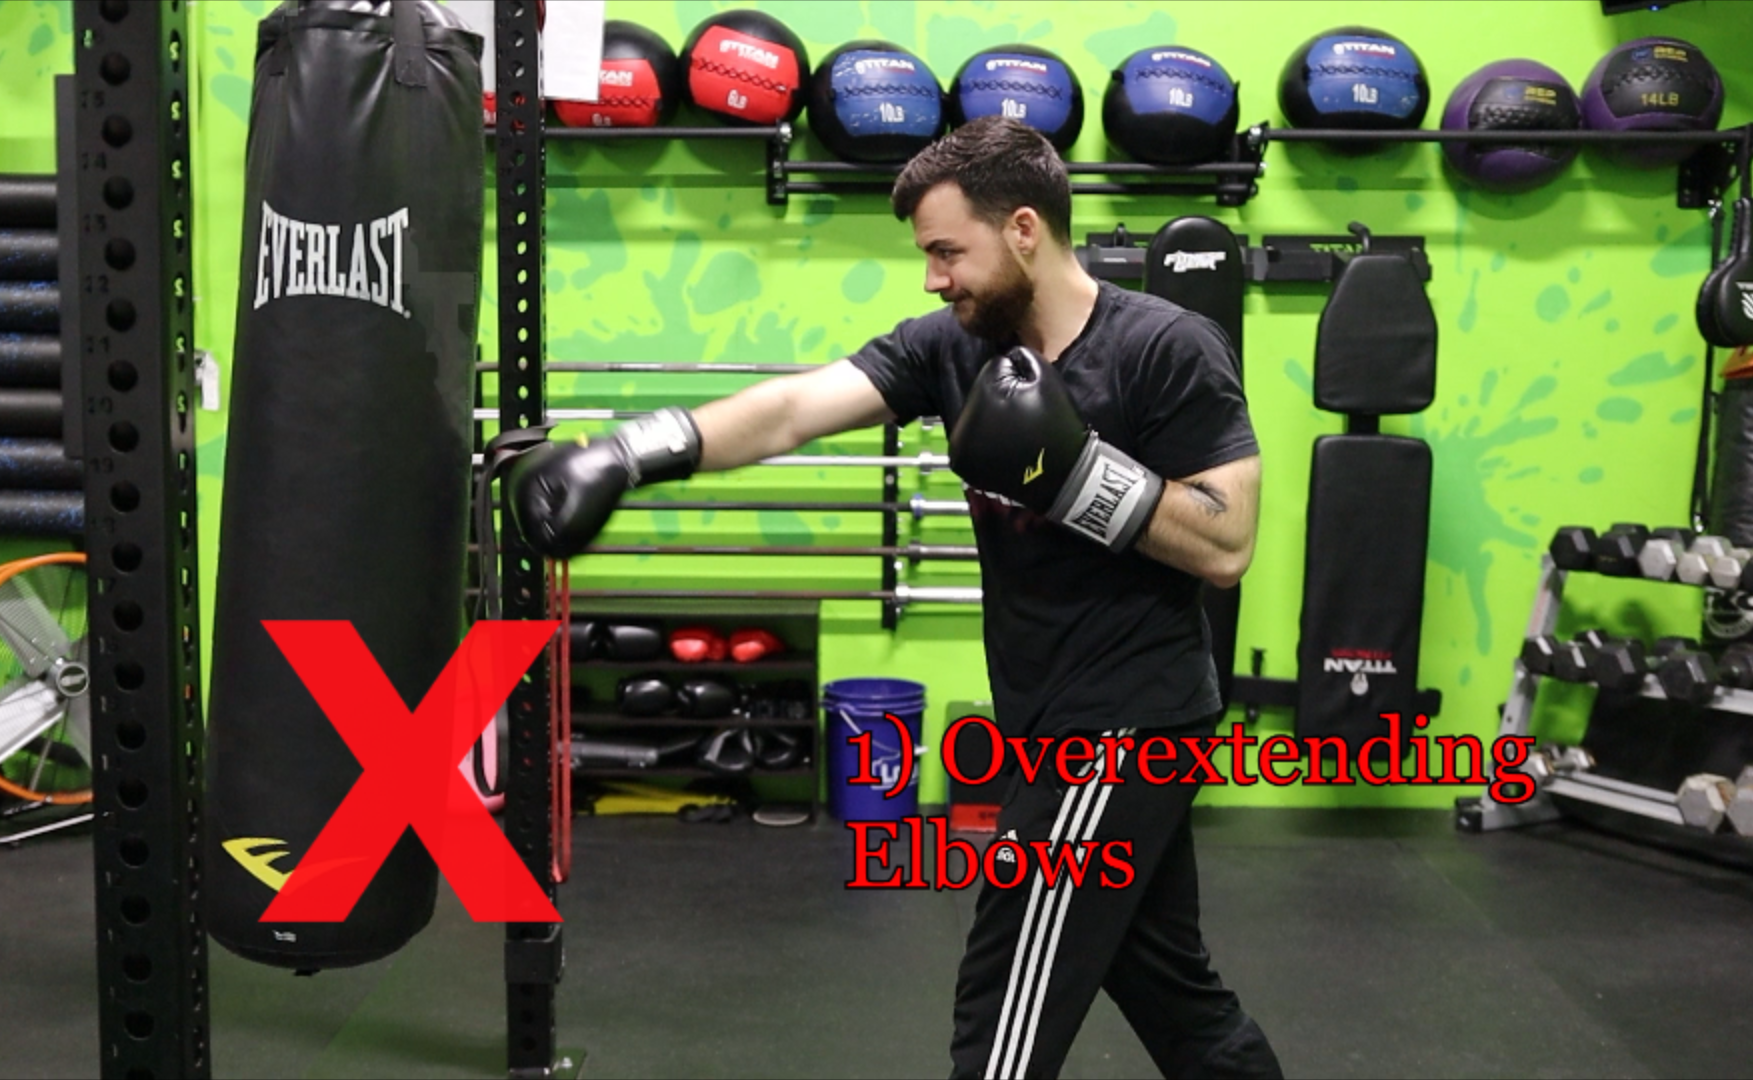
One of the leading causes of injury in boxing comes from hyperextending the elbows when throwing punches. This often comes from misjudging your distance between yourself and the bag you’re using, or just downright improper punching technique.
Always make sure you’re close enough to the bag (or opponent) so that you can hit them with a fully extended jab. Using the jab to assess distance is ideal because if you can hit the target with the extended jab, you’re at a good distance to land all the rest of the punches.
Another common issue is punching with a chopping motion rather than punching straight forwards. A good way to work on this is to imagine punching through a pipe. The punch will have to go straight forwards through the pipe to miss the sides, and will help throw straighter punches.
Make sure to fully extend your punches, as well. Failure to do this will result in far less power/force.
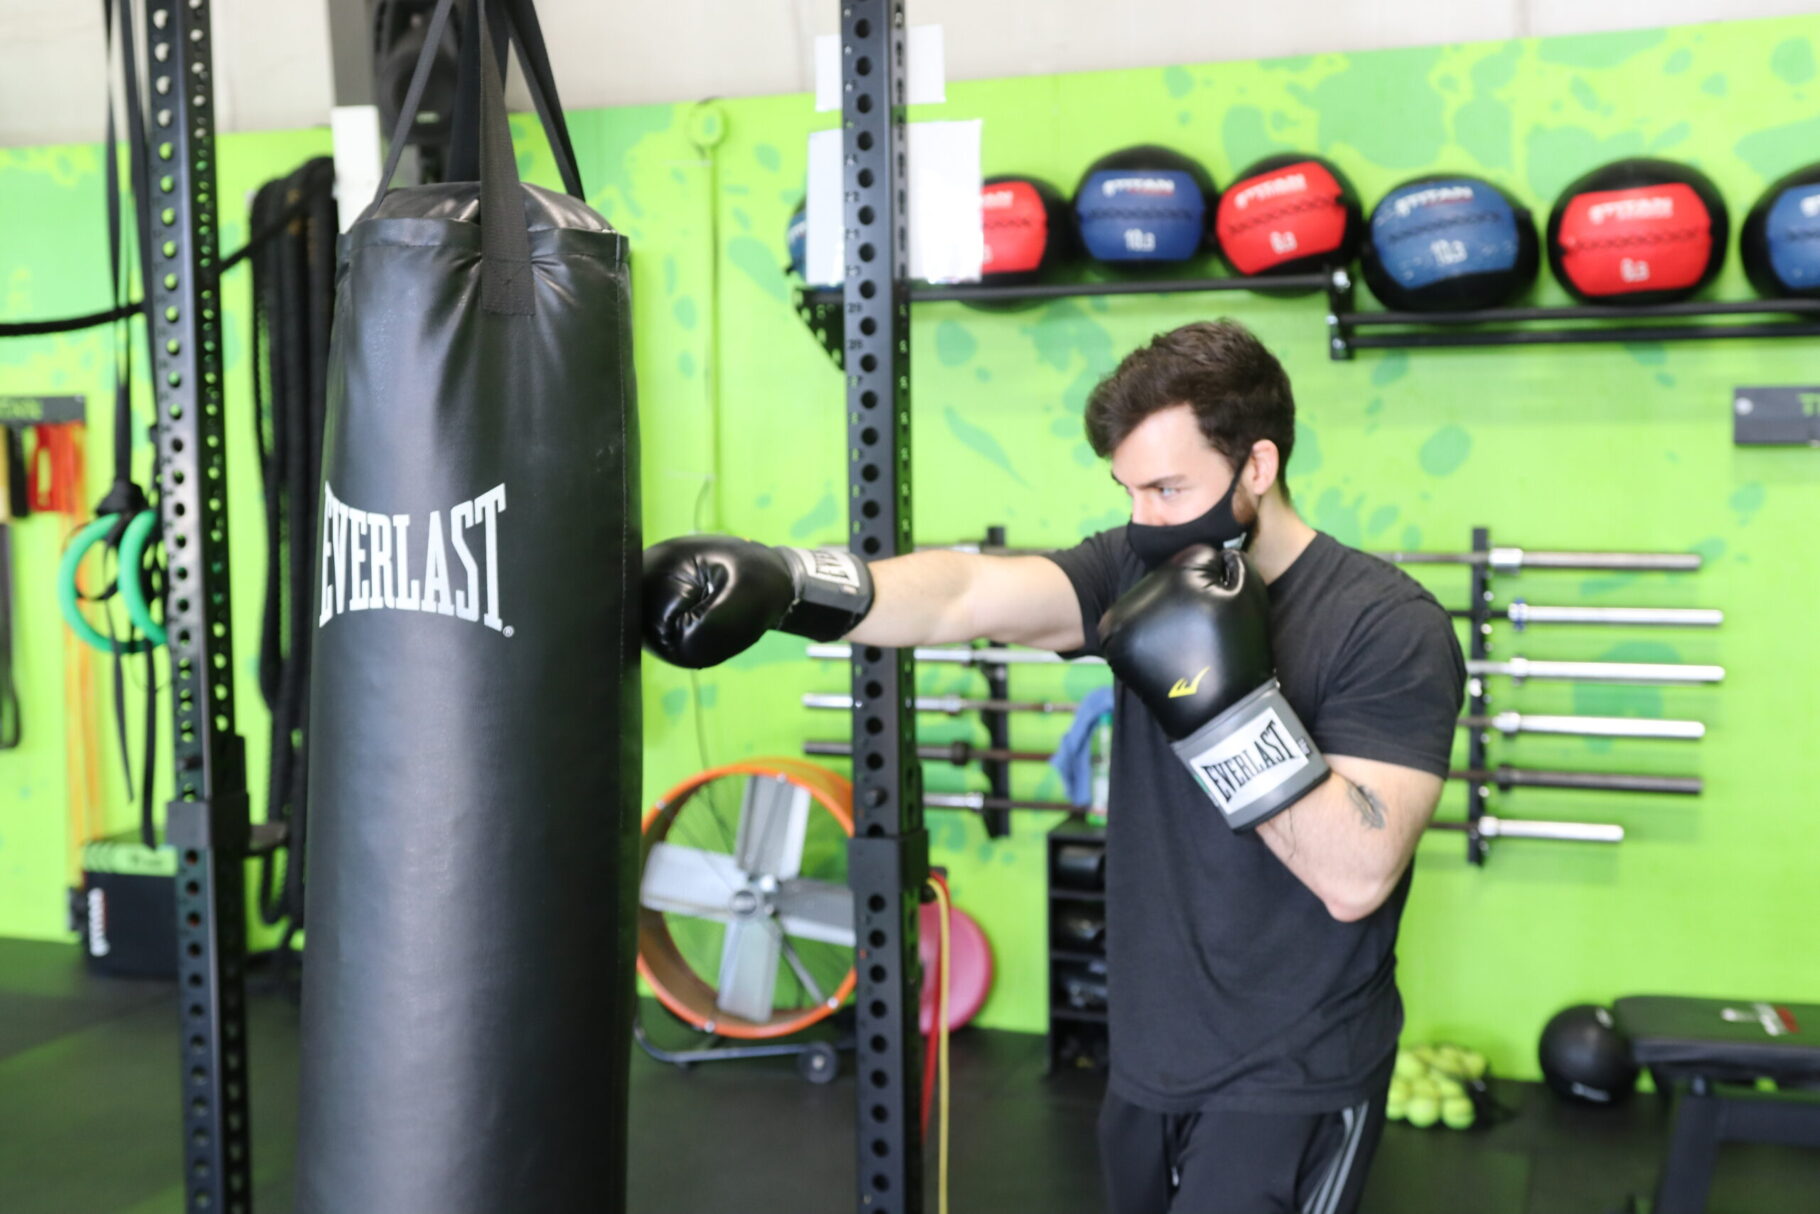
MISTAKE #2: NOT SNAPPING THE PUNCHES BACK AND DROPPING THE HANDS!
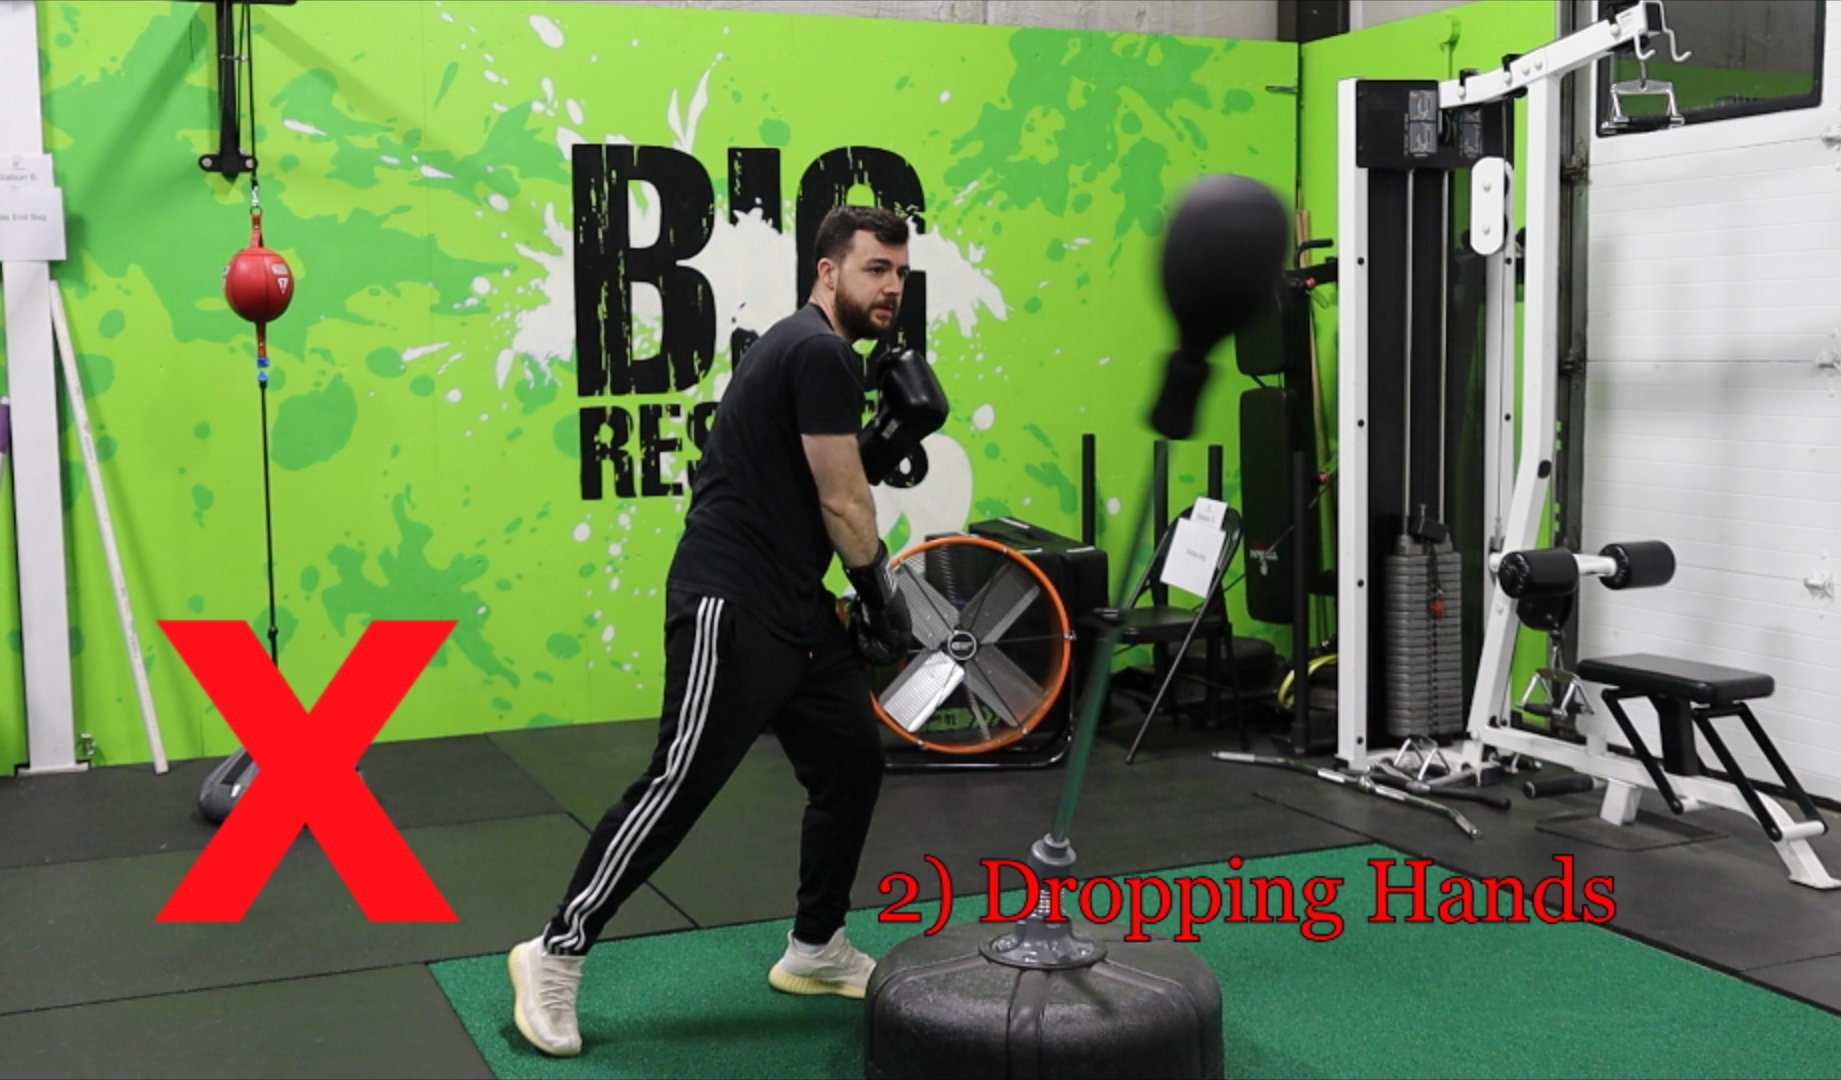
Another mistake I see all the time is throwing punches forwards, and letting them linger out in front. Every punch should be snapped back to the chin right after it’s thrown, as fast as possible. The motion is very similar to that of whipping a towel.. Throw the punch forward, and immediately snap it right back.
This increases the power of the punch, helps make your technique more efficient (getting the punches back quickly is important so you can throw them again if needed), and is also very important for defense. The longer your arm stays extended, the more time your opponent has to come in with a punch to your face/head which is vulnerable.
Always snap the punches back to the chin. Also, if your fist isn’t throwing a punch then it should be besides the chin protecting the head. Oftentimes, I see dropped fists after punches or while slipping. Never let your hands drop down and always bring them right back to that defensive position.
MISTAKE #3: NOT TURNING THE HIPS OR USING THE CORE!
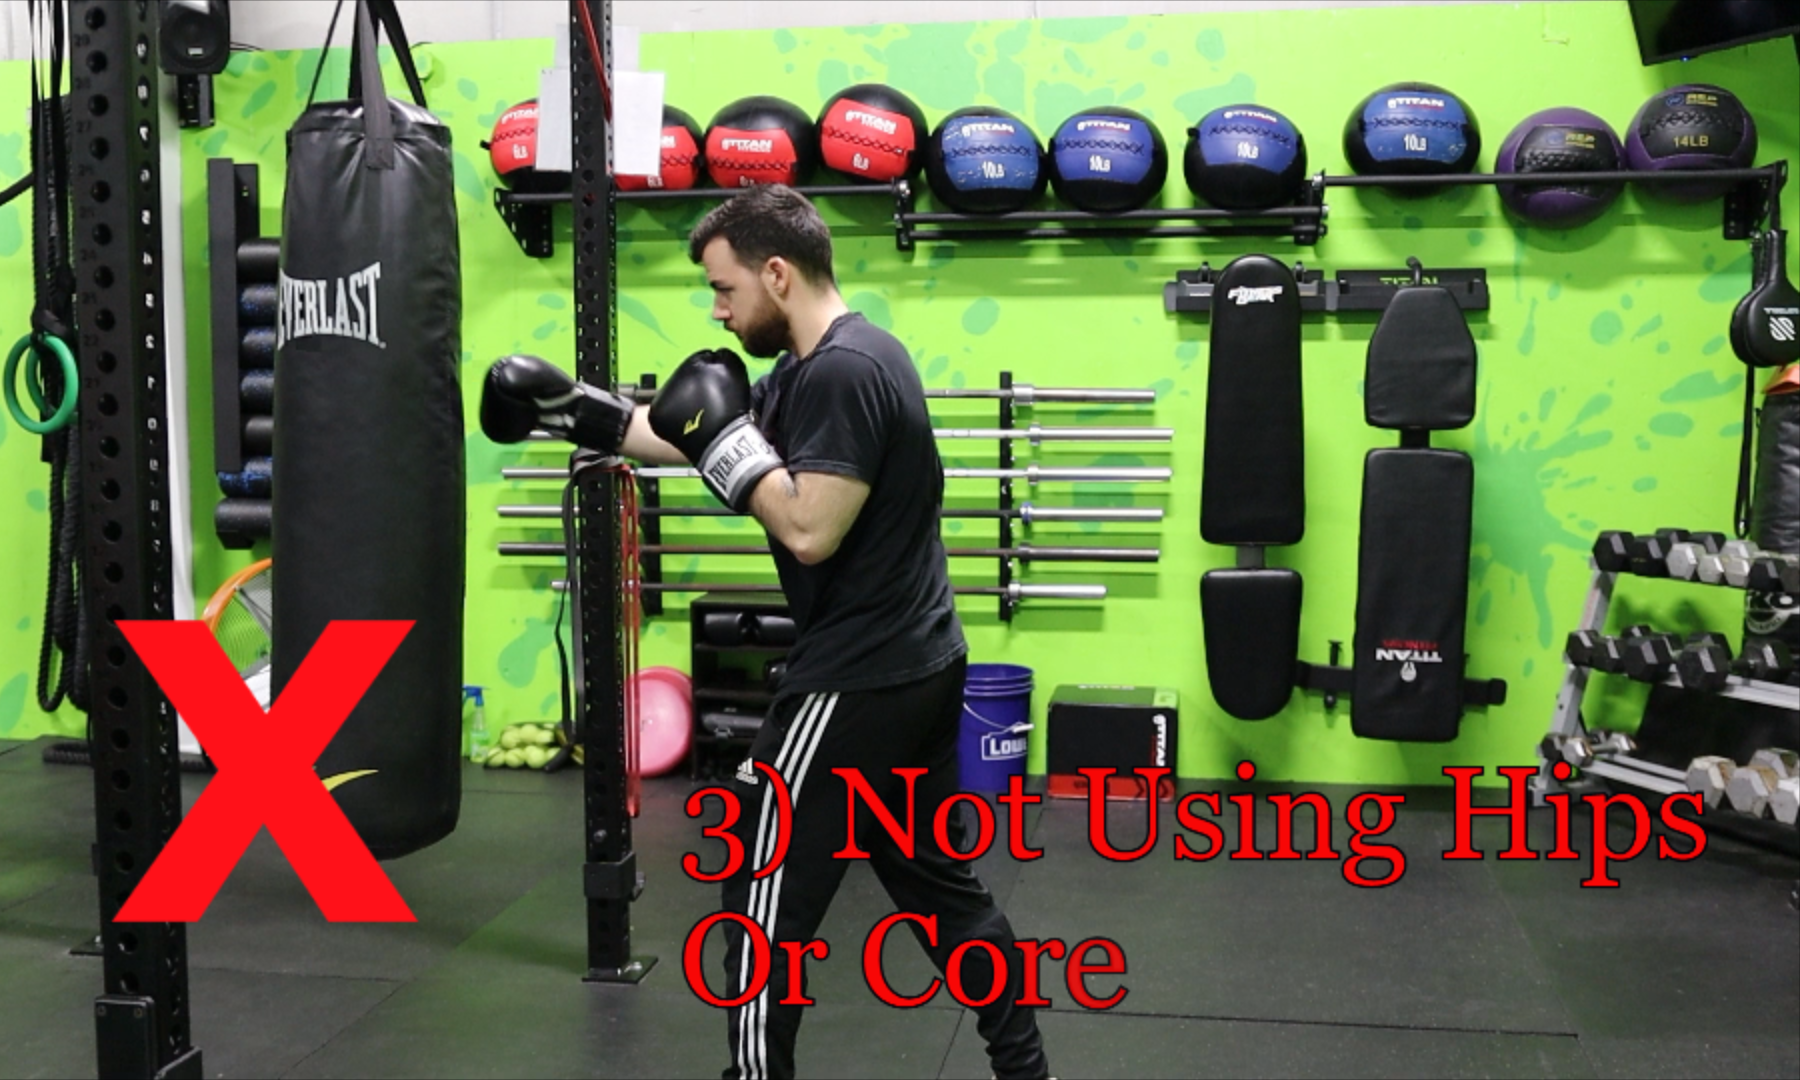
In regards to punching, the majority of your power is generated from the hips. It’s crucial to turn your hips and transfer your weight around to get a lot of power through your punches, and to have efficient technique (especially with the cross and hooks).
When you’re throwing punches, make sure to rotate through your shoulders, AND hips, as well.
This is where hooks can be awkward punches to master at first. I like to think of your core and torso as a spring. When you’re throwing the hook you want to almost load the spring before coming back around. Load the spring by rotating slightly to the opposite direction of the punch, then use the momentum through your core rotating back to add power to the punch.
This is easier and more effective if you throw the hook after another punch that already sets you up in that position (i.e. throwing a 2, then coming back around with a 3).
MISTAKE #4: FEET CROSSING OVER WHEN MOVING AROUND!
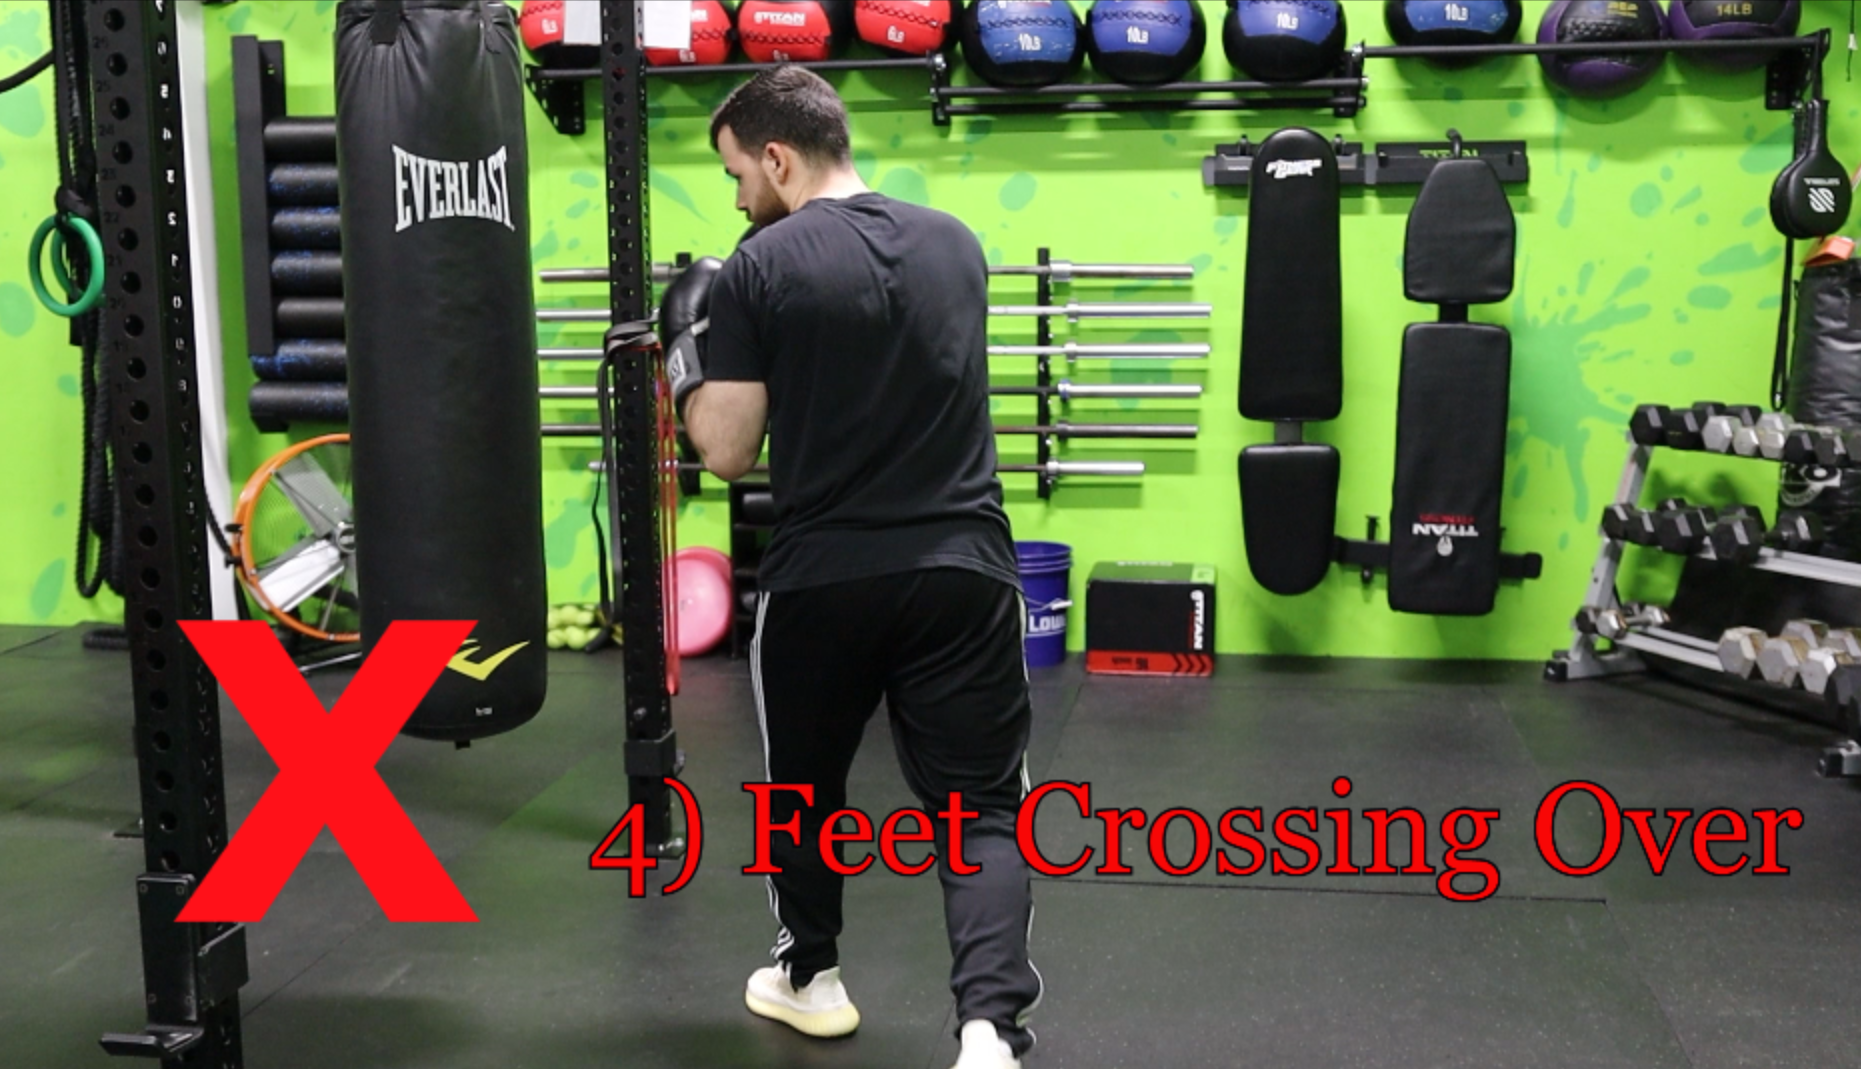
Crossing your feet over one another is never a good idea!. It throws you off balance, and makes you very easy to push over.
You should start a move to any direction with the foot that’s closest to that direction. For example, if you’re a righty and set up in an orthodox stance (left foot out in front, right in back) and you want to move to the left, start by stepping to the left with your left foot then follow with the right.
Opposite to the right, start with the right foot which is already closer to that direction then follow through with the left foot. Moving forwards should always start with the front foot and backwards should start with the back foot.
MISTAKE #5: BREATHING INCORRECTLY!!
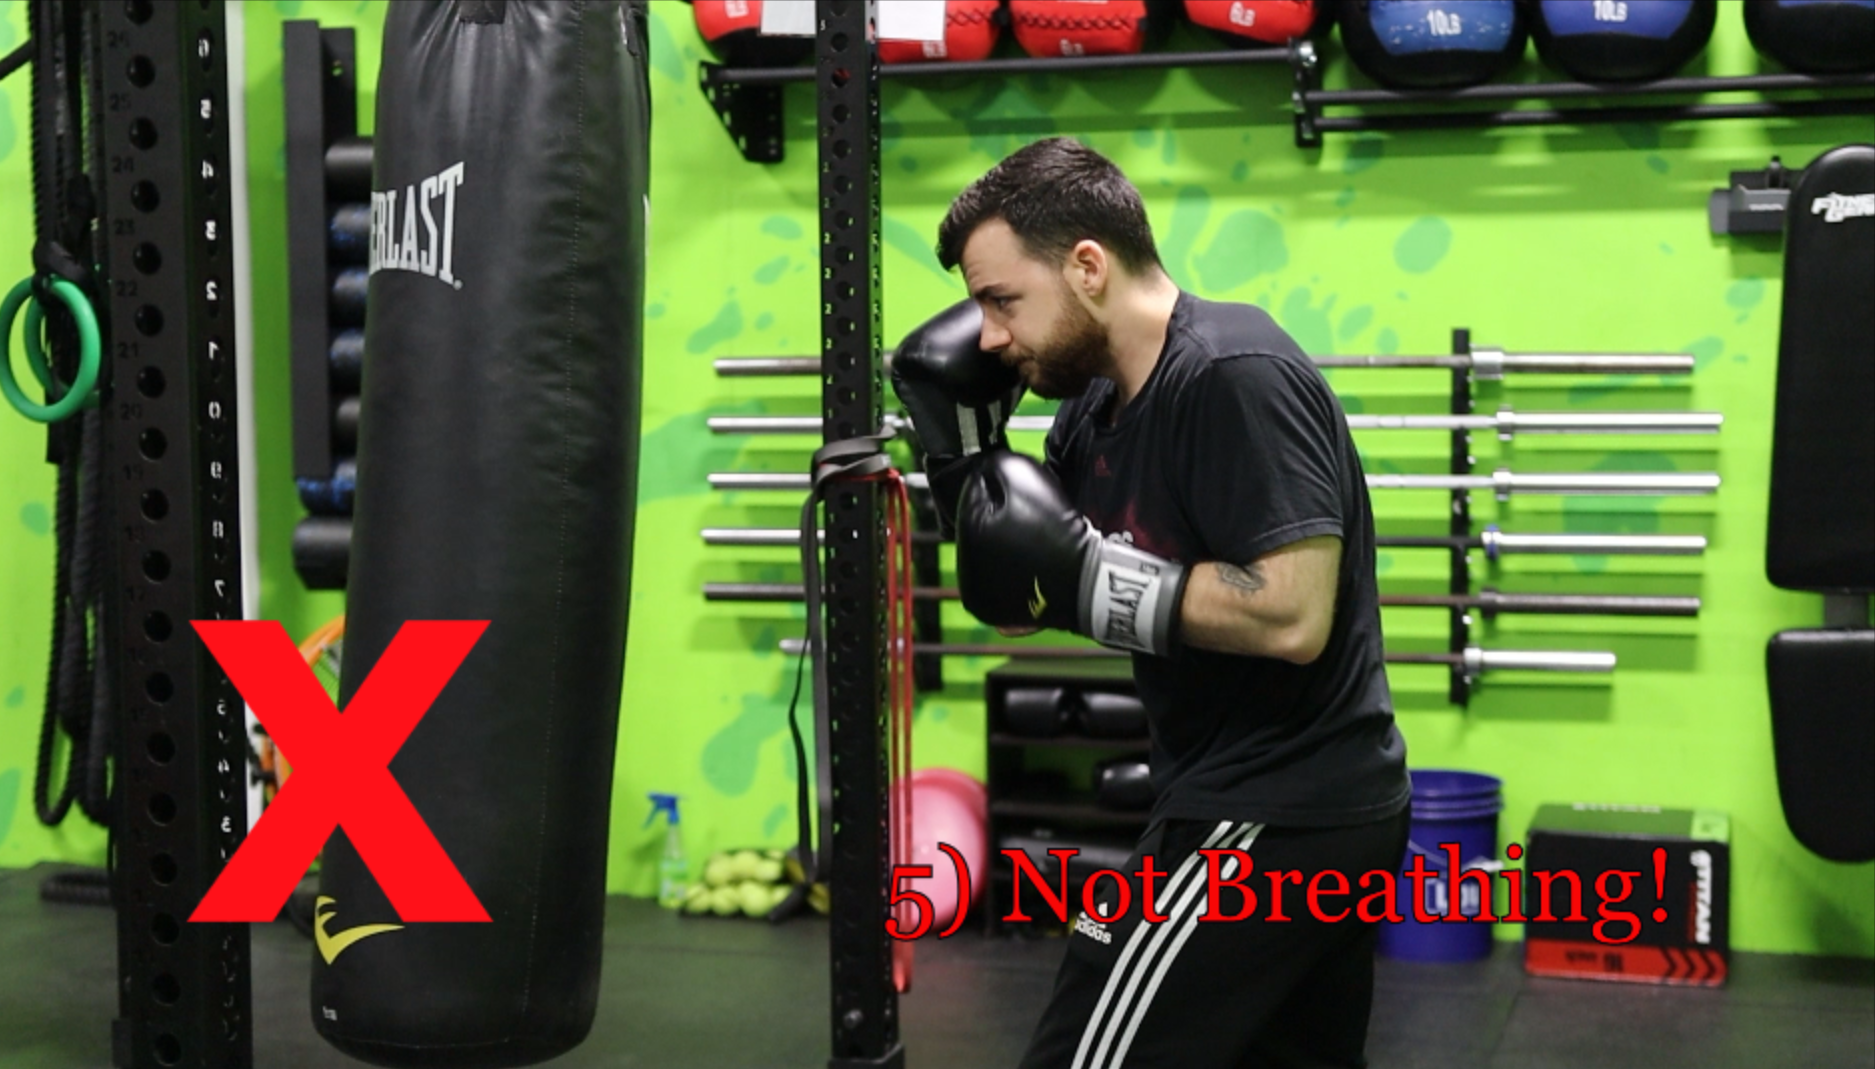
Lastly, I want to talk about something I see most often and commonly overlooked, but is incredibly important. Holding your breath should NEVER happen. Holding your breath through a punch, or through a series of punches is never a good idea.
This will make you winded very quickly. Not something you want to happen in a real fight, or even in a 45 minute class where you throw a TON of punches. Conserving your energy should be one of your top priorities.. You should take quick, small breaths with EVERY punch. This way you’re constantly moving air so you don’t get tired too quickly and it also helps with adding power to the punches. You have deep core muscles that only contract when you forcibly exhale so if you want to use your core to its highest potential…. BREATHE!
Now that you’re aware of some of the top mistakes beginners make when just starting off in boxing, it’s time to get to work! Fixing these up early on is very important. If you can master these 5 key issues with boxing early on, your boxing journey will be much more rewarding.
You’ll be significantly less likely to injure yourself, and you will have the tools to develop great boxing techniques and will solidify them throughout your experience. It’s much better to master the basics early rather than later when you’ve practiced the incorrect way for so long that it’ll take forever to unlearn everything, then retrain. Now that you know these 5 top beginner boxing mistakes and how to correct them, practice, practice, and practice some more, and I look forward to seeing you in boxing class!!
April 30, 2021
Best Exercises To Fix Neck Pain
What a Pain in the Neck!

If it’s not your boss with a last minute request on a Friday afternoon, or your in-laws showing up unexpectedly for the weekend, or even your dog shredding your couch cushions while you’re out on a hot date, then maybe the pain in the neck in your life is just that…pain in the neck.
If your neck is annoyingly sore, especially by the end of each day, let’s dive into why that is, and what you can do about it. This article shares a few simple tips, tricks, and the best exercises to fix neck pain.
Before following any of the suggestions in this article, please consult your physician if your neck pain:
- Is getting significantly worse.
- Exists for more than 6 weeks.
- Comes on sharp and quickly.
- Is accompanied by nausea.
Do You Really Have Rocks in Your Head?

One reason why your neck aches is that it may feel like your head is filled with rocks. Not necessarily true in most cases, but your head is HEAVY!
Weighing in between a whopping 10-12 pounds, your head not only affects your neck, but it also has a significant impact on the rest of your spine. Envision trying to balance a bowling ball at the top of your spine!
Seven small vertebrae in your neck, as well as, muscles, ligaments and tendons all working together support everything you do with your head. It’s a big job and something that most of us take for granted. So, making sure you maintain good posture is key to putting less torque on the neck.
The Impact!
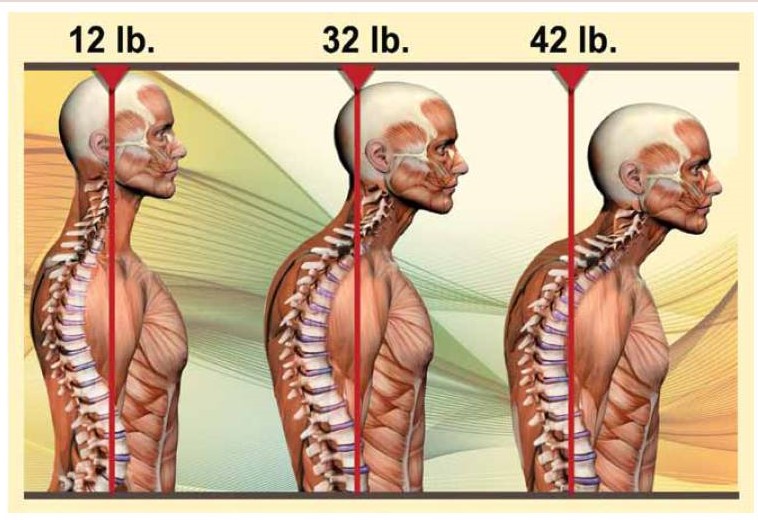
The position of your head impacts the pressure on your spine, meaning that for each inch your head moves forward, an additional 10 pounds of weight is felt on your spine.
So, for example, looking down at your phone (45 degrees) elevates the pressure on your spine from about 11 pounds (neutral) to 48 pounds. That’s huge!
If your neck and back are painful, what is happening at the top of your spine may be a contributor.
Let’s talk about perfect posture:
- Hold your phone up in front of your face instead of looking down
- Make sure you are looking straight at your computer monitor with your head neutral over your shoulders
- Ears over the shoulders by pulling chin in slightly and lengthening the back of the neck
- Shoulder blades pulled together and down slightly
- Chin parallel to the floor
Stretching Your Sore Neck Muscles

There are a variety of stretching exercises that you can do to alleviate and avoid neck pain. Here are some of my favorite:
Chin Tuck:
- Standing or sitting tall
- Chin parallel to the floor
- Pull chin in with ears over shoulders
- Hold 1-3 seconds
- Repeat for 10-15 repetitions
Wall Slides:
- Standing against a wall
- Pull chin in and lengthen the back of the neck
- Place arms laterally against the wall bending at the elbow for 90 degree angles
- Keeping your back against the wall by engaging your abs
- Extend arms directly over head by sliding arms up the wall to feel a stretch in your chest
- Return your arms to the starting point
- Repeat for 10-15 repetitions
Shoulder Blade Squeeze:
- Standing or sitting tall
- Ears aligned over your shoulders
- Squeeze shoulder blades together keeping shoulders down
- Hold for 1-3 seconds
- Repeat for 10-15 repetitions
Look Both Ways:
- Standing or sitting tall
- Ears aligned over your shoulders
- Slowly look directly left over your shoulder
- Return to center
- Slowly look directly right over your other shoulder
- Repeat for 5-10 repetitions each side
Beware of Traps!

Is your neck sore because you are holding a lot of tension in your trapezius muscle?
It’s the large triangle shaped muscle that runs from the base of your skull (occipital bone), down the center of your back (thoracic vertebrae), and laterally to your shoulders (scapula).
Simple Suggestions to follow to avoid being tripped by your traps are:
Shoulder shrugs:
- Hold arms down by your sides
- Lift shoulders up and back in a circular motion
- Repeat for about 10-15 repetitions
Trap stretch:
- Interlock fingers behind you and pull your fist to the left side of your waist
- Hold your left elbow out laterally away from your body
- Slowly lean your left ear to your left shoulder toward your elbow.
- Hold for 30 seconds
- Repeat on your right side
If interlocking fingers behind you is a challenge:
- Simply lean your left ear toward your shoulder
- Loop your left hand over your head
- Apply light pressure to the right side of your head, increasing the intensity of the stretch slightly
- Hold for 30 seconds
- Repeat on your right side
The above exercises not only help to increase neck strength and flexibility, but help improve posture, too!
Postural Kyphosis, Say What?

Postural kyphosis is curvature of the spine that forms a hump on the upper back. The hump can be located at the base of the neck, or slightly lower between the shoulder blades. Because of this, the hump is referred to as buffalo hump, round back, hunch back, as well as the outdated and offensive term dowager’s hump.
Accordingly, contributors to the formation of a back hump are:
- Carrying extra weight – extra pounds are a challenge for the skeletal structure of your whole body. However, fat also accumulates on the spine as protection and increases the presence of a hump
- Poor Posture – allowing your body to slouch can create physical misalignment
- Lack of Fitness – keeping your muscles strong and your limbs mobile allows your body to hold it’s frame properly
- Injury or vertebral compression fractures in which part of a vertebrae collapses
- Degeneration of the spine, a.k.a osteoarthritis, in which function and ability are impaired
How You Can Prevent or Correct Your Hump

You can prevent the formation of a back hump or decrease the hump you have by making some changes that involve more than just exercises for your neck and back, such as:
Sitting and standing tall, as well as sleeping with appropriate support – Your posture determines how your tissues support your bones in proper alignment – see the Hybrid Fitness posture article HERE
Stretching the pectoral muscles of your chest to allow the front of your torso to open, and your shoulders to move back and align with your hips. To do this:
-
- Stand in an average doorway
- Place arms at 90-degree angles on either side of the door frame
- Step one foot forward and lean forward with your sternum while relaxing the muscles of your chest
- Keep your head aligned with the spine, with ears over shoulders
- Increase the stretch by leaning forward a little at a time as you inhale and exhale
- If the doorway is too wide, do one side at a time
- If this stretch is easy, raise arms higher against the door frame
- Hold for 30 seconds
Stretching the muscles of your upper back to pull the shoulder blades together broadening the chest. To do this:
-
- Face a wall standing a few feet away with feet at least shoulder width apart
- Place both hands flat against the wall above head height
- Keep your neck and head aligned with your spine
- Slowly push your butt back as you lean into the wall
- Inhale and with each exhale sink a little deeper into the stretch
- Hold 30 seconds
Building strength in your back, shoulders and arms by doing a variation of a push-up.
*Note – before you discount this exercise thinking it’s too hard and no fun, see the Hybrid Fitness article on how to get your first push-up and variations of push-ups HERE.
The Miracle of Massage

Another option is to receive a massage from a licensed therapist in order to help target muscle “knots” specifically. It’s beneficial to relax as much as possible while the therapist is massaging the muscle. Slow inhales and exhales can help here.
In a pinch, an alternative to a massage:
- Place a tennis ball in a long sock and hang the ball over your shoulder
- Stand with your back to the wall with the ball between your body and the wall
- Locate the ball just below your neck to left side of your spine
- Bend your knees to roll your back over the ball in a vertical line between your shoulder blades on the left side of your spine.
- Then, move the ball to the right side of your spine and roll vertically again.
- Concentrate longer on areas where you have muscle soreness or pain until the muscle relaxes.
Be sure to hydrate with water after any massage in order to help your body flush toxins that have been released into your bloodstream. As if you needed another benefit to drinking more water!
The Next Step!
There you have it! The best exercises to fix neck pain.
These exercises will help you stretch parts that are sore, and build strength in your neck and back muscles to prevent the pain from returning.
You don’t need to large chunks our of your day to do these. Implement them slowly, and one at a time. Build a habit of doing them, and I promise, you’ll see relief!
I would even recommend adding them into your routine even if you don’t experience any pain currently. This will help prevent any soreness or pain from even starting!
If you found this article helpful, please check out the other articles from Hybrid Fitness coaches HERE
Hybrid Fitness YouTube Channel
April 22, 2021
Boxing Basics: Knowing Your Punches!
You’ve learned how to wrap your wrists to protect your hands, you’ve learned about setting up your boxing stance and you saw the video about how our Hybrid boxing class works… As you’re walking into your first class, you see all these stations with random numbers and have no idea what they mean. This article is going to dive into the 6 main boxing punches and how they’re integrated into each station we offer here.
Left Handed vs Right Handed
There are 6 basic punches we use in boxing class here at Hybrid. Each punch corresponds with a number and each station has a combination of those numbers to form a boxing combo you use to workout with.
If you’re right handed, any odd numbered punches are thrown with your left hand. Even numbered punches are thrown with the right.
If you’re left handed, any odd numbered punches are thrown with your right hand. Even numbered punches are thrown with the left.
Think about your non-dominant hand matching up with odd numbered punches. Dominant hand matches up with any of the even numbered punches.
The Punches
1- The Jab
The jab is a light punch that will be thrown with the non-dominant hand. It’s the first of the punches that are straight out and should be lighter.
2- The Cross
Next is the cross! A powerful punch that is thrown with the dominant hand and the second punch that is thrown straight out.
(Straight out punches are quick and need to be snapped back to the chin after. Kind of like a towel whip)
3- Non-Dominant Hook

This punch is thrown with the non-dominant hand and comes in from the side. Think about cutting the bag completely horizontally. Elbow & forearm stay parallel to the ground. Palm face down or face in towards yourself (whichever feels better to you, doesn’t make a big difference)
4- Dominant Hook

This punch is thrown with the dominant hand and comes in from the side (same as above).
5- Non-Dominant Uppercut
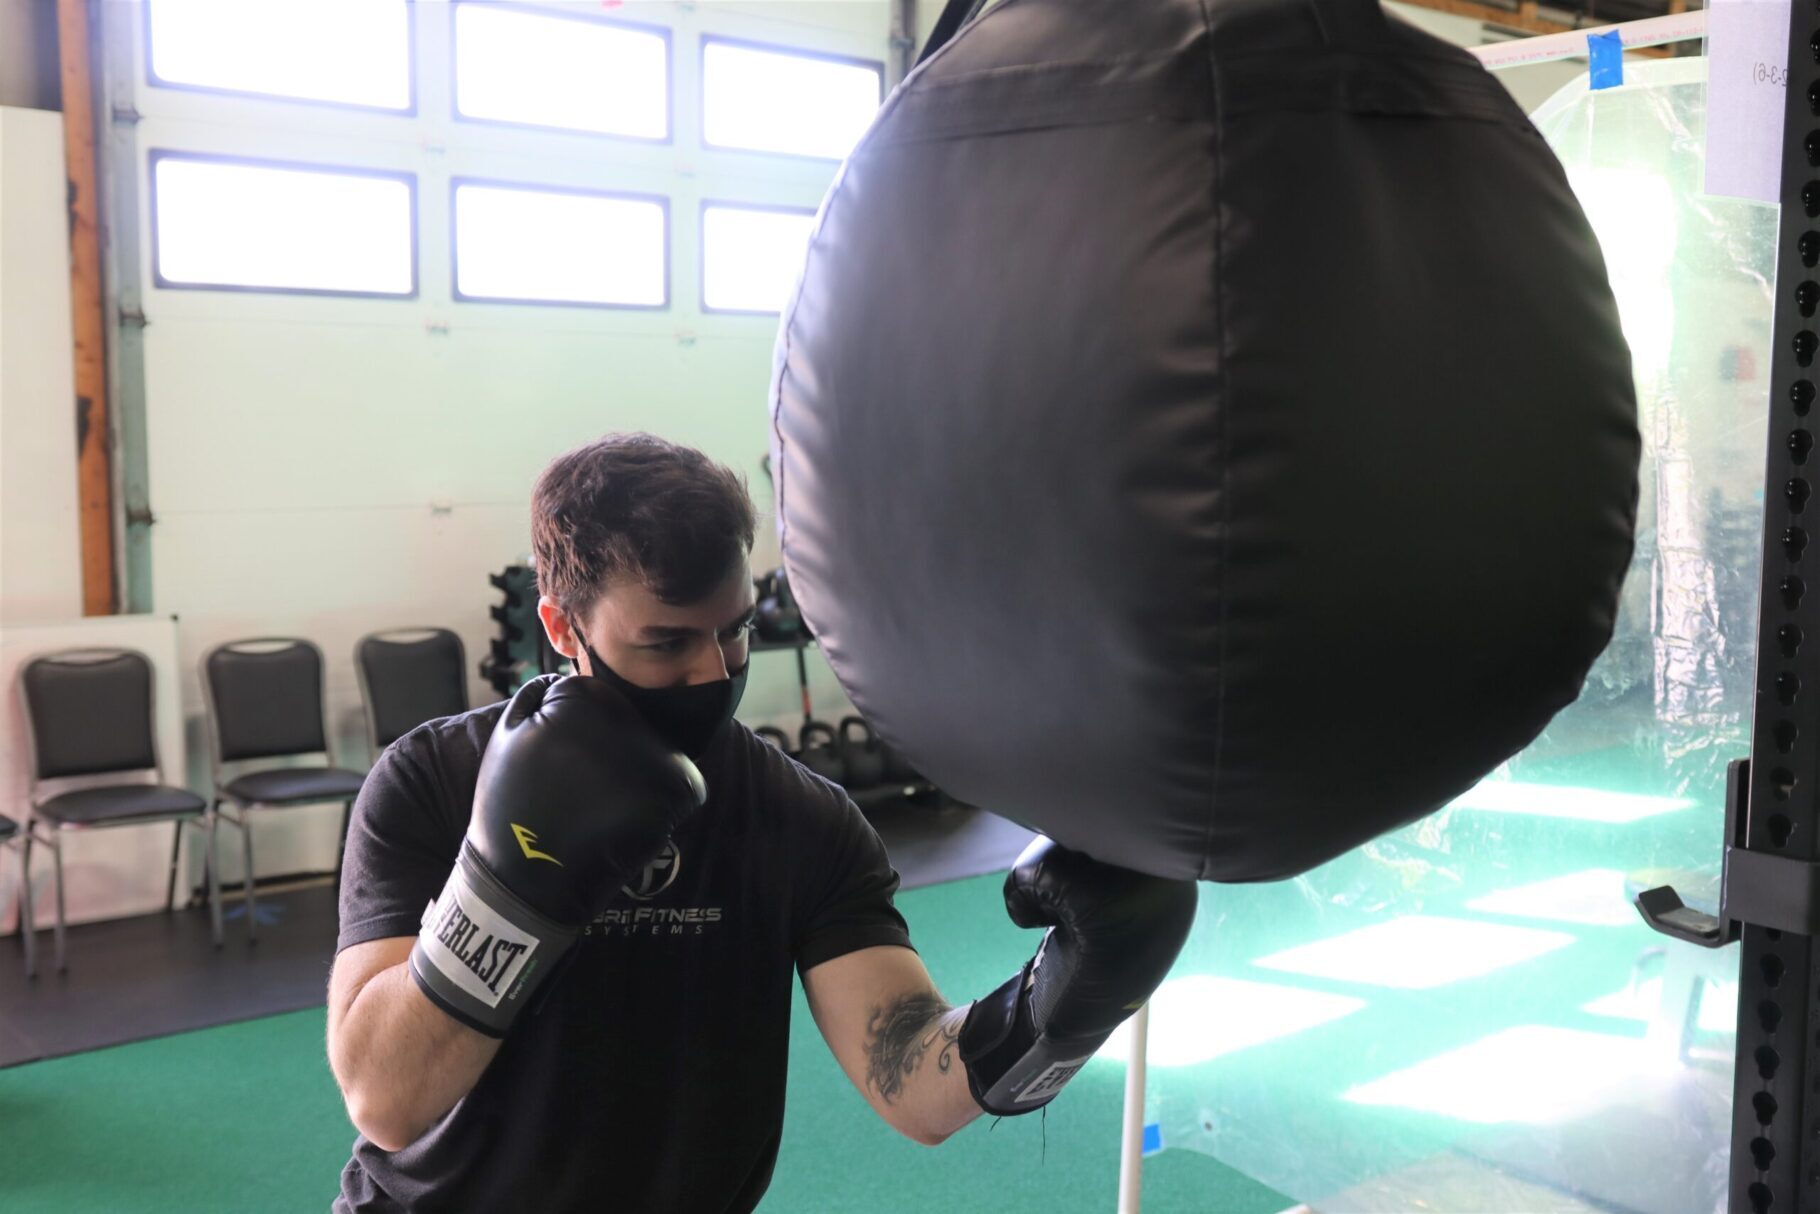
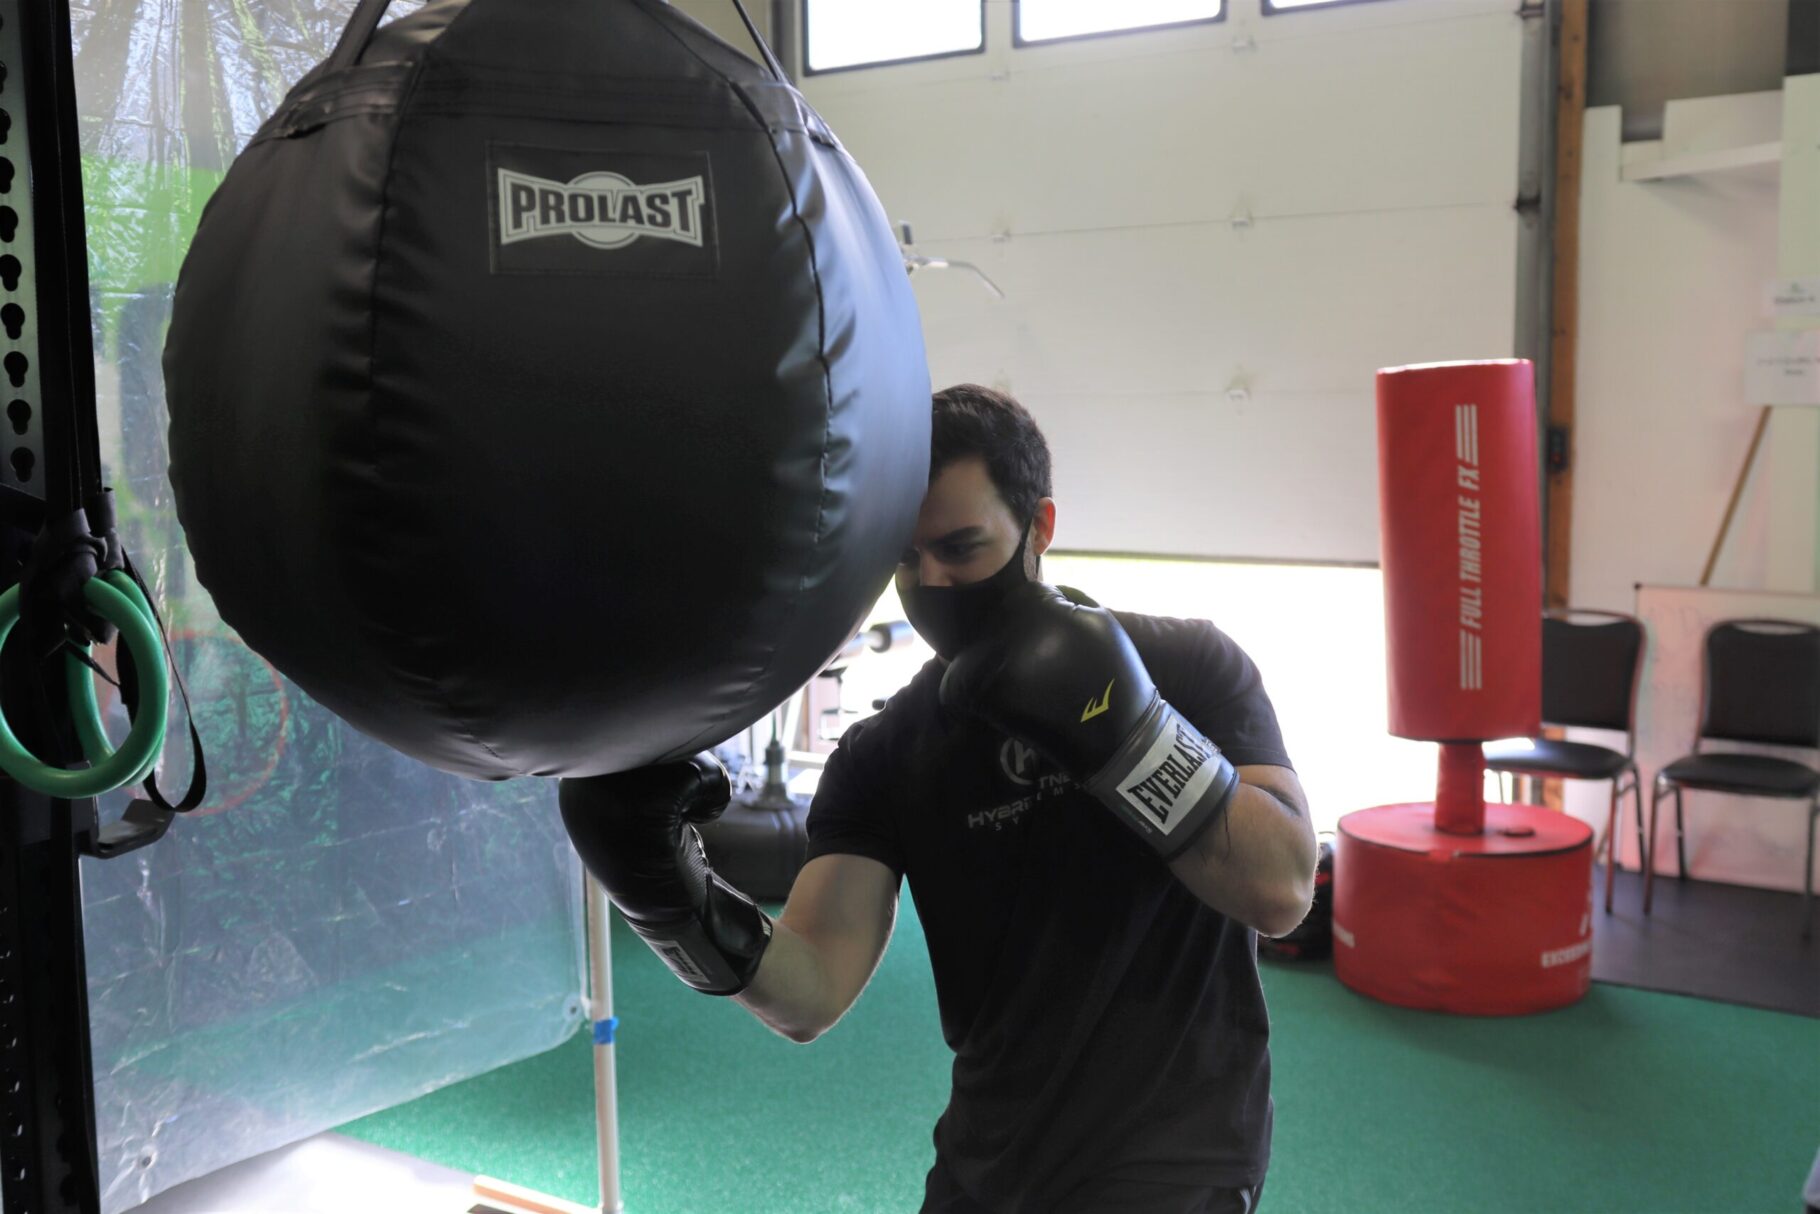
This punch is thrown with the non-dominant hand and is thrown straight upwards. Elbow/forearm should be perpendicular to the ground. You can get underneath the bag with our wrecking ball bag (Station 3) but if you’re throwing an uppercut on a regular heavy bag, think about cutting the bag diagonally from low to high.
6- Dominant Uppercut
This punch is the same as above except with the dominant side.
Four Things To Watch Out For When Throwing A Punch!
-No hyperextended elbows!! Also, always assess your distance from the bag before you throw a punch.
-Make sure to keep wrists tight and don’t let them extend when making contact with the bag.
-Step in to get underneath the wrecking ball bag.
-Make sure to take a short quick breath every time you punch so you don’t get winded!
Practicing these 6 punches, and using the combinations of them will help you remember which number matches up with which punch. Shadowboxing, or boxing and throwing the punches in the air (not on a bag) is a great way to practice the punches and help memorize them. Now the more you practice them, the easier they will flow and once you’ve mastered the six basic punches you can start to work on adding more power to your punches, harder combinations and adding things like kicking in!
Check out all of our other boxing, fitness, and health articles here!
Check out our YouTube channel here!
And remember….
Small Steps, Big Results!