-
Blog
January 28, 2021
How To Improve Low-Back Pain
Let’s be honest, if you’ve got lower back pain, you’re probably missing out on a lot of fun in life. Fortunately, here are a few simple tricks you can do at home, without any equipment, to improve, and hopefully, eliminate your low-back pain.
DISCLAIMER: Before following any advice given here, please refer out to a doctor or other medical professional.
What Causes Low-Back Pain?
Aggravation of the low-back usually occurs due to improper alignment, or if our mobility has been disrupted. Usually misalignment is caused by a previous injury, or by improper repetitive movement over time. As many of you know, it takes only one vertebra to be out of alignment to experience pain.
Discomfort also occurs if two or more vertebrae are stuck together. Consider that each vertebra has 4 joints/facets that are held together with tiny ligaments. That’s 20 joints that can be sprained or fixated potentially leading to aches and pains!
3 Tips to Reduce or Eliminate Low-Back Pain
You can resolve low-back pain at home by taking the proper steps. First, you’ll want to reduce any inflammation, if possible. This is beneficial to remedy joints, nerves, and soft tissue that are irritated, raw, and swollen, causing discomfort and/or aggravation. In particular, your doctor or chiropractor may recommend oral anti-inflammatory medication, applying ice and/or stretching.
Here are 3 tips that you can do in the comfort of your own home to try and remedy that pesky low-back pain!
Tip #1 – Your Low-back Wake-up Call

How you start your morning contributes to the flow of the rest of your day. Your initial actions when you wake up prepare your body for sitting, standing and moving about your day.
Here’s an example of how to stretch your low-back before you even get out of bed each morning:
- Lying on your back with legs bent, gently pull one knee toward your chest
- Relax your low-back muscles while holding this position for 3-5 seconds, or longer if desired.
- Slowly switch legs.
- Now, do the same thing, but bring both knees toward your chest.
- Repeat 5-10 times to wiggle free from stiffness
Tip #2 – Your Core is Key to Resolve Low-back Pain
Strengthening your back is obviously important, but it’s just as important to strengthen your entire core. All the muscles extending from your head to your pelvis deep within your trunk provide support for your spine.
Exercises to aid with low-back pain are those that provide simple, low-impact movement of the whole body. The more you move, the more your lymph and circulatory systems flow. This increases the delivery of oxygen and nutrients to the joints keeping them healthy and removes waste products from your body.
Examples of Exercises for Mobility:
- Walking
- Swimming
- Biking
Specific Exercises for Building Core Strength:
- Pelvic tilts to create movement in the pelvis.
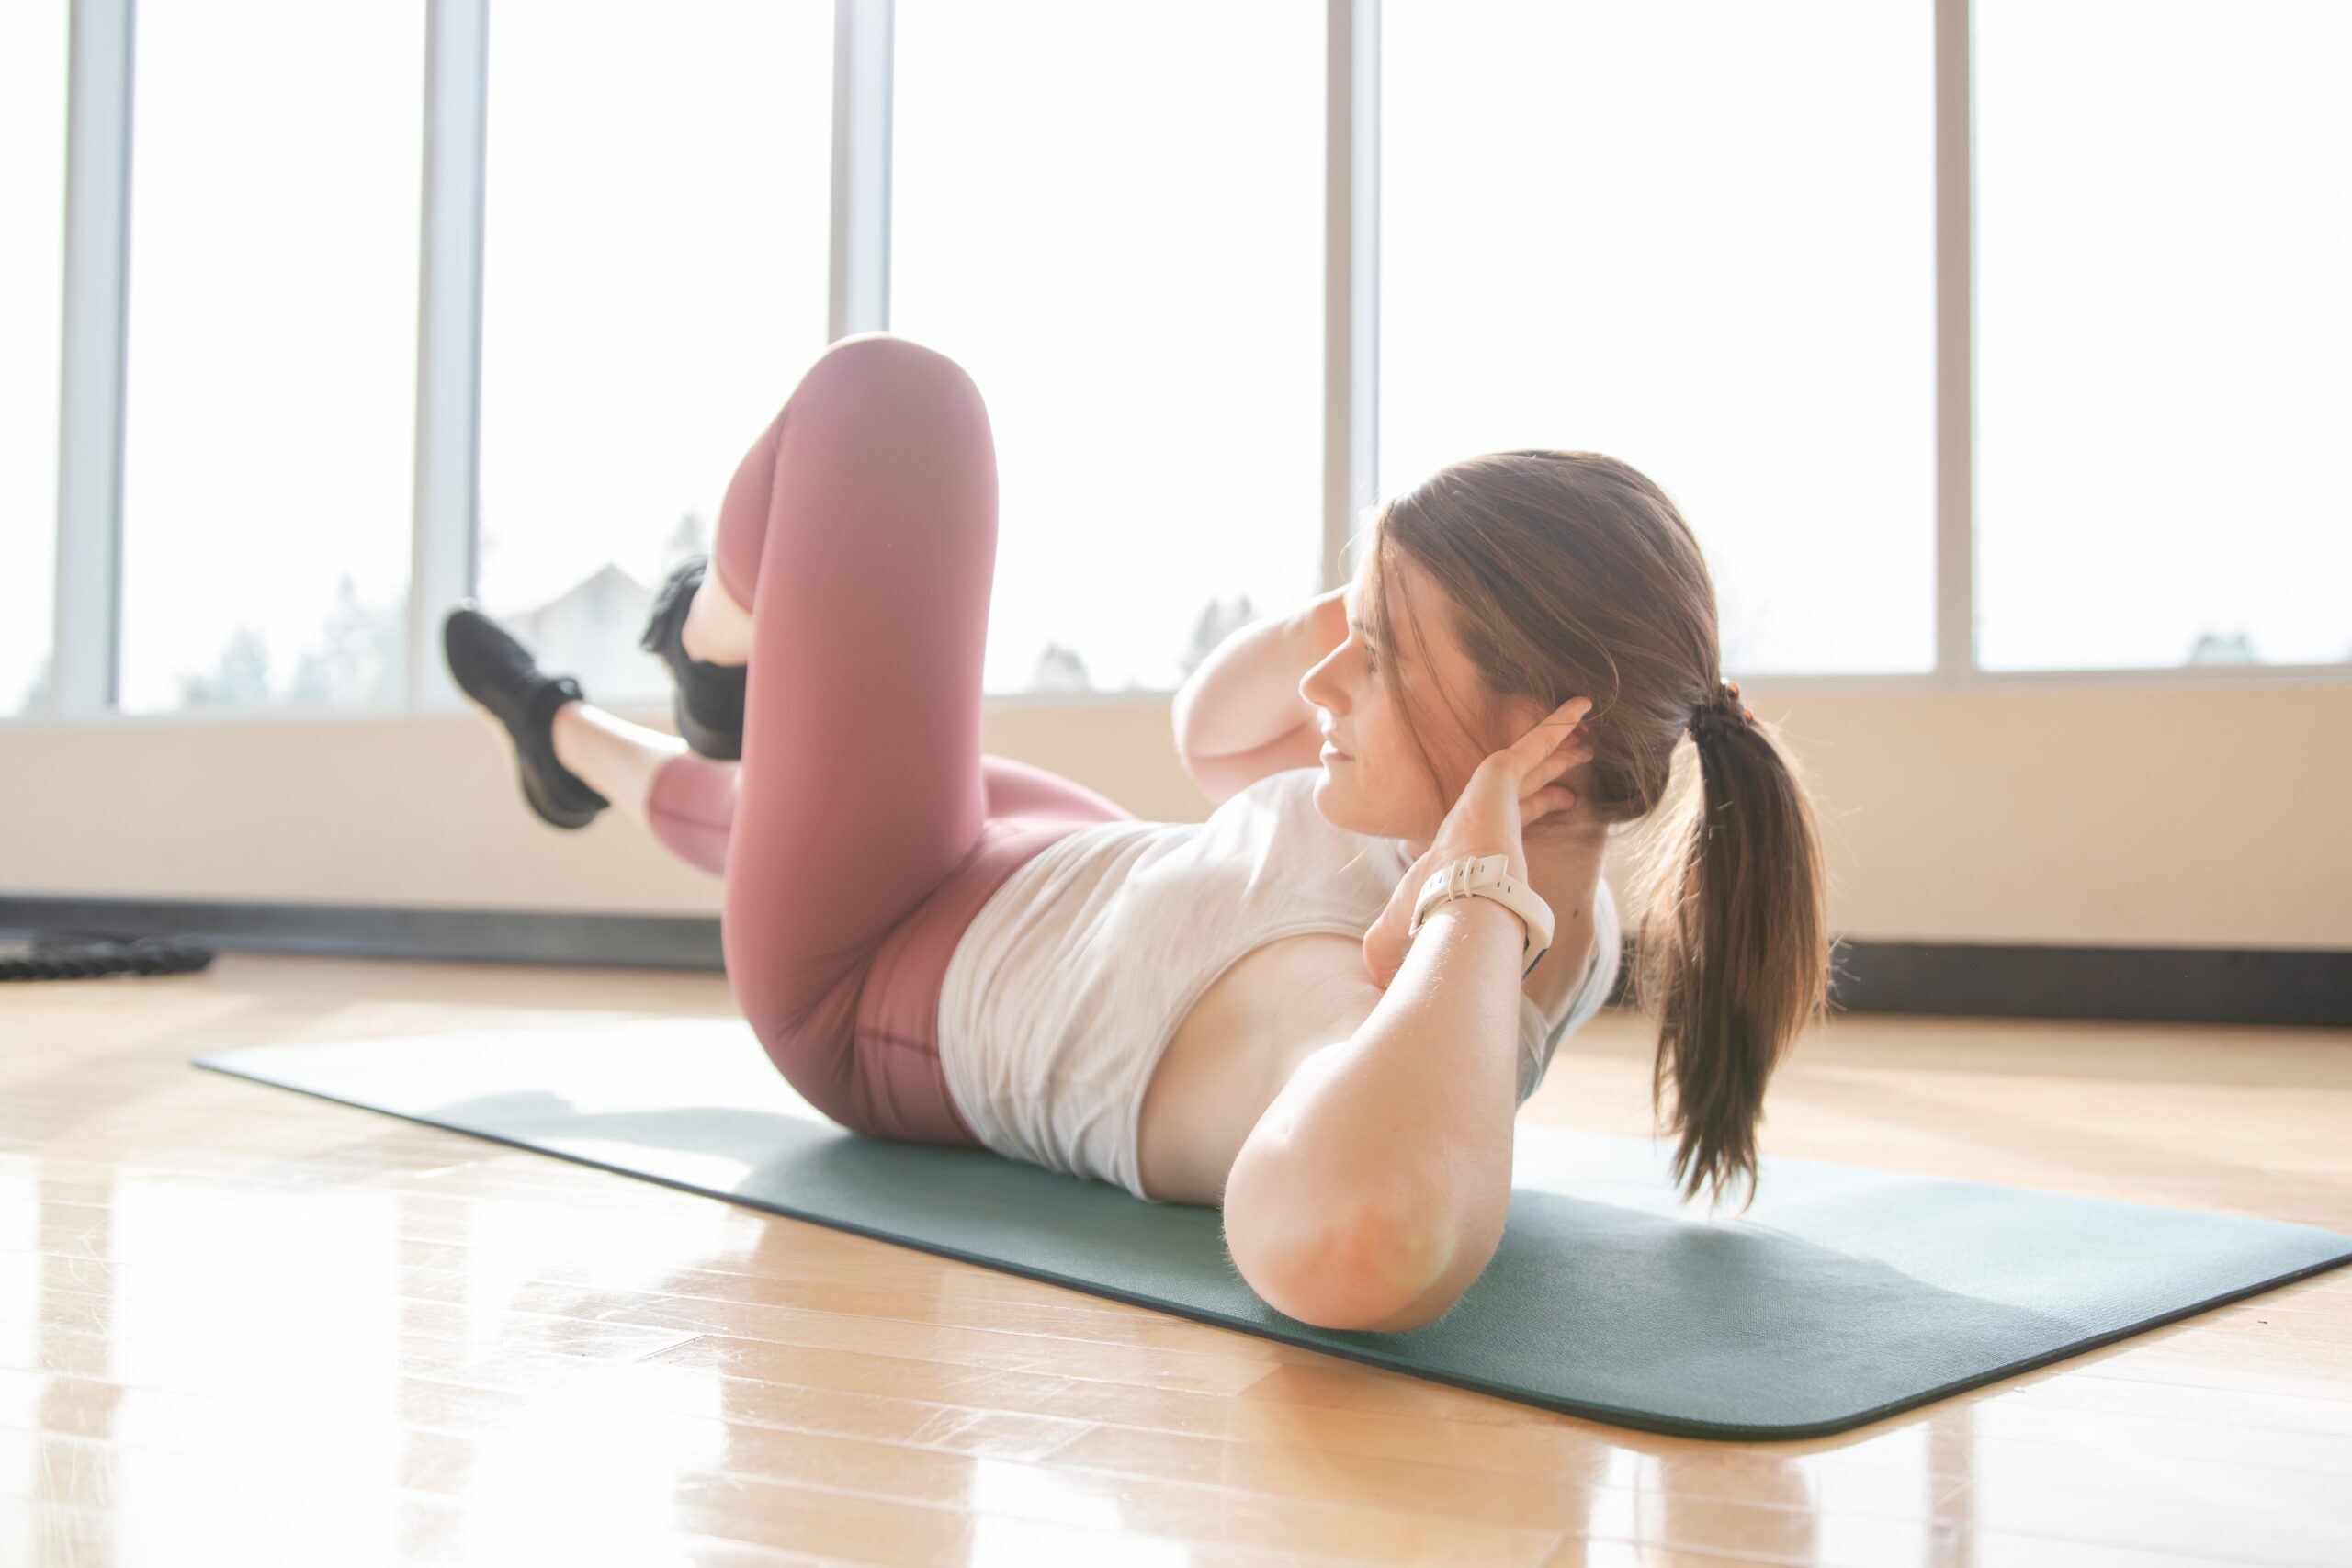
- Partial abdominal crunches lifting the head and shoulder blades off the mat.
- Crisscross, also referred to as Bicycles to strengthen the obliques
Give the core a hand by strengthening the glutes, quads and hamstrings with these exercises:
- Glute bridges to activate the glutes & hamstrings.
- Step-ups
- Walking lunges
- Single leg deadlift
- Elevated split squat
On the other hand, if lying on your back to exercise is not comfortable, then perhaps getting down on all fours for:
- Cat-cows
- Bird-dogs
- Planks, either low planks on your forearms or high planks with arms extended
Many exercises are beneficial and improve low-back pain but only if they are performed properly. Please be mindful when involved in the following to make sure your form is correct. If an exercise is too difficult to hold proper form, then modify the exercise appropriately.
Here are some exercises & behaviors you may want to be cautious of when dealing with low-back pain:
Planks
I know this may sound contradictory since I mentioned planks as a beneficial strengthening exercise above, however, ensure that you have proper plank form. To do this, align your body in a straight line from your head to your toes. If your low back sags or if you experience pain, try planks on your knees, elevated on a bench/chair or against a wall.
Prone positions
Although prone positions are beneficial for building core muscles, please use caution. Prone positions, such as Superman, can compress the spine by lifting your upper body and lower body too high off the floor. Instead, focus on making your body as long as possible by reaching with your fingertips and toes or lift only the upper body or lower body independently.
Excessive bending
Exercises that pull on the low-back such as, trying to pick something up off the floor without bending your knees. This movement can strain your low-back, especially if you cannot comfortably touch your toes with straight legs and/or if your hamstrings are tight. In other words, the low-back tries to provide the slack necessary to bend farther and could increase the chance of injury.
Quick twisting movements
Remind yourself to engage your core to support the low-back before slowly rotating the torso.
Contact or high-impact sports
Even though these sports may be fun, there is a risk of injury to your low-back if your core is weak. Low-impact exercises where there is always a grounded body part (whether it be a hand, foot or even a behind) can build muscle for more strenuous activities.
Heavy lifting that compresses the spine
Lifting heavy weight can increase the chance of low-back injury, even with proper precautions. In fact, it is possible to build muscle using body weight or light weight exercises.
Tip #3 – Strike a Pose to Relieve low-back pain

Posture! Posture! Posture!
Be mindful of your posture whether sitting, standing or lying down by:
- Engaging the core to support the low-back
- Aligning your head with your spine by lengthening through the back of the neck and pulling your chin back so your ears are over your shoulders
- Slightly pulling your shoulders back and shoulder blades together
- Using lumbar support when needed
Granted, nobody enjoys a moment of “Ouch! My back!”, as it impacts our enjoyment of life. Starting with the wake-up call exercise above and following through with these simple tips will help improve your low-back pain by keeping your joints mobile and your core strong.
For more on posture, check out this article!
If you found this article helpful, please consider sharing it with someone suffering from low-back pain.
Swing over to our YouTube channel to check out our latest videos here:
Hybrid Fitness YouTube Channel
And remember…small steps, big results.

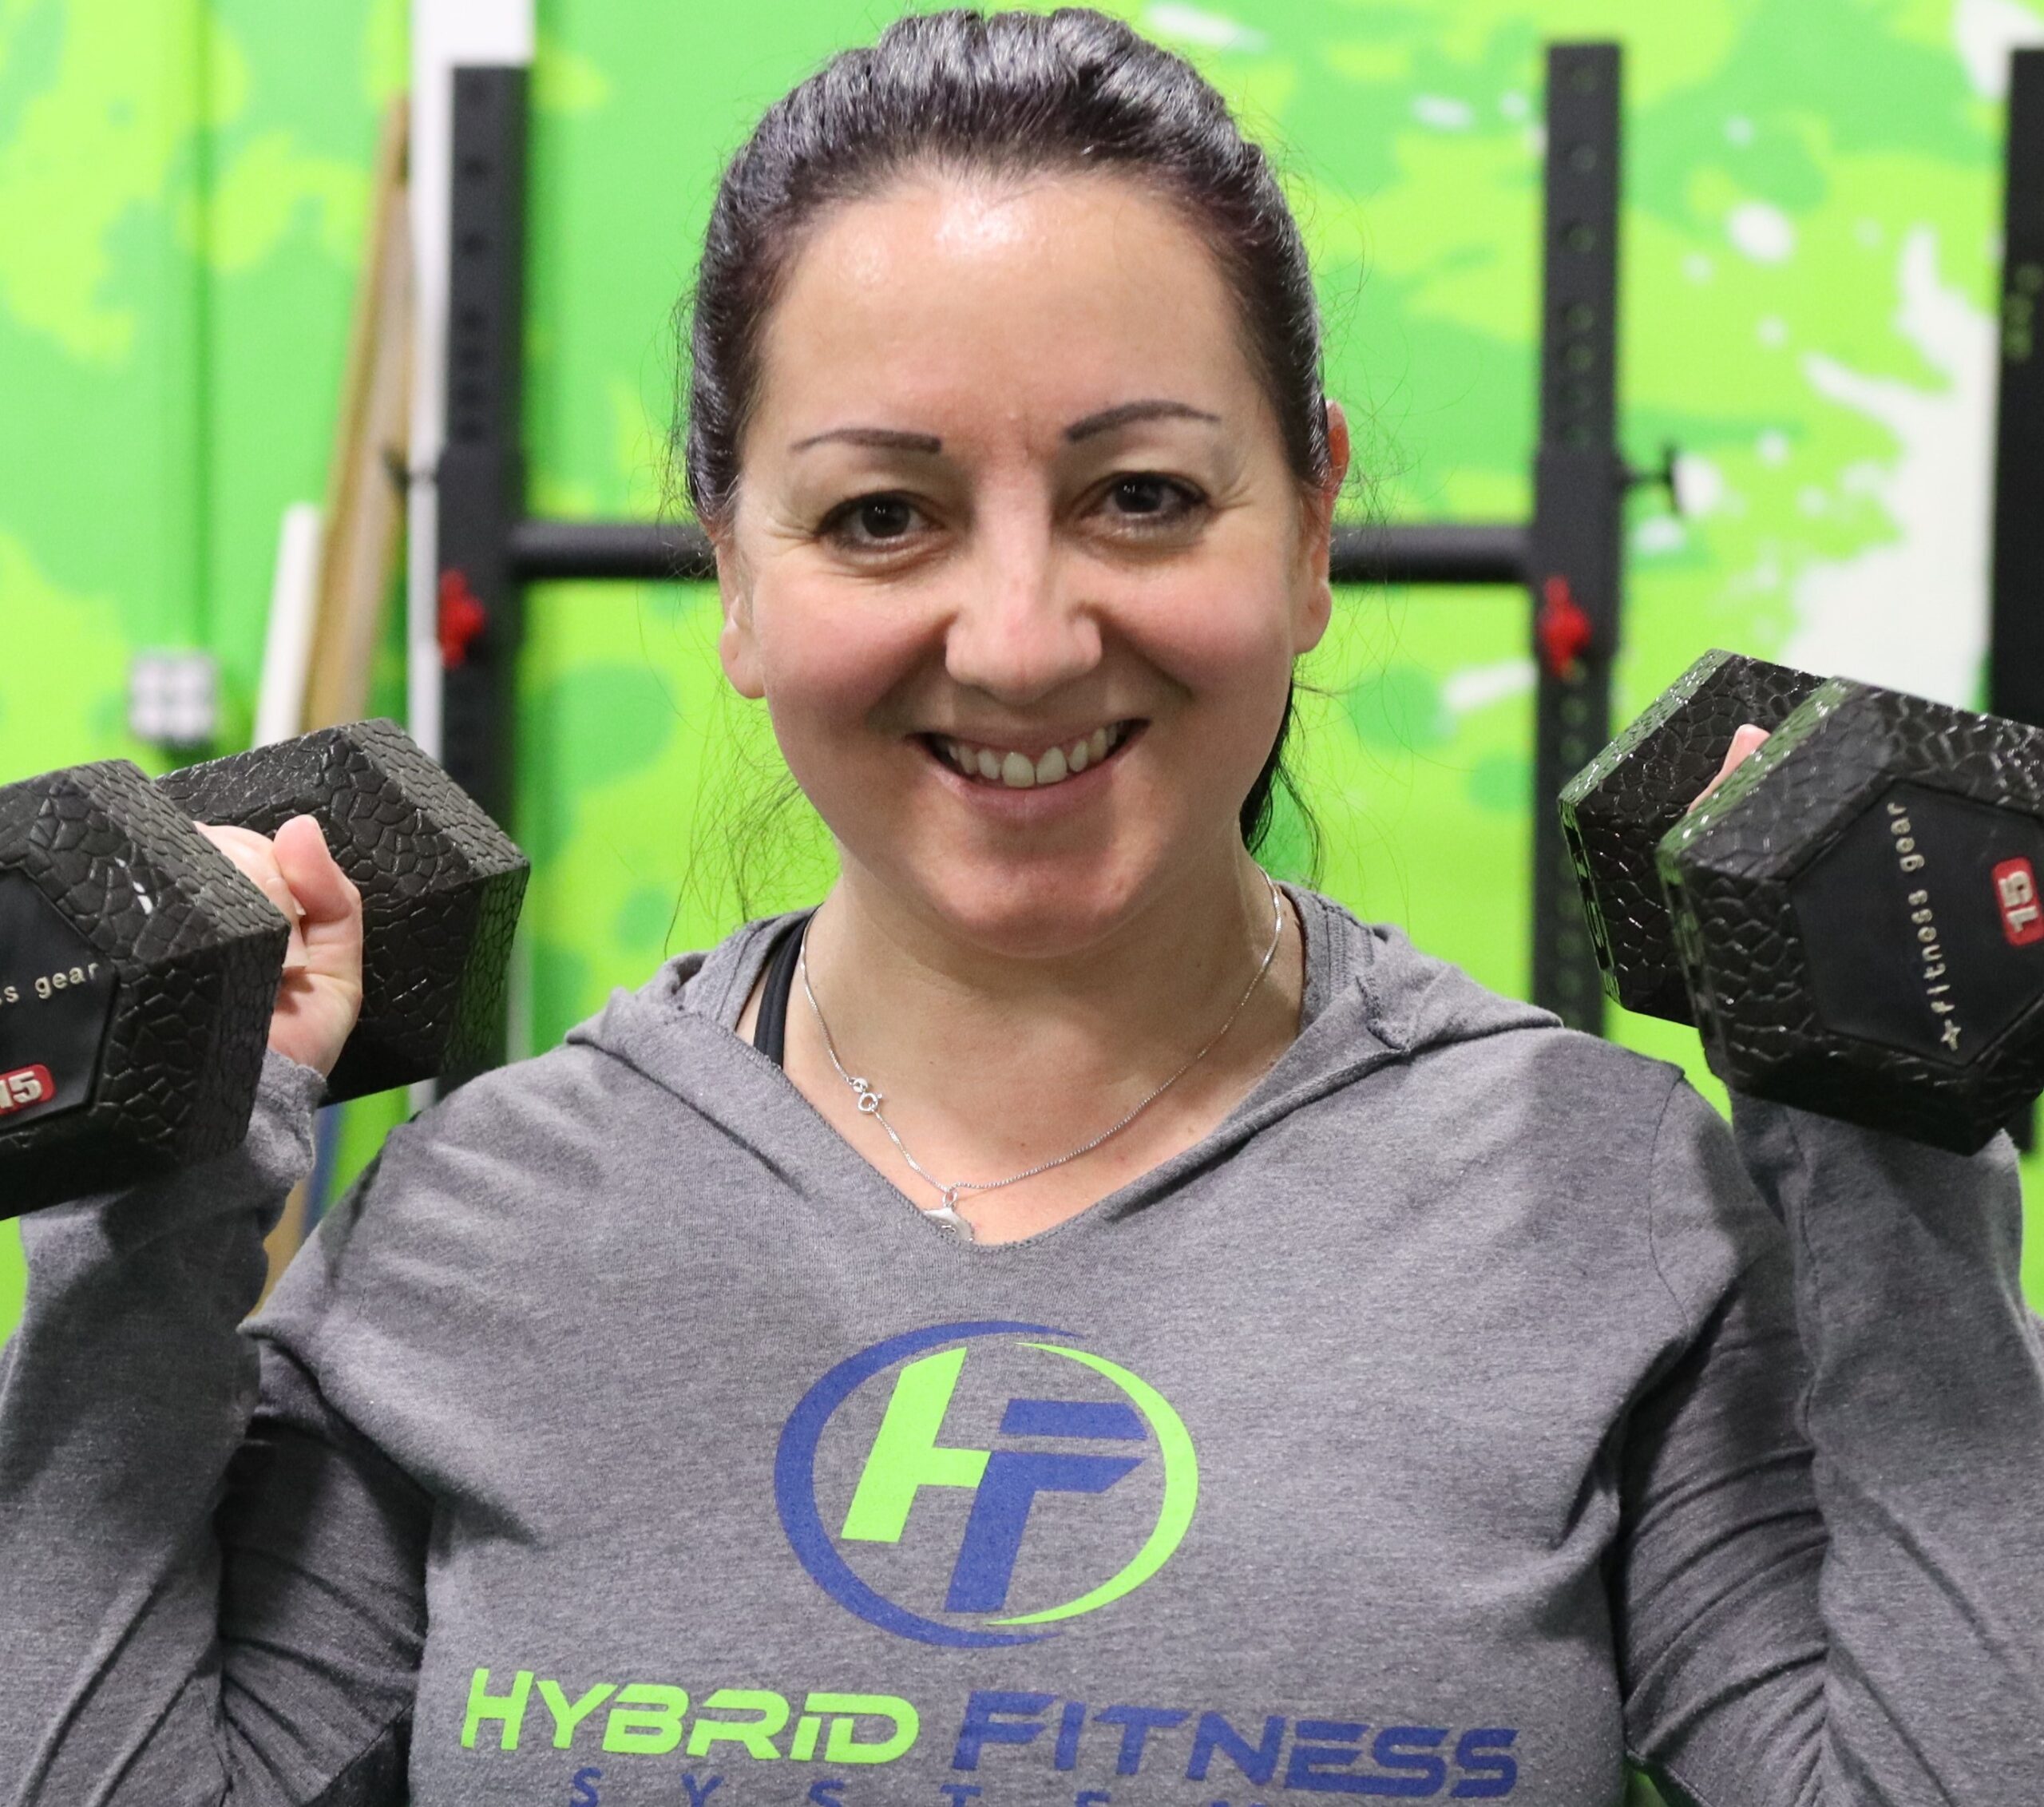
Cathy grew up in NH surrounded by a large, loving family, where she learned generosity and hard work. She now models that for her two children. She was inspired to become a fitness coach when searching for ways to become more healthy herself after a life-threatening illness.
January 25, 2021
How To Get Your First Pull-Up: A Step-By-Step Guide
The pull-up has long been one of the main lifts in regards to testing pound for pound strength. But, getting to the point of being able to do a pull-up can be a very long, and grueling road. The pull-up had once been explained to me as just grabbing the bar and simply pulling myself up. Sounds simple and easy, right? Well it’s not. There’s much more that goes into obtaining your first pull-up. Follow the step-by-step guide on how to get your first pull-up below, and you’ll be repping them out before you know it!
Nutrition

Before we step into the gym, we need to get into the kitchen. The path to your first pull-up starts here. The heavier a person is, the harder it’s going to be for that person to perform a pull-up. Getting control of yourself here is the make or break moment for people with a goal of pull-ups. You will never train hard enough to overcome poor eating habits. If you’ve already overcome this stage and nutrition is not an issue, then wonderful, it’s time to hit the gym.
Rows
Rows are a great way to start building the muscle and strength needed to achieve your first pull-up, and luckily there are multiple rows at your disposal to achieve this. Below is a list of rows, and the order in which I would suggest progressing through them.
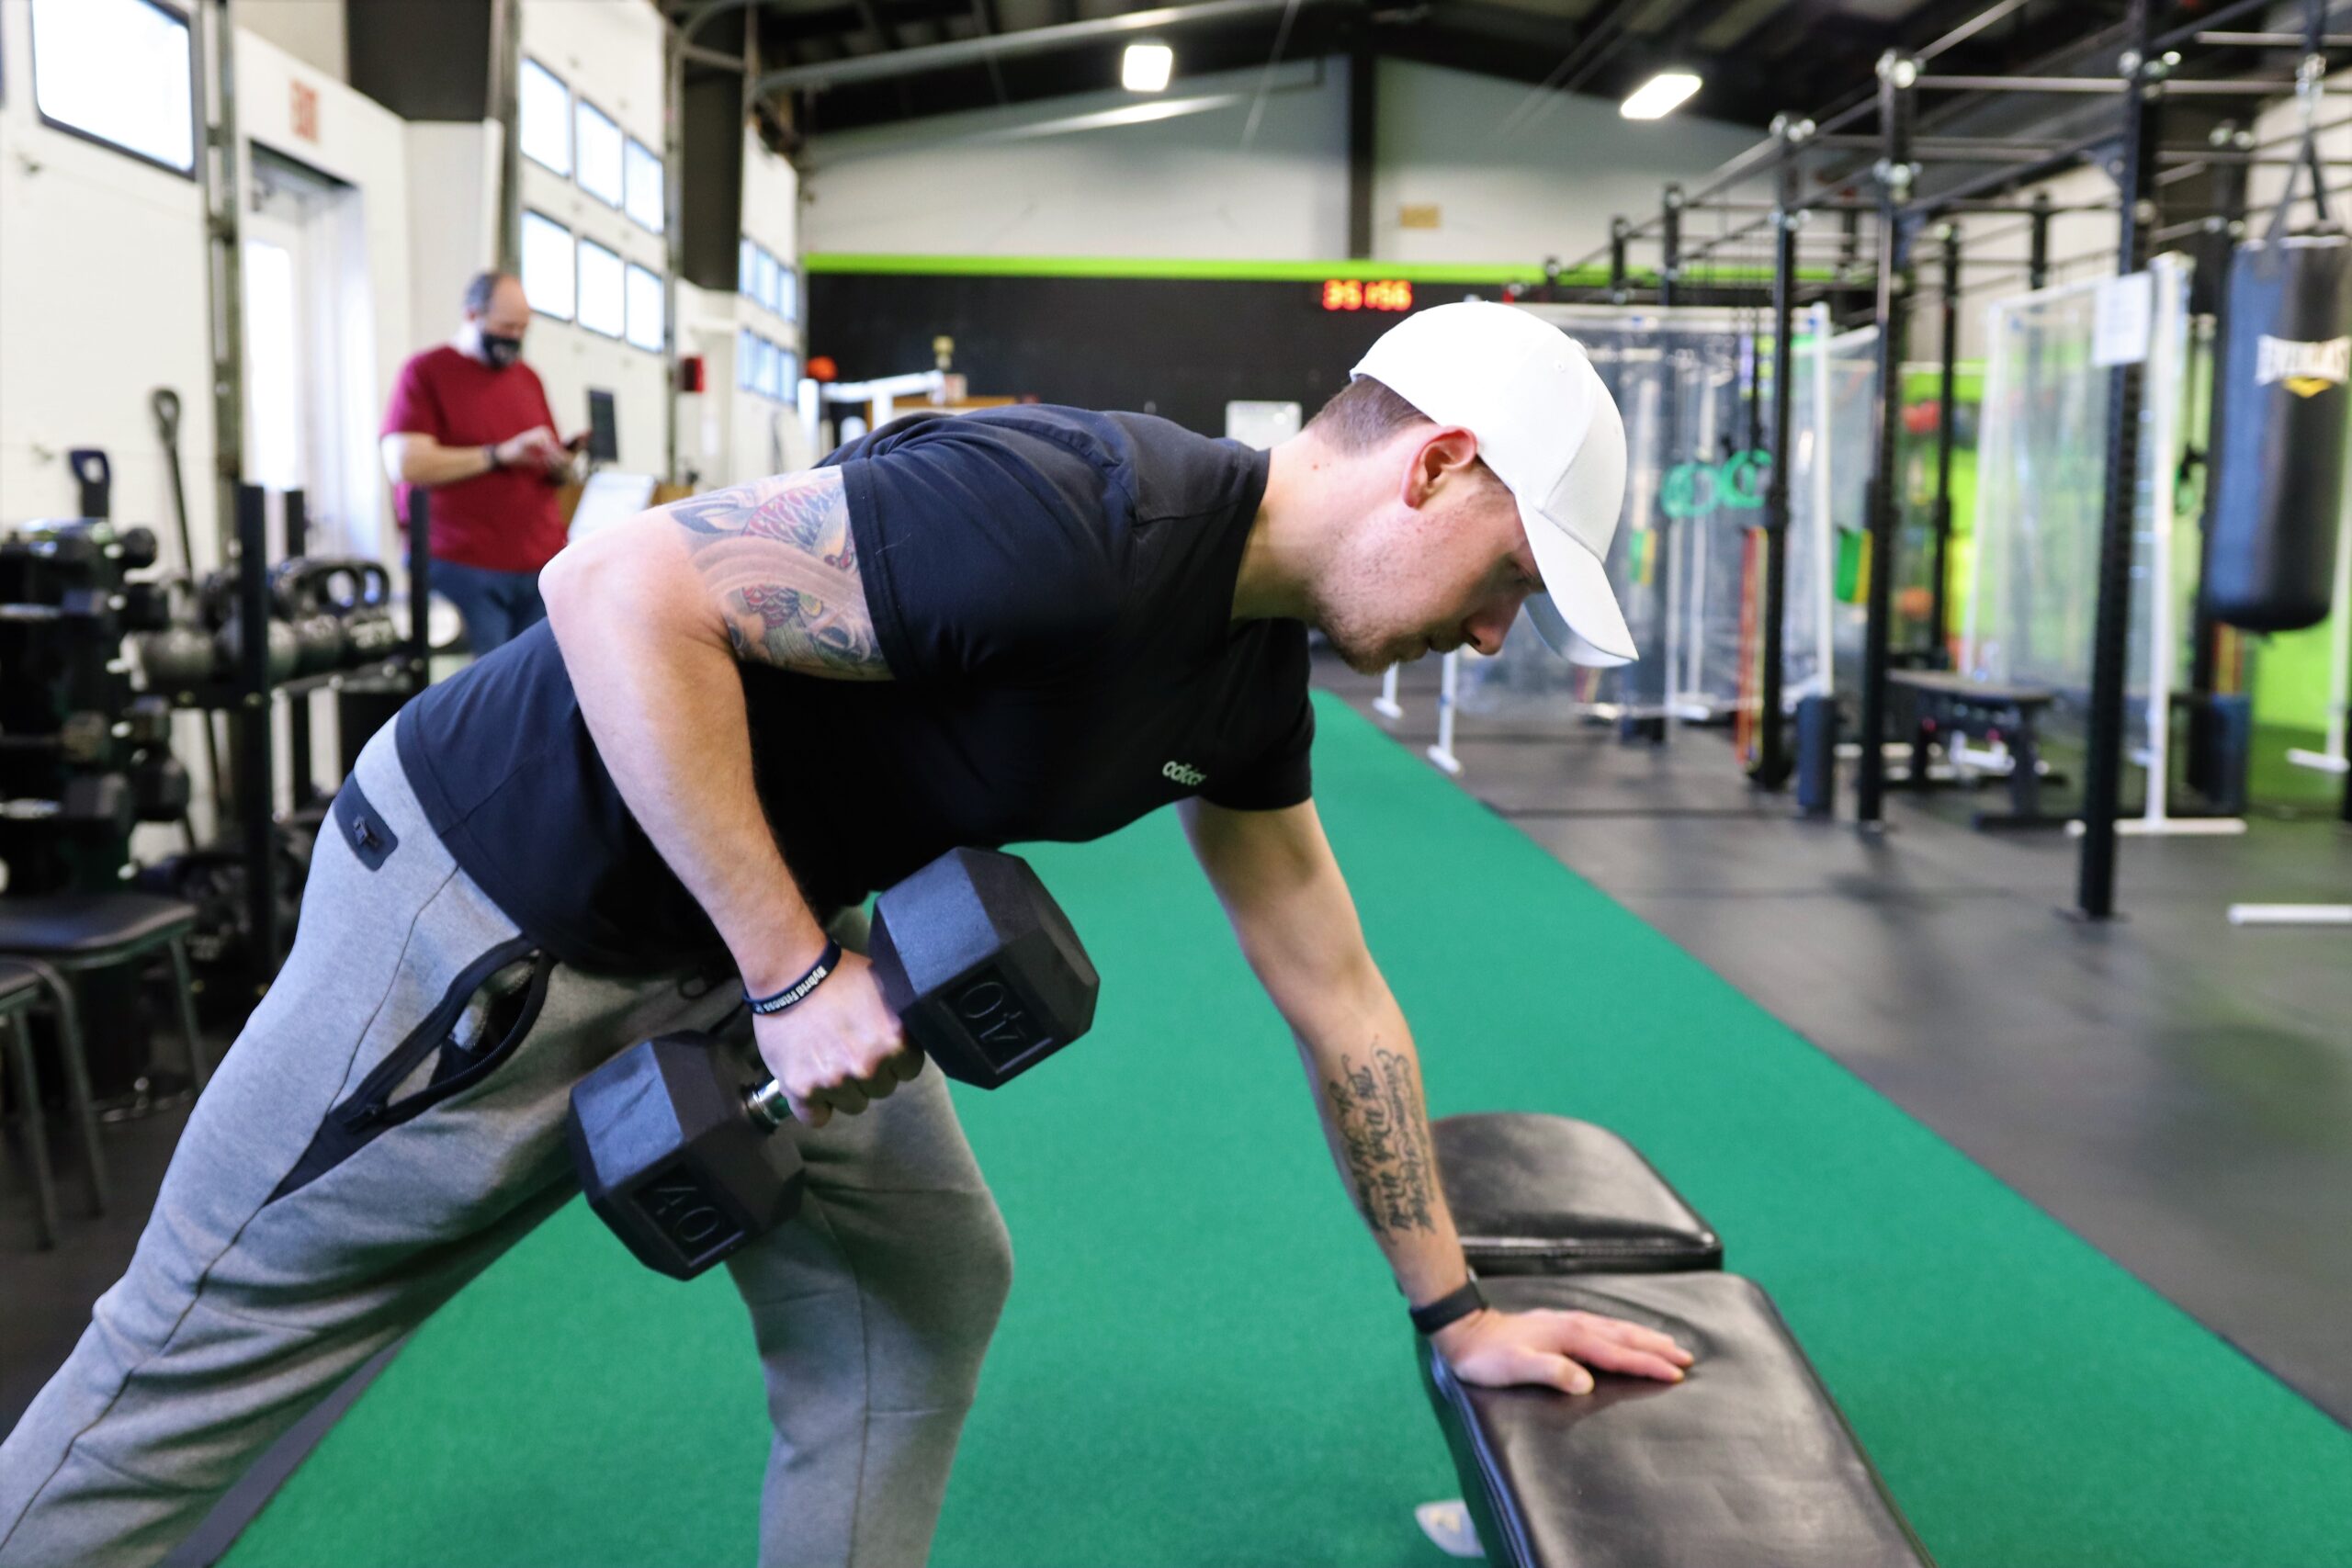
The 3-Point Row
The first row I would suggest is the 3-point row. This is a great way to start building the muscle and strength that will be needed later on. It also provides a little more stability for the back for beginners who may have lower back issues. To perform this row, follow the checklist below:
- Stand with feet shoulder width apart
- Lean forward placing one hand on a flat surface while keeping a straight back
- Grab a dumbbell/kettlebell with the opposite hand
- Pull the weight up to your side, while keeping your elbows in close to the body
- Slowly return to the starting position
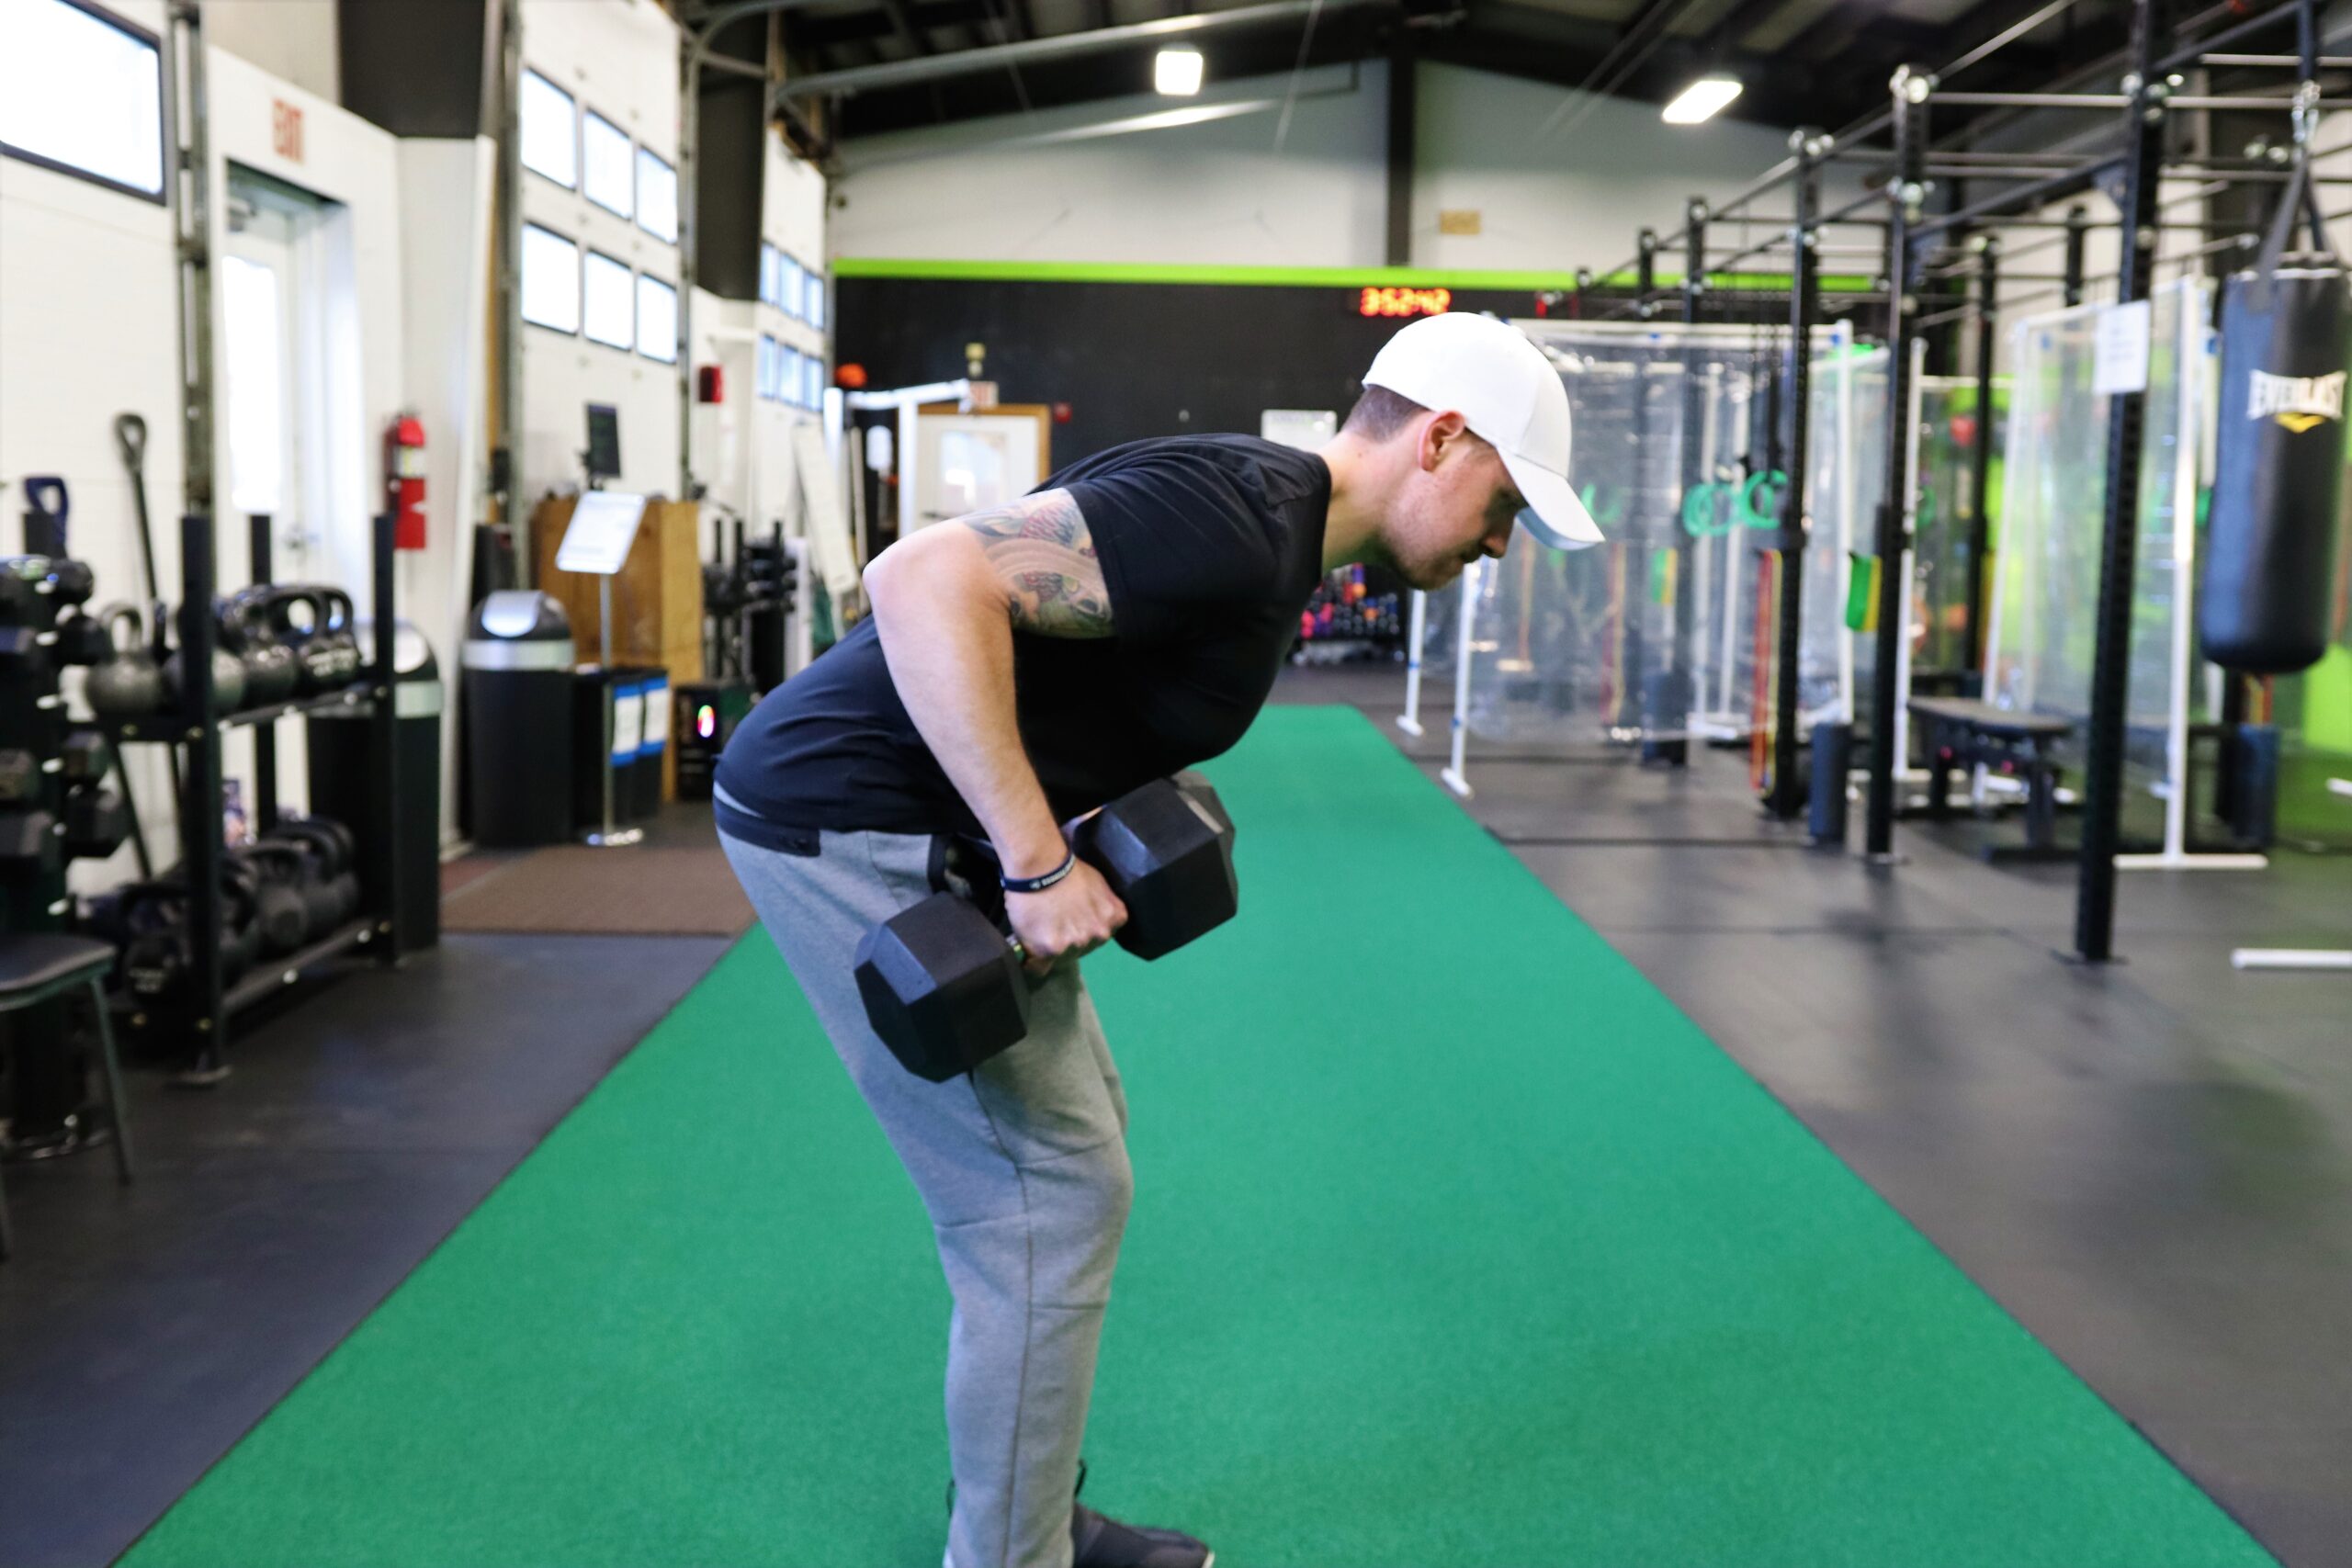
DB Bent-Over Row
After you’ve gained some strength and have learned how to control your body while under load in the bent over position, it’s time to remove the surface that your hand was using as support. By doing this we’ll be able to start building strength and support in the lower back. Follow these steps:
- Stand with feet shoulder width apart
- Lean forward, this time grab a dumbbell/kettlebell in both hands
- Pull the weight up to your side while keep elbows in close
- Slowly return to the starting position
Bodyweight Row
For bodyweight rows, you can use either a barbell set up on j-hooks attached to a squat rack, or some type of suspension trainer (rings for example). Whichever you decide to use, the set up will be close to the same. Start by laying on the floor underneath the bar or suspension trainer. From here, reach up and grab whichever you are using with your grip wider than shoulder width. Continue through with this checklist:
- Pull yourself up onto your heels
- Back and hips are straight, with no sagging
- Shoulders are braced

Once you are ready, start pulling your body to either the bar or the rings while keeping your elbows in close. Before moving on from the bodyweight rows make sure you can perform multiple sets and 10-12 reps
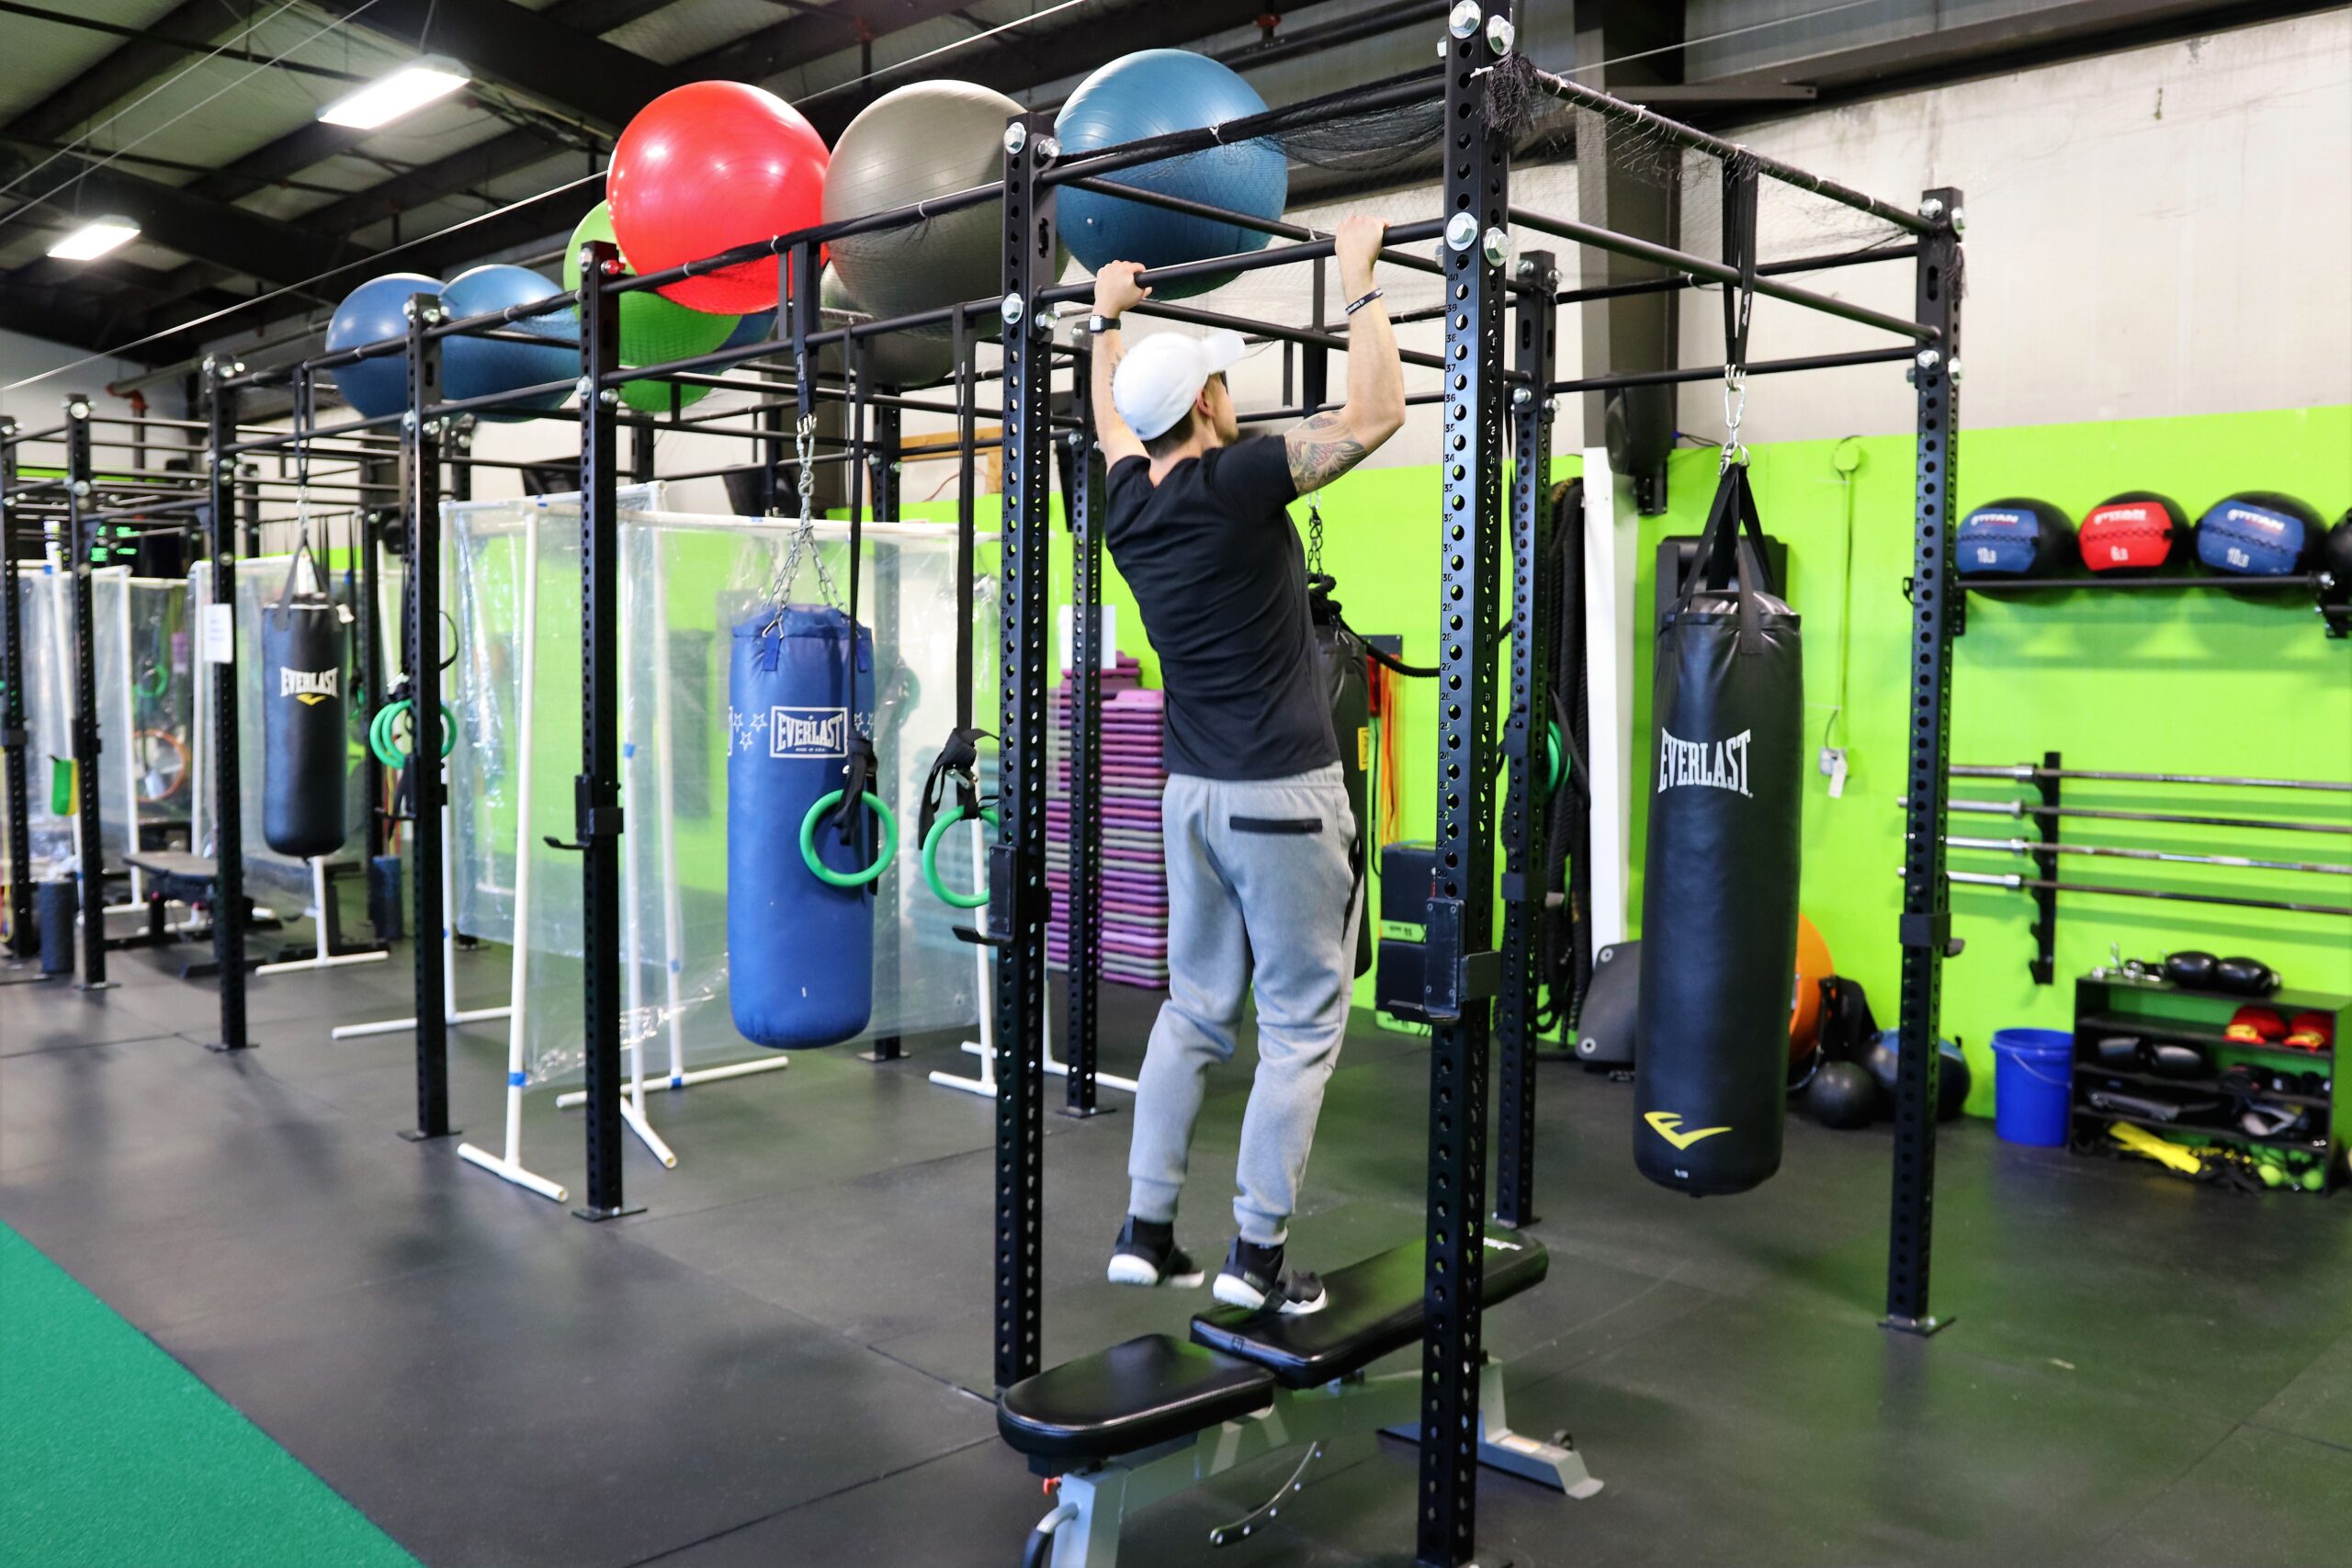
Pull-Ups
After progressing through the different variations of rows, it’s time to move on to the next step! Achieving that pull-up still may be a little out of reach, so in order to replicate the motion we’re going to go through some regressions of the pull-up. Doing so will give you the upper hand in reaching the strength needed to reach the ultimate goal of getting your first pull-up. Let’s go!
Assisted Pull-Ups
After you can successfully complete multiple sets of 10-12, full range of motion bodyweight rows, it’s time to advance to the pull-up bar. BUT, we still have a couple steps before we advance to full pull-ups. As we begin on the pull-up bar, we will start with a band assisted pull-up. Wrap a band through the pull-up bar so that it is dangling in front of you. Stretch it down and place one or two of your feet in it depending on the amount of assistance needed (two feet for more assistance; one foot for less assistance). Grab the pull-up bar and start pulling your body to the bar. While doing this remember these cues:
- Tuck shoulders back
- Keep the rest of the body tight
- Instead of pulling yourself up, pull the bar to you
- Expand your chest the closer you get to the bar
- Control your body as you lower back to the starting position
It is important during this phase to keep your patience. If people get stuck at a certain phase of pull-up training for a long period of time, it’s usually during this phase. This is the first part of the training where we are using the pull-up bar. It takes time to progress past this part. Patience is key. Keep at it!
Eccentric Pull-Ups
If you’ve been doing the assisted pull-ups for a while, and really feel that it’s time to progress, then this is the next phase. To do this, I recommend using a chair or box of some sort to stand on, as we want to start at the top of the movement. So, with our chest at the bar we will slowly lower ourselves back to the ground. Stand back on the chair or box, and repeat.
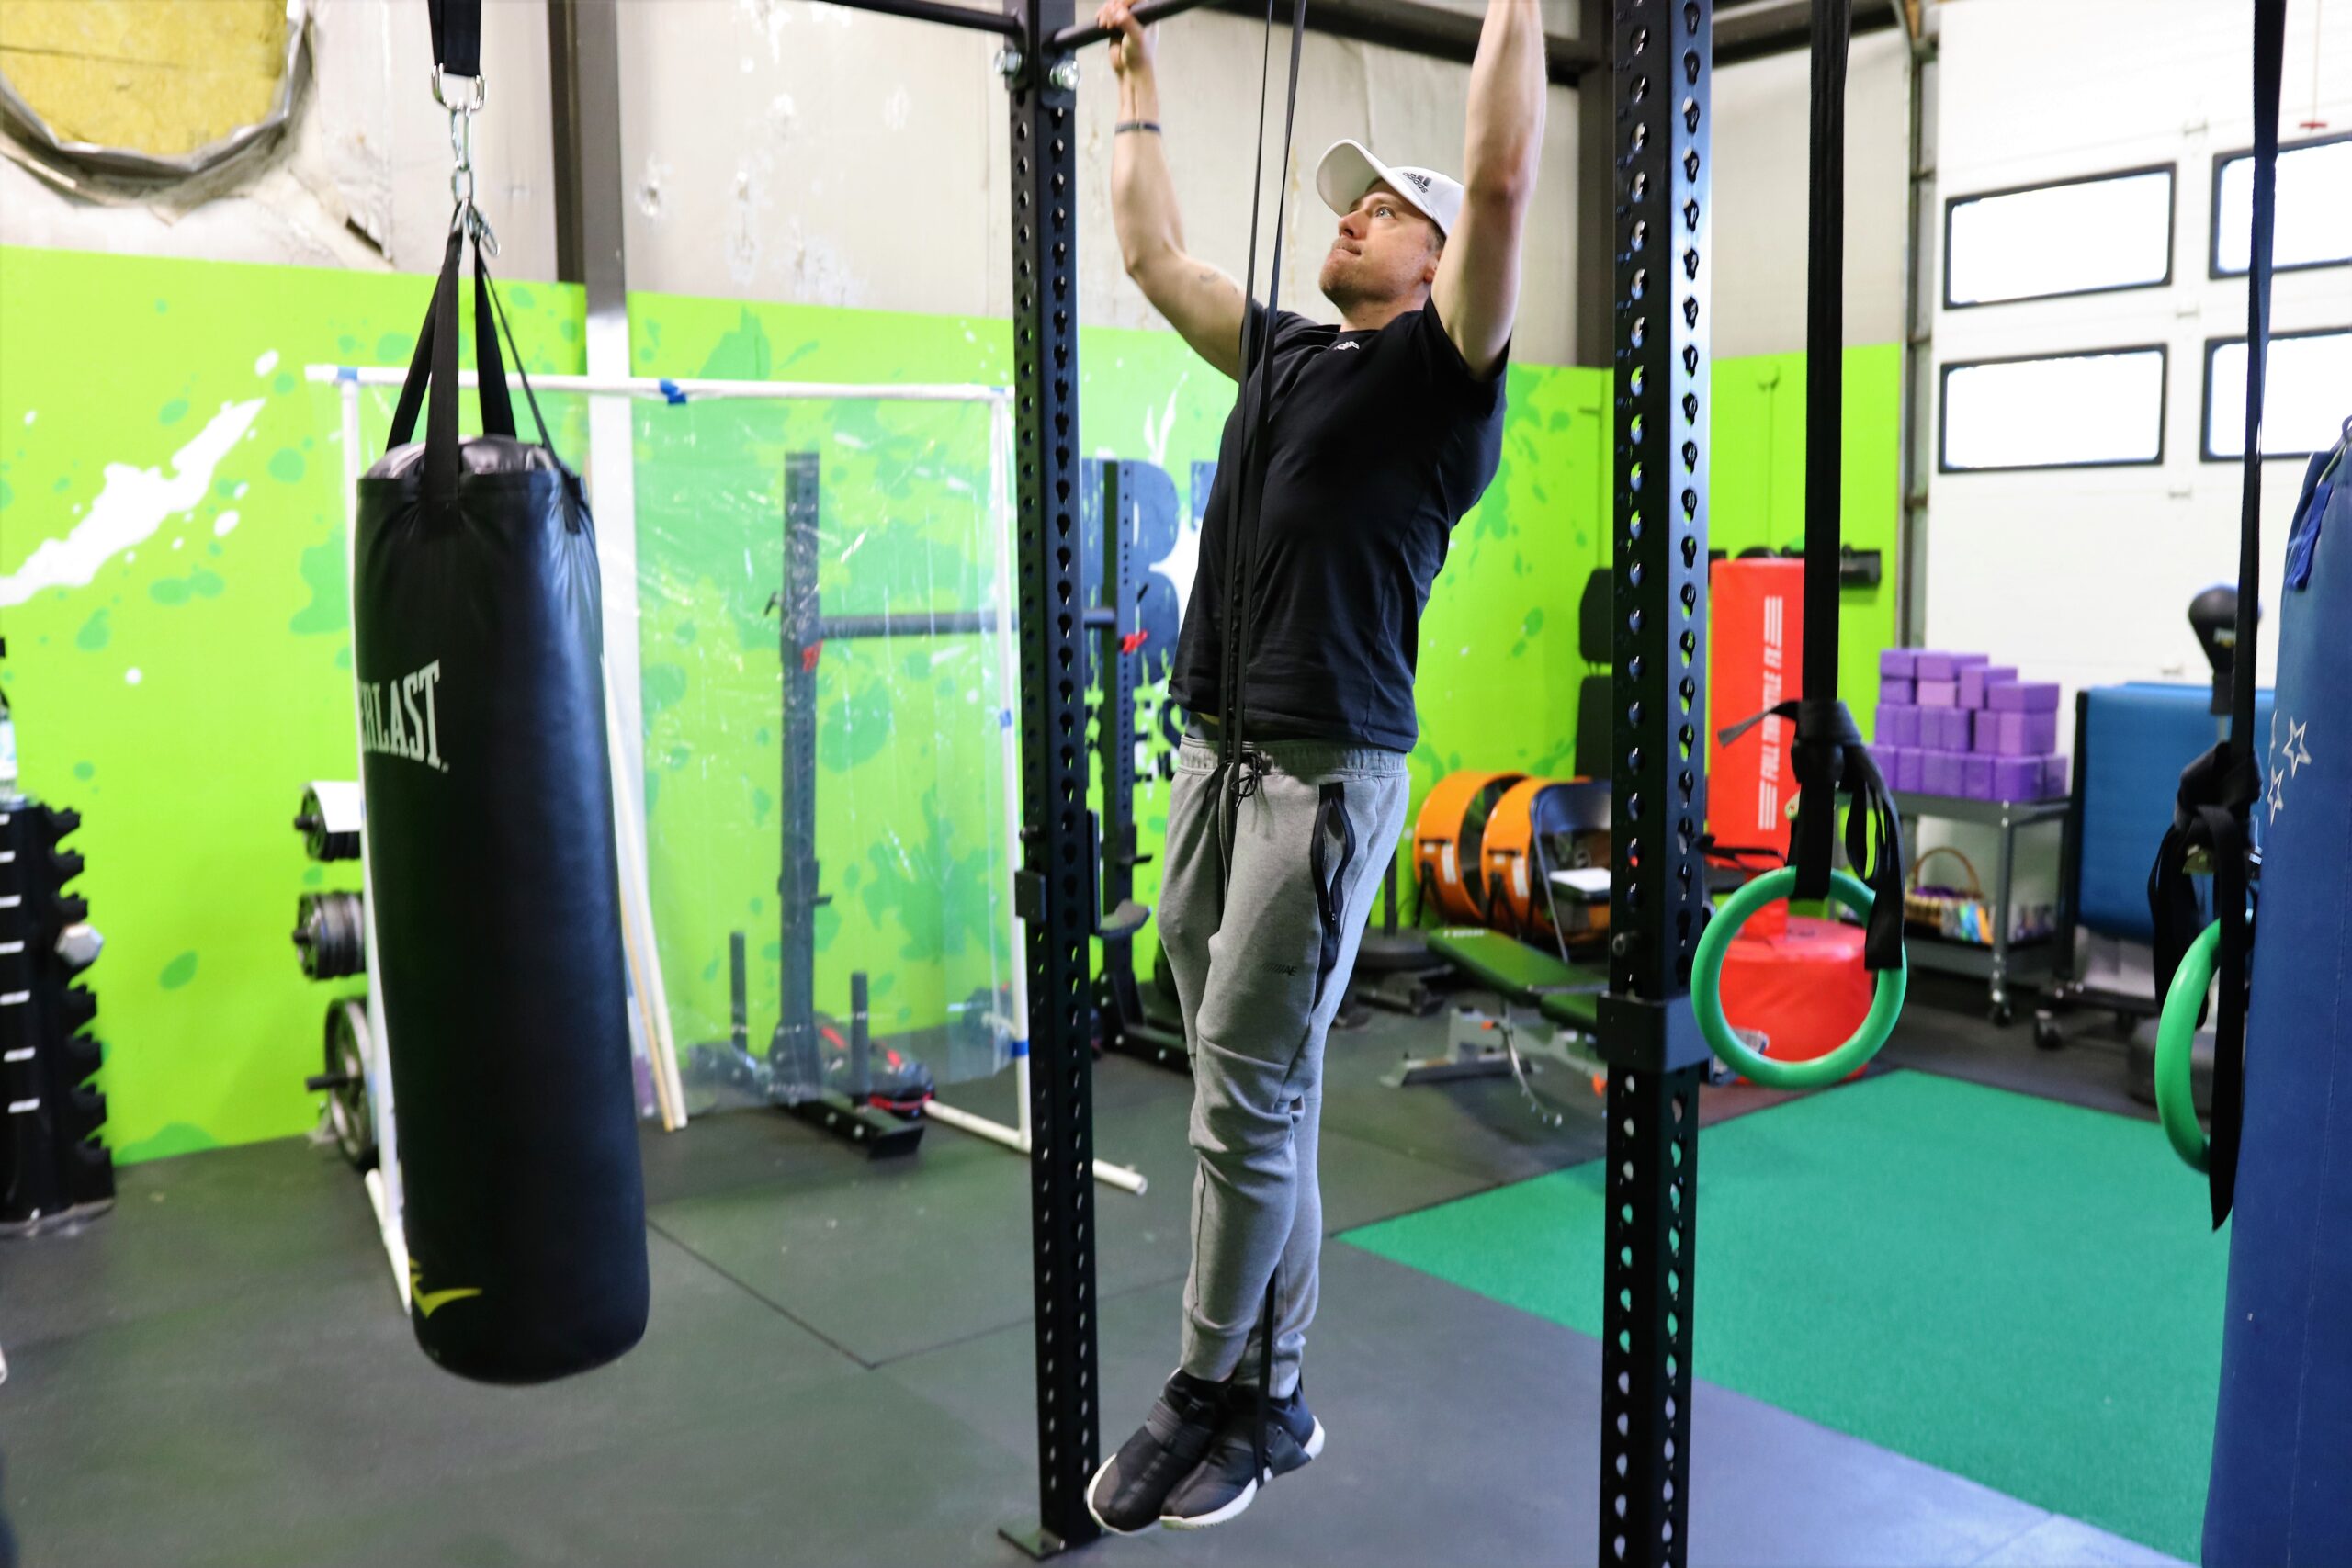
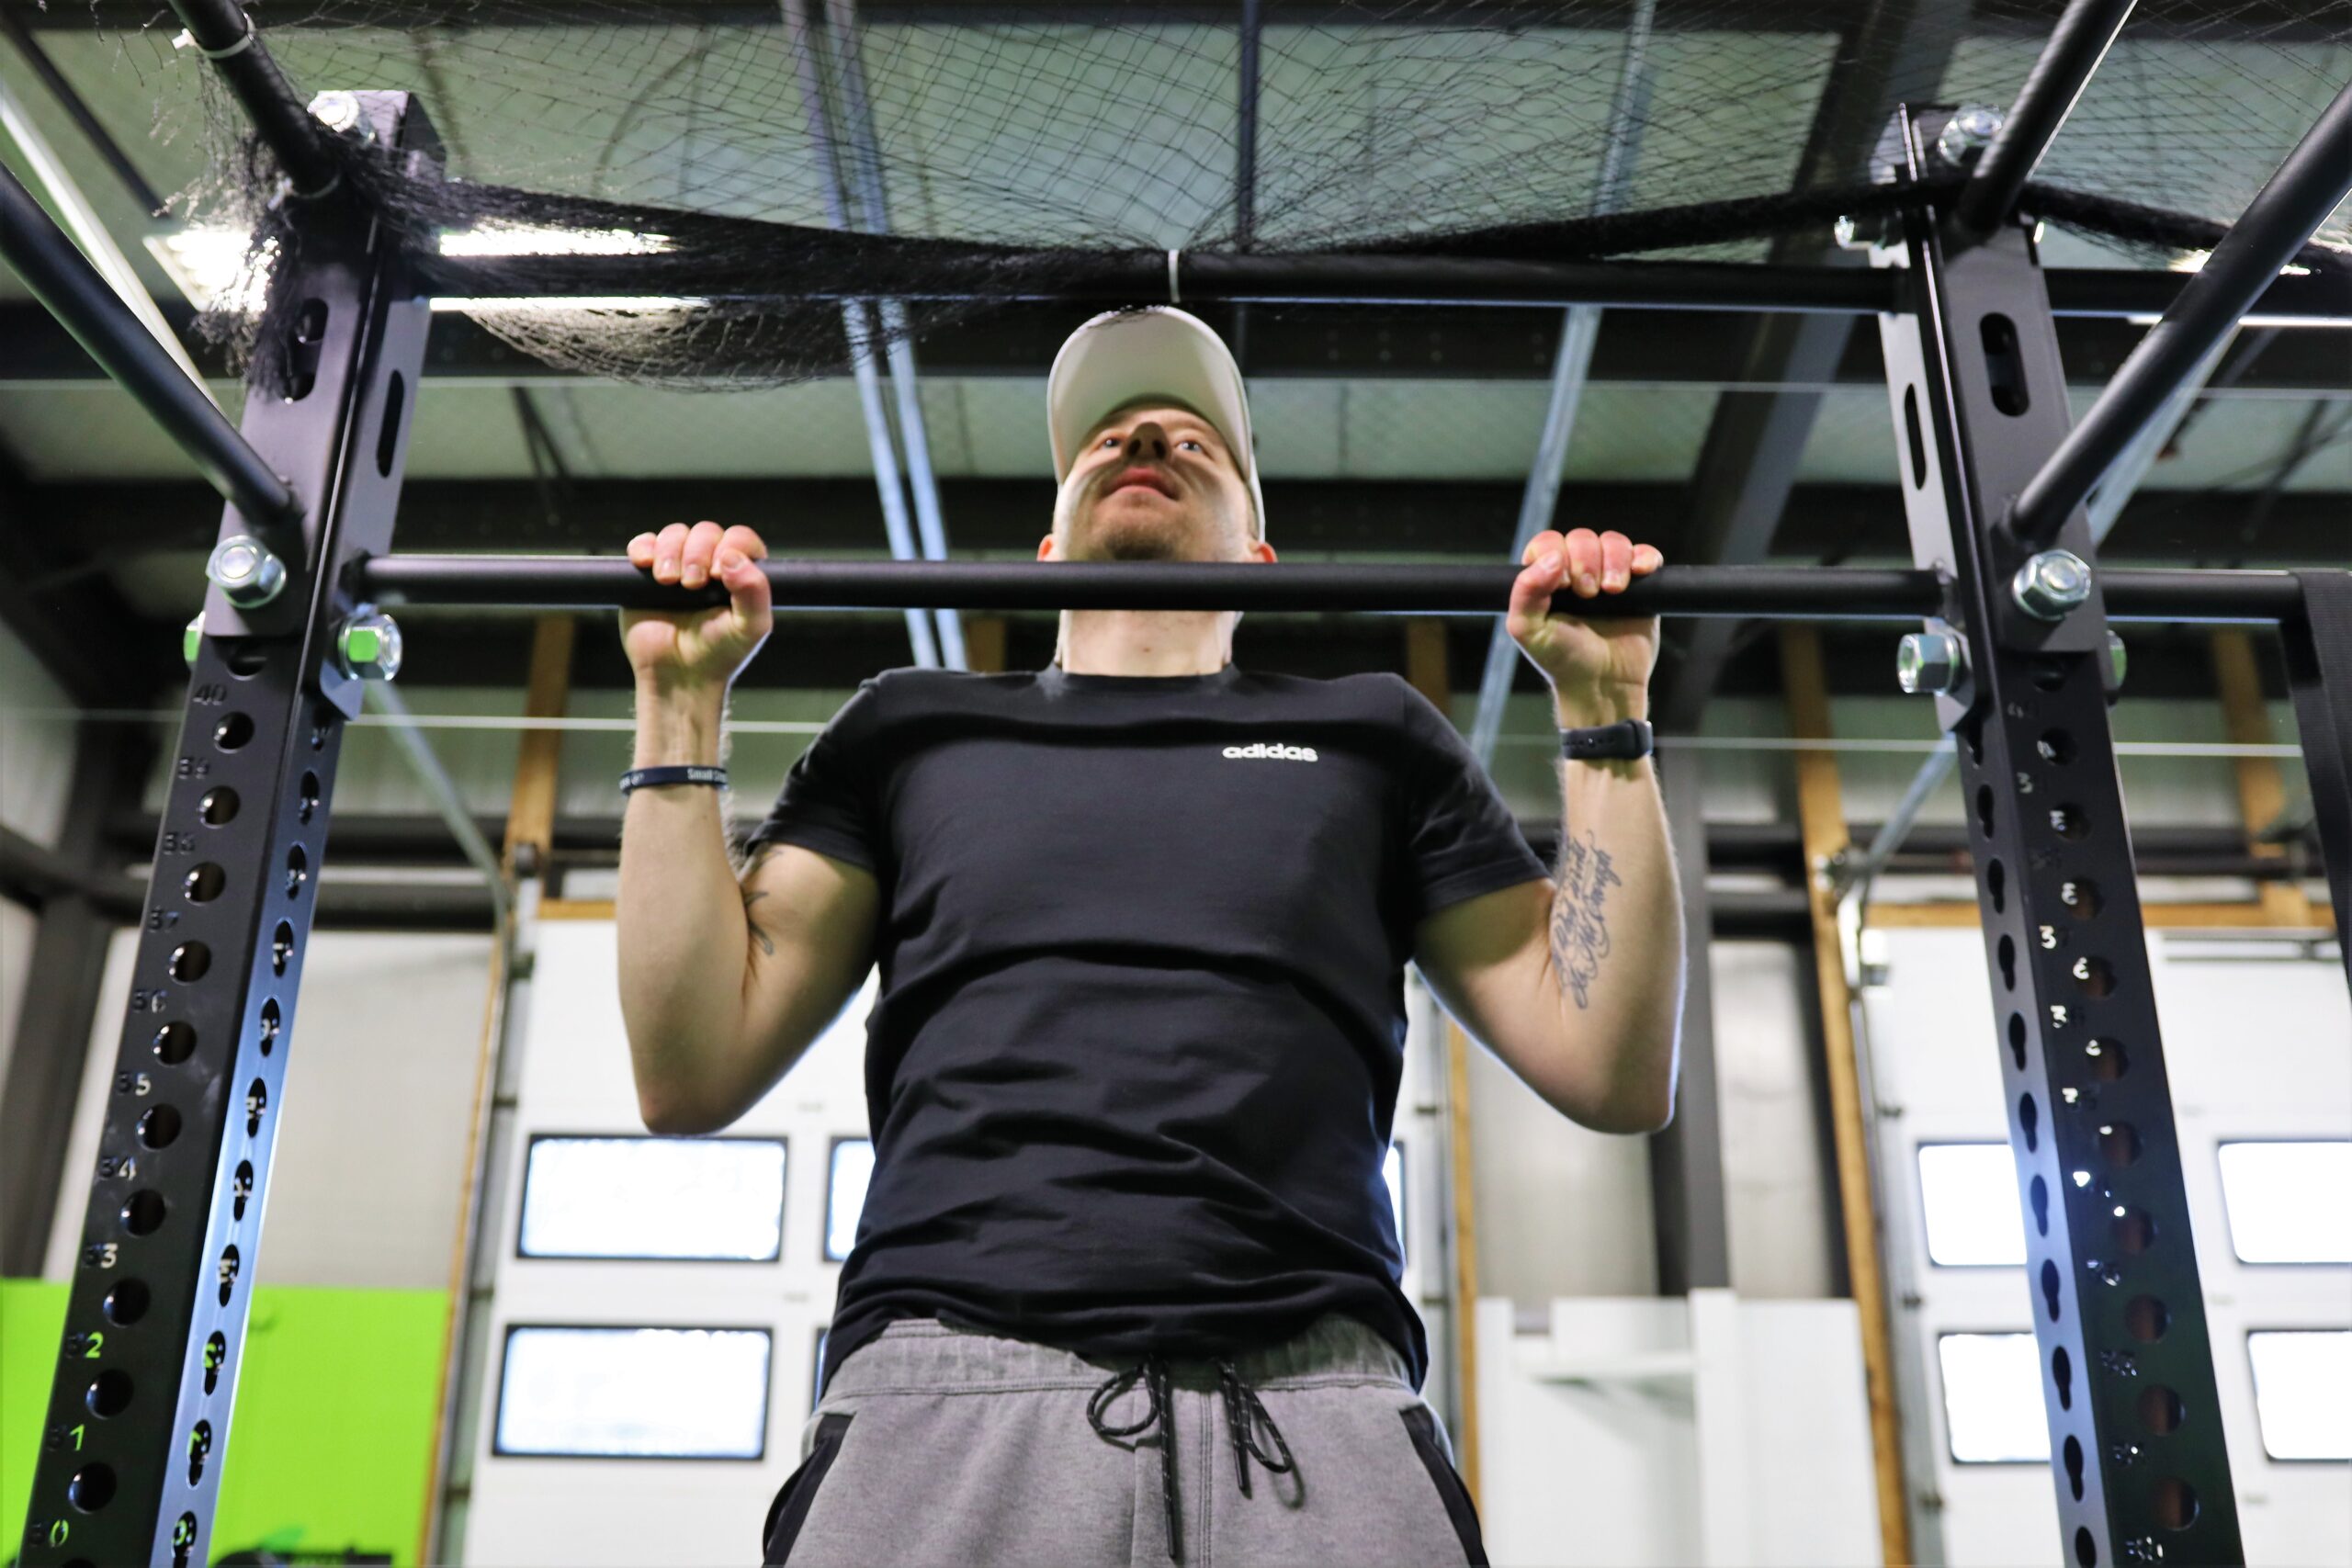
Pull-Ups
Here it is! The moment you have worked so hard for! Jump up, grab the bar, get into the ready position, and remember to:
- Tuck shoulders back
- Keep rest of body tight
- Pull the bar to you; not you to the bar
- Expand your chest to the bar
- Slowly lower yourself to the ground
- Celebrate!
Your first pull-up! Take a moment to congratulate yourself. A lot of hard work went into this process. It’s not easy, so don’t just shrug it off. Take this moment and be proud of yourself. A whole new world of training has just opened up for you!
If you enjoyed this information, please check out our other fitness & health articles here:
https://hybridfitnessgym.com/articles/
Swing over to our YouTube channel to check out our latest videos here:
Hybrid Fitness YouTube Channel

Brandon started working out as an athlete in high school, striving to push his limits and reach his full athletic potential. As he spent more and more time working on his own goals, he found a passion in the science of strength & conditioning, and using that new-found knowledge to help others. Brandon is exceptional at giving his clients the extra push to get stronger in a safe manner, while going above and beyond to making sure they feel comfortable and safe.
January 20, 2021
How to Fight Depression
5 Tips To Turn That Winter Blues Into Summer Smiles!
Have you felt down, depressed, or even isolated around having to social distance due to the Covid pandemic? If so, this article may be JUST what you need to help you take the steps needed to turn your mood around! Below, I’m sharing five simple tips on how to fight depression, kill the blues, and have you springing out of bed with an extra kick in your step!
What is Depression?
Depression is a state of low mood and aversion to activity which can affect a person’s thoughts, behavior, motivation, feelings, and/or sense of well being.
According to a study from Harvard Medical School in July 2013, 1 in 10 adults struggle with depression.
And, right now in our current state of affairs, between Covid bringing isolation to many of us, the holiday’s, time change, and seasonal change, who isn’t feeling a bit stressed out and down?
Let’s talk about some things you can implement into your daily lives to combat these feelings of stress and depression!
Tip #1 – Stay Active
Staying active will give you a huge boost in feeling better!
Take the dog for a walk, join an organization, start exercising! Having something to look forward to will help with feelings of sadness or depression.
When you exercise, your body releases brain chemicals such as:
- Dopamine
- Serotonin
- Norepinephrine
- BDNF
- Endorphins
All of which give you that “feel good” boost, or “runners high”, as some like to refer to it as.
There are so many ways to incorporate exercise into your routine, and it doesn’t have to be crazy intense!
- Walking
- Biking
- Weightlifting
- Yoga
- Swimming
- Playing sports
The list is endless!
And, as a result, your blood pressure may lower, and if you have diabetes, the long term effects may even be reduced!
Exercise becomes even more beneficial in a group setting, such as a gym. There is positive reinforcement, the support of others, a sense of belonging, and simply having fun while seeing positive results physically. Over time, friendships can develop and it begins to feel like a family.

Tip #2 – Get Outside Daily
Try and get outside every day!
Take a walk in the fresh air, and feel the sunshine on your face. Even in the winter, we can bundle up and take in the cold, crisp air. There’s nothing quite as invigorating as fresh air!
Around 42% of Americans are deficient in vitamin D, and studies have shown that low vitamin D levels may be correlated with depression. One of the best ways to increase your vitamin D levels? Natural sunlight!

Tip #3 – Do Something That Makes You Happy
Be sure to do things that you enjoy and make you happy!
- Read a book
- Have a cup of tea
- Do something for someone else
- Explore a new hobby
- Spend time with loved ones (virtually if necessary)
- Do something that is fulfilling or gives you purpose
- Volunteer your time
There are no right or wrong things here. Whatever makes you happy is where your focus should be, and we should always take pleasure in the things we enjoy!

Tip #4 – Laugh
Keep in mind to laugh, at yourself and others. Try not to take yourself too seriously! Laughter really is the best medicine!
- Watch a funny comedy movie or television show
- Listen to a funny podcast or stand-up
- Spend time with children – they’re always laughing!
- Play entertaining games with friends

Tip #5 – Keep a Journal
Journaling daily in the morning and/or at night is a great practice to get into. Especially if you’re feeling down or isolated.
Document these feelings! It’s a great way to get them out of your head, down on paper, and be able to reflect on them.
Don’t forget to write down any positive thoughts, as well! You can always look back on these as good memories. It may just spark the positive shift in mindset that you’re looking for!

In Conclusion
The effects of these tips on depression is a positive one, not a cure, but it can definitely help with your overall well being. By incorporating these things into your daily life, you should see positive results, and fast! Implement even just one of these this week, and I promise you’ll see improvements in mood, sleep, mindset, and motivation. Slowly build off of that, and you’ll be kissing the winter blues bye-bye for good!
If you found this article helpful, please consider sharing with family and friends that would benefit as well!
If you enjoyed this information, please check out our other fitness & health articles here:
https://hybridfitnessgym.com/articles/
Swing over to our YouTube channel to check out our latest videos here:
Hybrid Fitness YouTube Channel
Danielle lives in mid-coast Maine after growing up in Boston, MA. She’s a nursing school graduate, and is currently working towards becoming a certified grief counselor. She also has her personal training certification through ASFA.
Danielle has run multiple half marathons, and has even completed 2 full marathons, including the Boston and Des Moines marathons.
Danielle loves to create a comfortable, fun, and relaxed environment in the gym, and is dedicated to making a positive impact on others, and helping people feel good about themselves while reaching their goals.
January 19, 2021
How To Properly Wrap Your Wrists For Boxing
Have you ever noticed that boxers and fighters have their wrists and hands wrapped up before a fight?
Have you ever wondered why?
In this article, not only will you learn the why, but more importantly the how to properly wrap your wrists and hands prior to participating in boxing and/or any other striking sport.
Properly wrapping for boxing, or any striking sport is extremely important for the health and longevity of your hands and wrists. The structure of the hand alone consists of 27 bones, not to mention numerous joints, ligaments, and tendons that can be easily injured from the impact of repetitive punches.
Wrapping thoroughly around the wrist joint, knuckles, and hand will keep everything compressed, therefore reducing the risk of injury. Not only that, but it will help you punch harder, as well!
As you train more and more, your punching power will increase along with the amount of force and impact, so it’s important to learn how to wrap before even attempting something like boxing.
Wrapping your wrists will reduce the risk of hyperextending and injuring your wrists, and adds an extra protective layer to the knuckles as well to help keep them protected.
Boxing gloves should fit snug and not wiggle around too much, so wrapping also helps limit the space inside for a tighter fit. The wrapping process can be daunting where it includes numerous steps, but it’s important to learn early on, and properly, so you don’t injure or limit yourself along the way.
Like anything, the more you do it, the easier it becomes. Follow along with the step-by-step guide below, and you’ll be a wrist wrapping pro before you know it!
Let’s go!
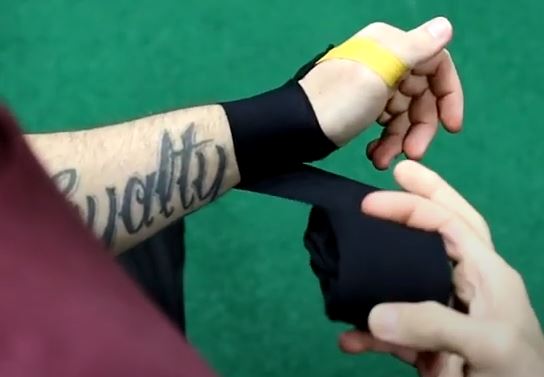
Step 1
- Place the starting loop around your thumb, and begin wrapping around the back of your hand.
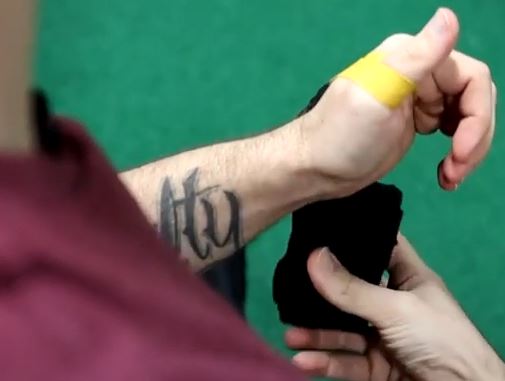
Step 2
- Wrap completely around your wrist 3 times.
Step 3
- Wrap around your palm and knuckles 3 times, leaving your thumb free.
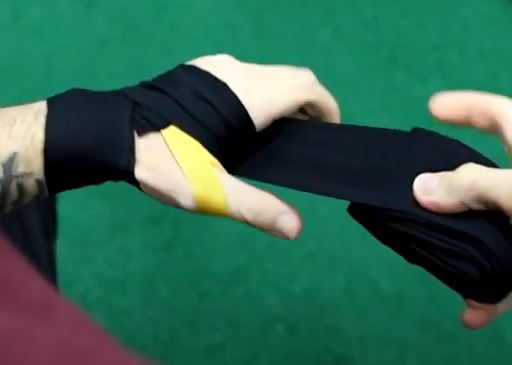
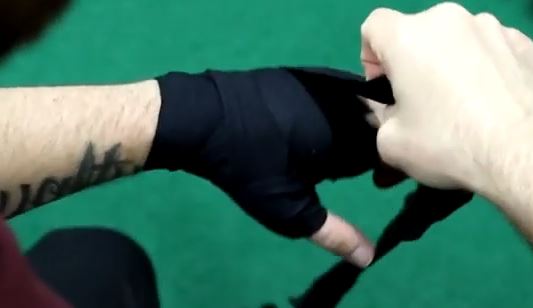
Step 4
- From the underside of your hand, wrap around your thumb, continuing between your pinky and ring finger towards the palm, and wrapping around the palm and knuckles as you did in the previous step.
- You should be back to the same position as you were at the beginning of this step.
- Once again, wrap around your thumb, but this time continue between your ring and middle fingers. Continue around the palm and knuckles, until you are back in the same position as the beginning of step 4.
- Repeat one more time. This time taking it around the thumb and continuing between your middle and index fingers.
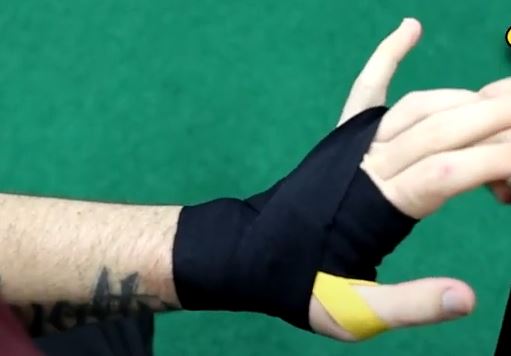
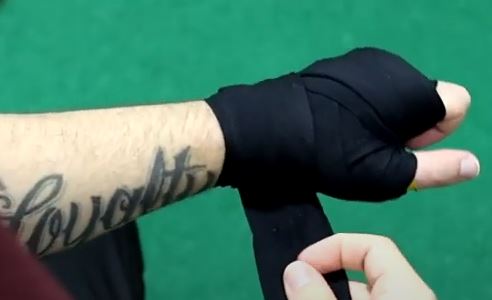
Step 5
- Once you’ve wrapped between each finger, wrap around the thumb and continue over the back of the hand.

Step 6
- With your palm facing up, wrap around your thumb and down over your palm around to the backside of your hand, in the opposite direction of the way you’ve been wrapping.

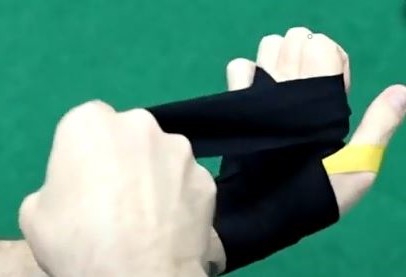
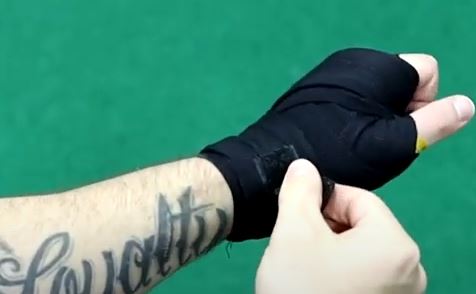
Step 7
- Repeating Step 3, wrap around your palm and knuckles 3 more times, excluding your thumb.
Step 8
- Wrap any excess wrapping around your wrist, and fasten the velcro securing strap.
There you have it! Your wrists are wrapped, and you’re ready to strike!
If you enjoyed this article, please feel free to share it!
Keep your eyes peeled for the 6 numbered punches we’ll be covering soon!
If you enjoyed this information, please check out our other fitness & health articles here:
https://hybridfitnessgym.com/articles/
Swing over to our YouTube channel to check out our latest videos here:
Hybrid Fitness YouTube Channel
Mike grew up as a multi-sport athlete and received his Bachelors in Kinesiology (Exercise Science) and also received his Personal Training Certification from the American Council of Sports Medicine.
Mike has worked with a wide range of ages and abilities and is an expert at working around injuries and helping those individuals reach their health goals.
In his time in college, he also worked with D1 Athletes (specifically the UMASS Amherst Men and Women’s Basketball teams) helping them get stronger, faster, and more athletic.
January 12, 2021
The Ultimate Guide to Your First Push Up
The Ultimate Guide to Your First Push Up
When asking a new member at the gym what some of their goals are, a common response is that they want to be able to do their first push up. That’s a fantastic goal to have! The push up was first popularized in the early 1900’s, but has been seen to date back to the Roman Emperor Constantine all the way back in 300 AD! It’s been around for so long for good reason. Not many movements that involve just body weight can put the amount of stress on the upper body and core simultaneously as the push up can, and few exercises can match how awesome you look and feel while repping out a set. When used properly the push up can, and should be a staple of any strength training program. Here’s a step by step guide to assist you on your journey of strength and awesomeness, by helping you achieve your first push up!
Regardless of its popularity, the push up can be one of the most daunting and challenging movements to learn and progress towards. The reason for most people struggling to achieve their first push up is rooted in that word, “progress”. I see too many people who can’t do a push up just lay on the floor and start pushing hoping that they will magically be able to do one someday. Unfortunately, it doesn’t work like that. In order to get better at push ups, one must have a set plan in place to achieve this goal, just like with any other exercise.
The High Plank
The first step you should take on your path to push ups should be looking at the health and stability of the shoulders and core. By starting with a High Plank, you’ll be able to build the strength and stability in your shoulders and core that will be crucial further down the road. To do a proper High Plank, get into a push up position and make sure you are checking off all of these boxes:
- Hands are directly underneath your shoulders.
- Your body is staying in a straight line. No sagging in the hips.
- Breathing is controlled. Inhale through the nose and exhale through your mouth.
- Hold this position for 45-60 seconds
If you can do all of those things consistently while staying in that High Plank position, then it is time to move on to the next step.
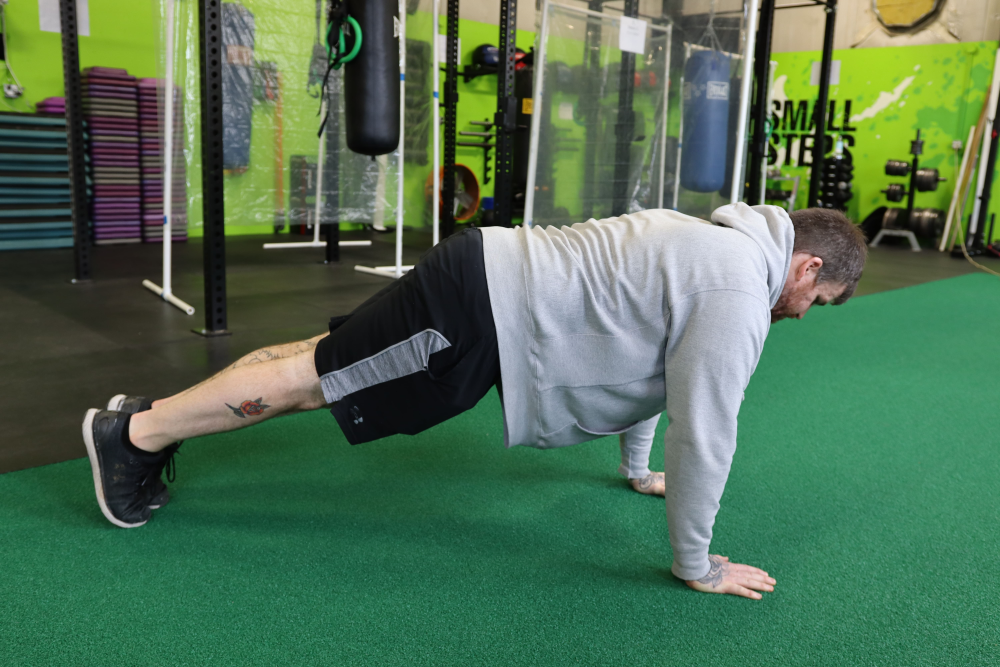
Hand Elevated Push-Up
The next thing we want to do is to start incorporating the pushing motion. Instead of staying in the high plank position for this one, let’s elevate the hands onto a higher surface. This can be anything like a chair, bed, bench, table or even a wall. Whatever surface you choose to use, place your hands onto it. From there, we will use all of the principles of the high plank listed above, but now we are going to start lowering our bodies to our hands and checking off these boxes:
- Lead with your chest first. Don’t let your head or hips take control.
- Keep your elbows slightly tucked into your body at around a 45-degree angle.
- Use shoulders, chest and triceps while keeping the core engaged to push back to the starting position.
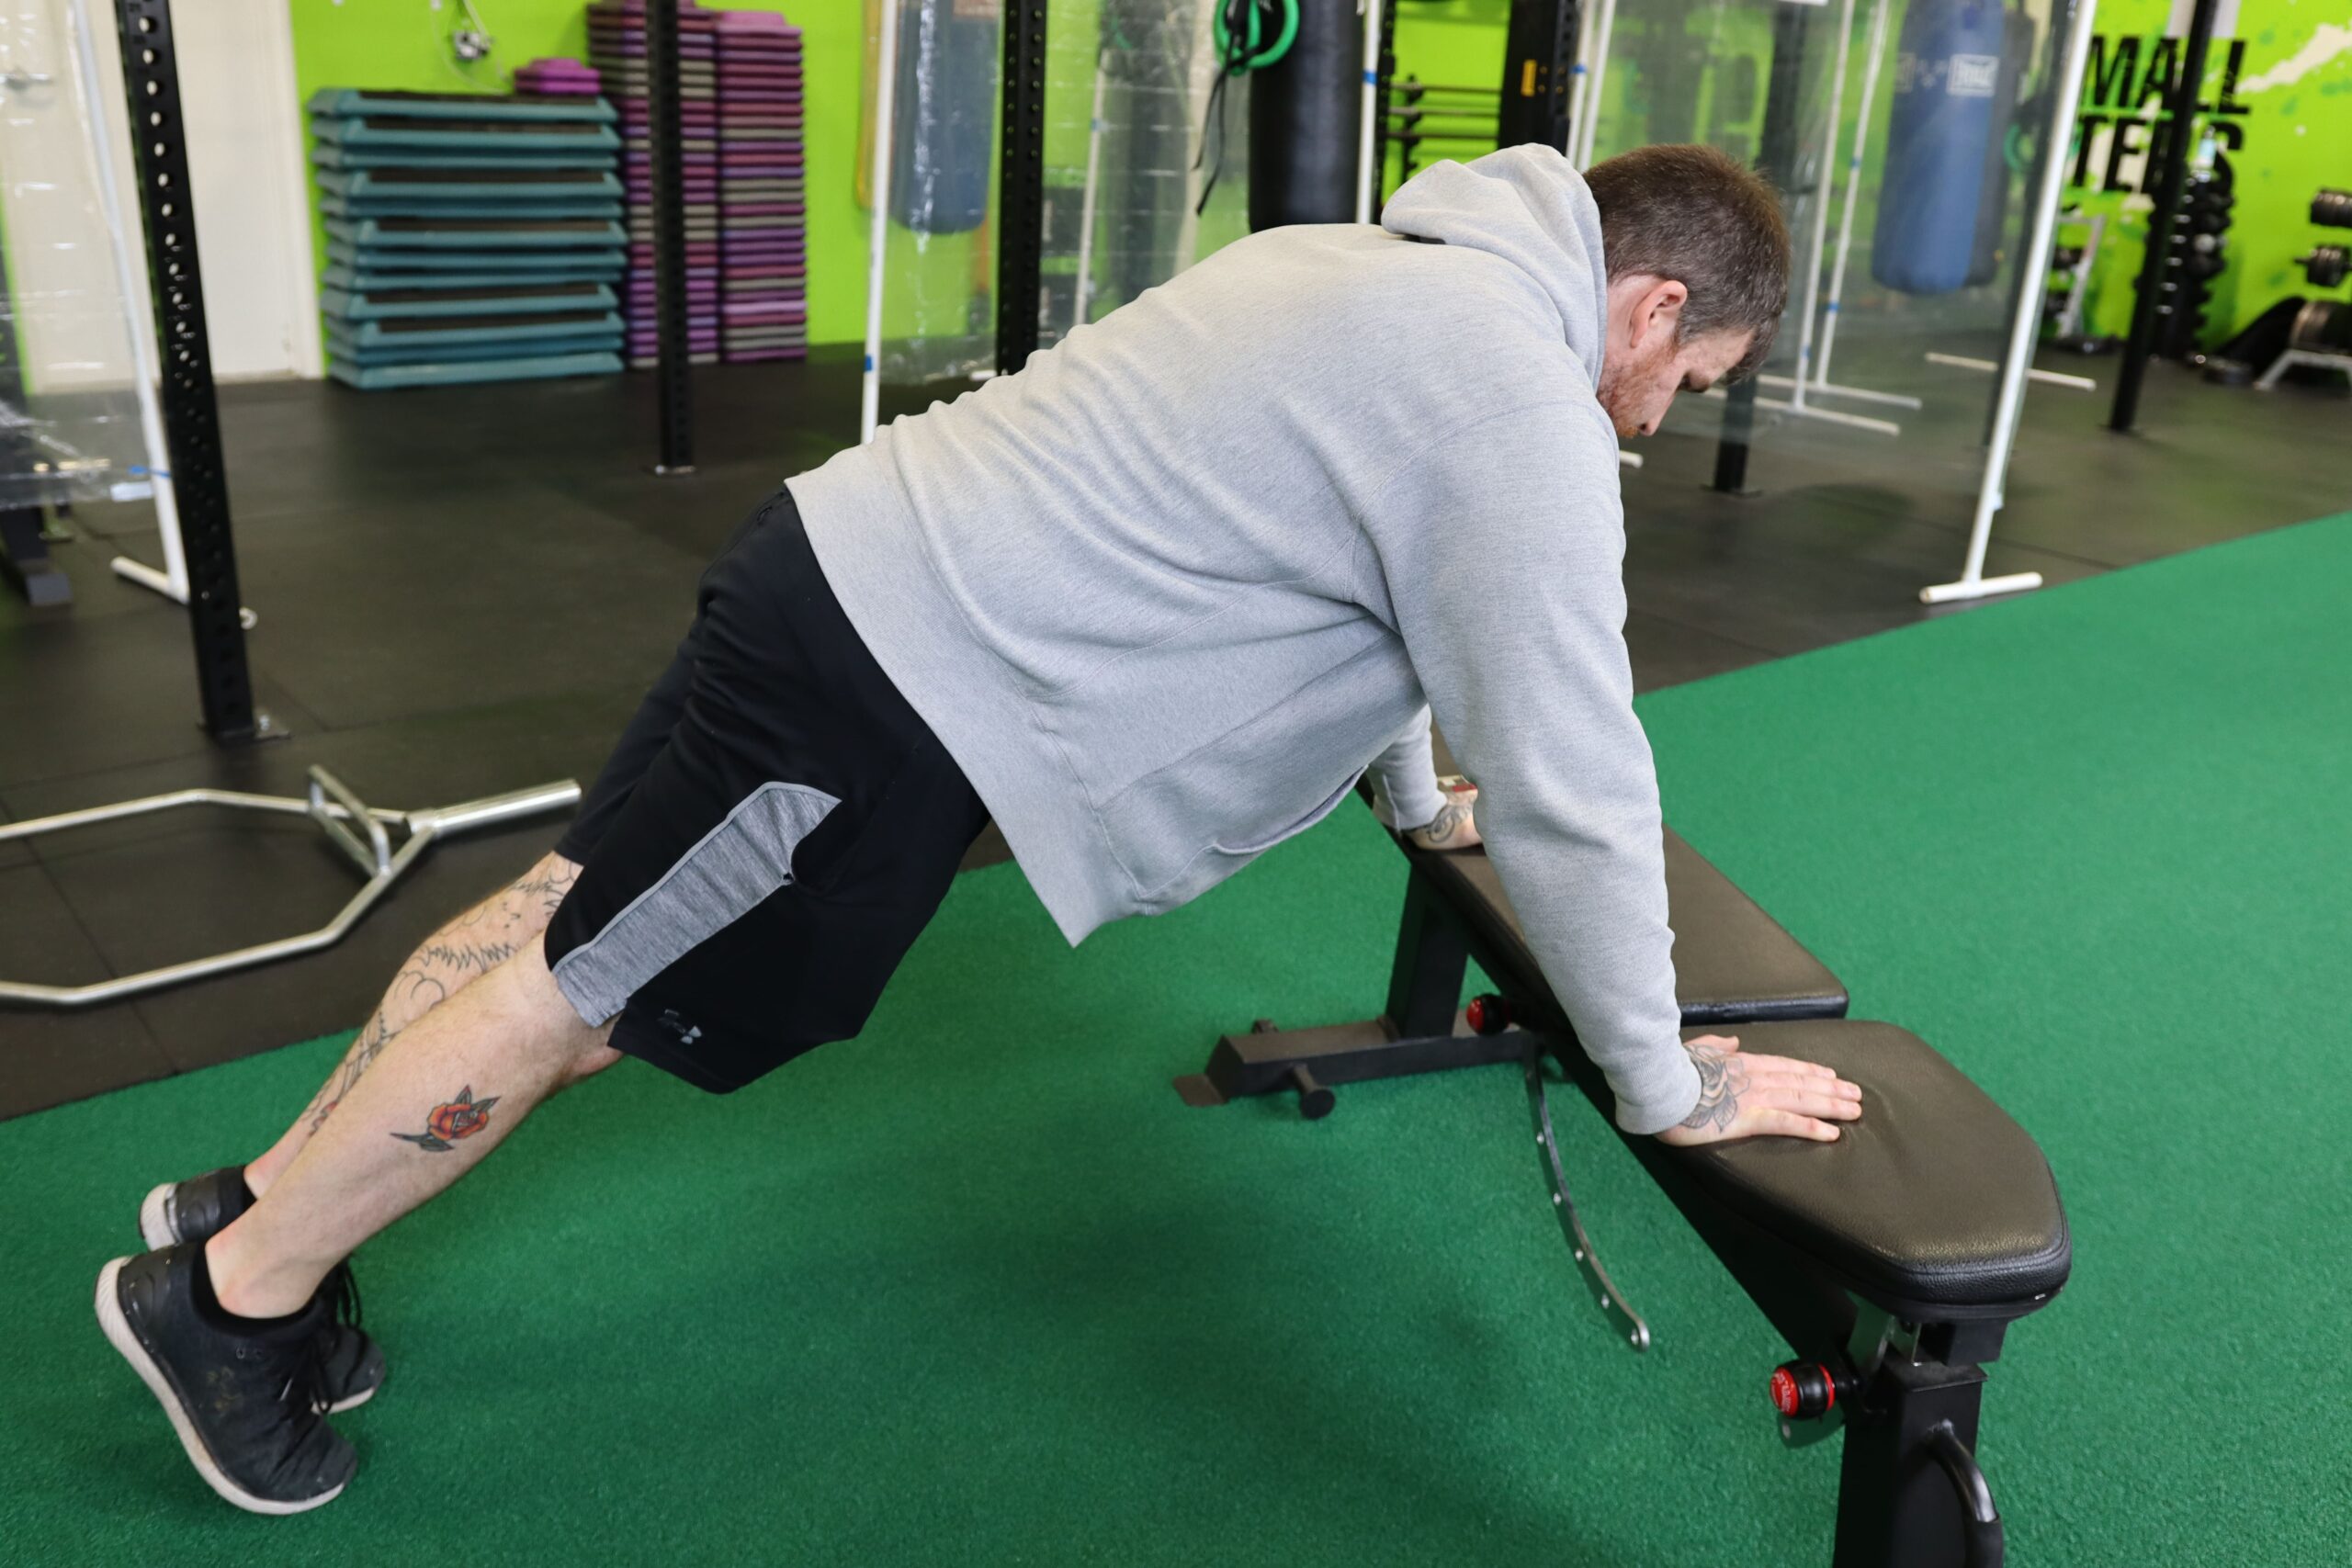
Perform 10-12 reps at this height. Once you can perform those 10-12 reps consecutively, move to a lower surface and repeat.
Knee Push-Ups
So, by now we should be getting closer to the floor. From here, we are going to drop down to our knees and place our hands directly onto the floor. Now we will slowly lower our upper body to the floor. Before we begin to push up, let’s make sure we are keeping the same form requirements as we did on the Hand Elevated Push Ups.
- Keep your elbows slightly tucked into your side at around a 45-degree angle.
- Keep your body straight without any sagging in the hips.
- Slowly lower your upper body to the floor and return to starting position by pushing off the floor
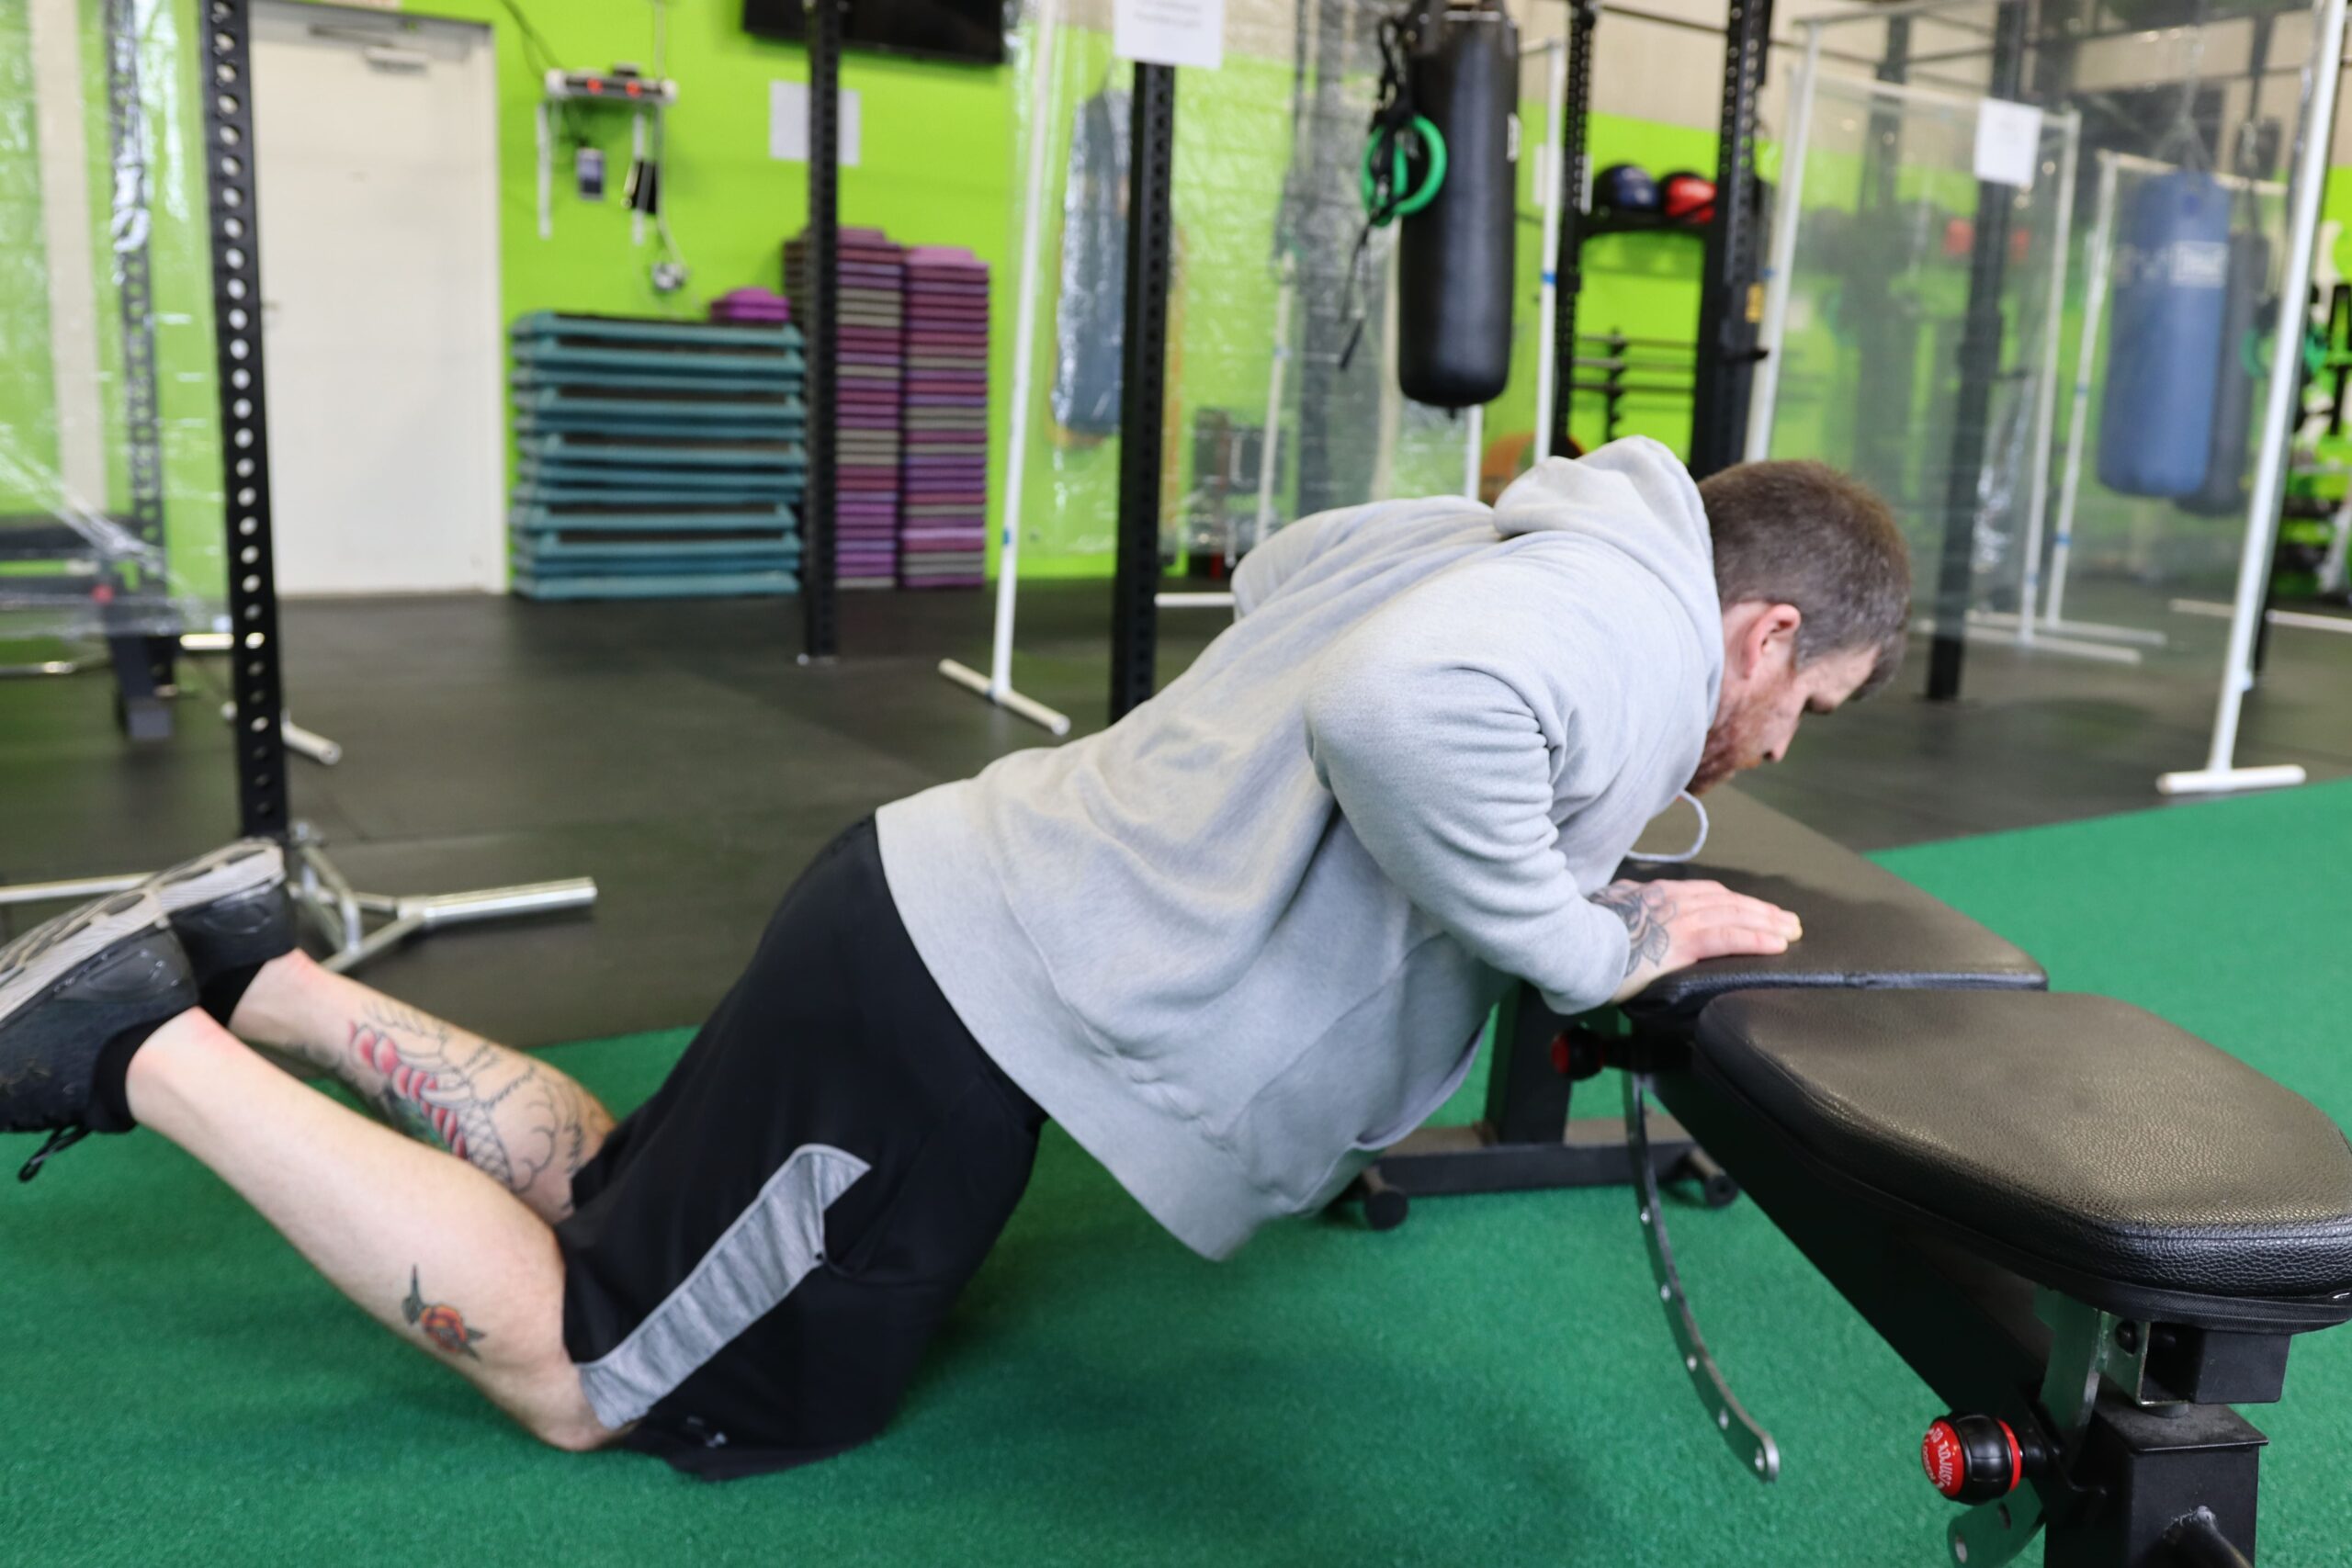
To make this move either more difficult, or slightly easier, change the position of your knees. Move them closer to your hands to make the move easier and move them further back to increase difficulty.
Eccentric Push-Up
After spending time and mastering the Knee Push Up, you should be ready to start working from the High Plank position again. BUT, there is still more work to do before rushing into full push ups. One part of the push up that people tend to do incorrectly is properly lowering themselves to the floor, so here we will work on just that and that alone. To start, get into the High Plank position same as before. Now, we will simply take 3-5 seconds to lower ourselves to the floor, all while maintaining the checklist we had on both the high plank and the hand elevated push ups. Once you reach the floor, instead of pushing yourself back up, drop to your knees and return to the starting position. This can become very strenuous and if time needs to be taken in between reps, then do so. We are working on perfecting form here, not how many reps we can get. Once you can perform 10-12 continuous reps of these slow eccentric push ups, it’s time to move on.
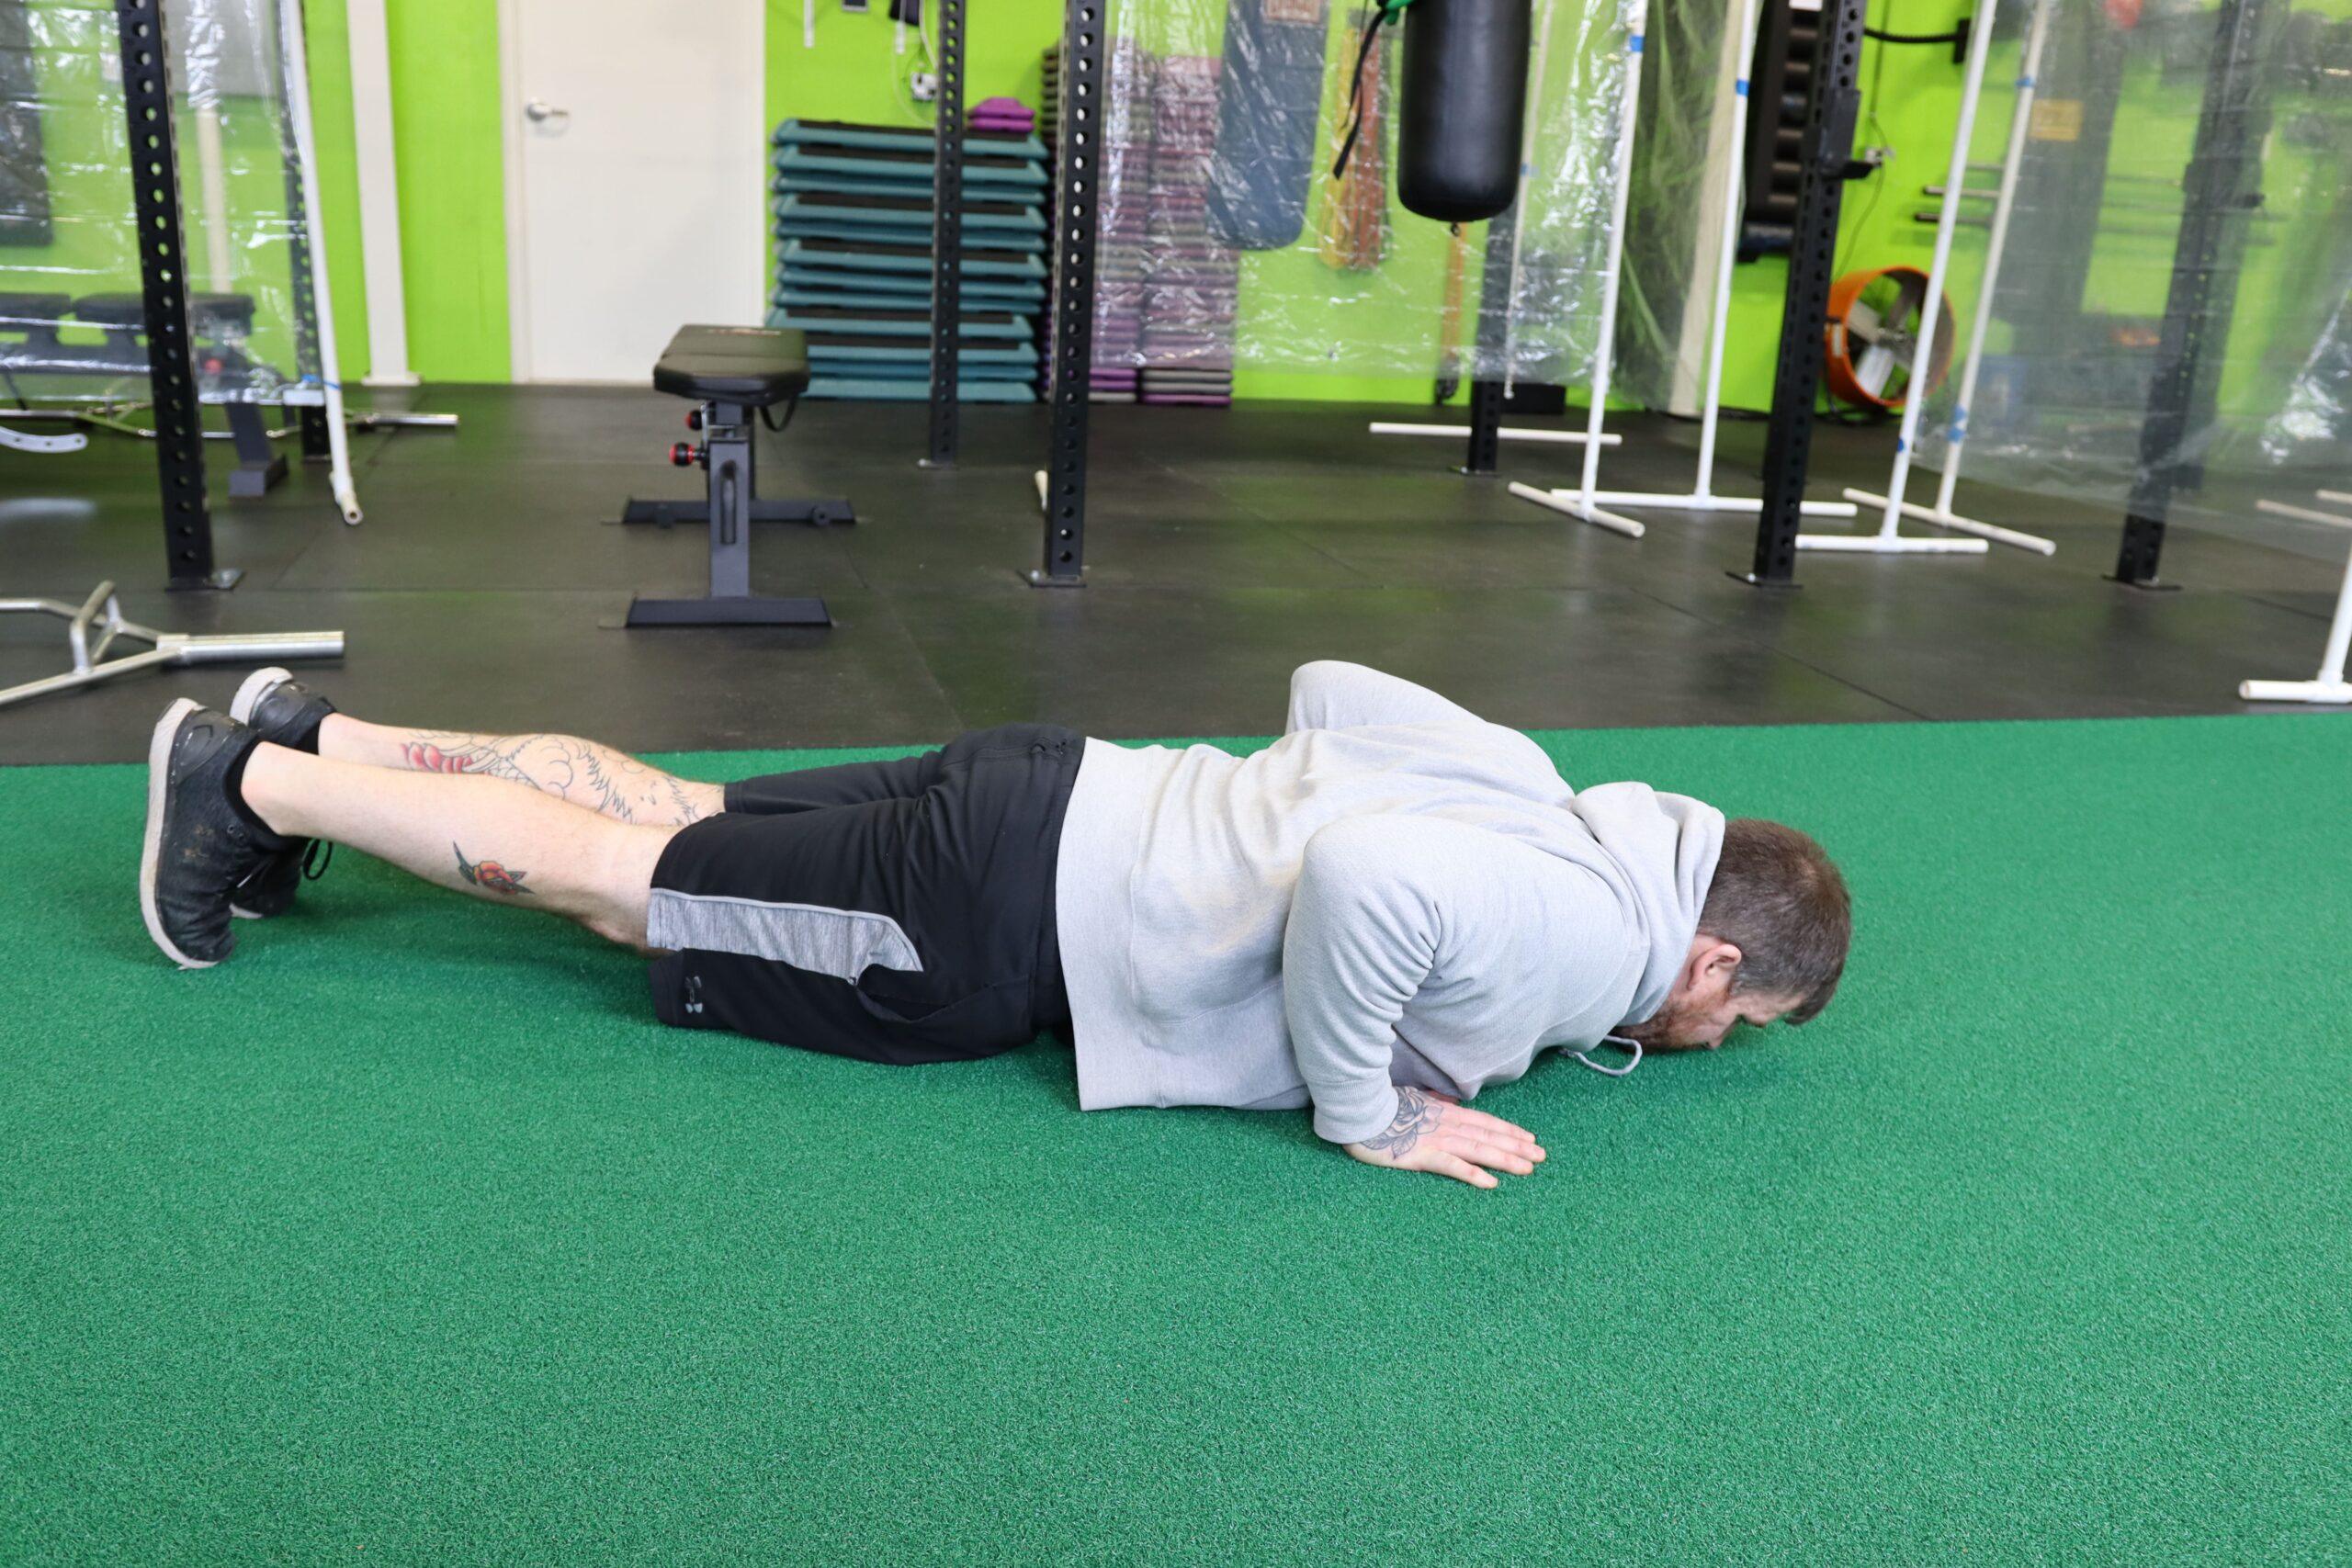
Push-Ups
After all the hard work, the sweat, and the sore muscles, it’s time to get it! Set up in the High Plank position and remember to follow all the ques that we’ve previously gone over.
- Hands are directly underneath the shoulders.
- Body is in a straight line without any sagging in the hips.
- Take a big breath in.
- Slowly lower your upper body to the floor while keeping elbows at a 45-degree angle.
- Exhale and push yourself off the floor back to the starting position.
- Give yourself a high five!

You’ve done it! Don’t try to play it cool. Your first push up is an incredible accomplishment that you should be proud of. Boast a little. You’ve earned it!
If you enjoyed this information, please check out our other fitness & health articles here:
https://hybridfitnessgym.com/articles/
Swing over to our YouTube channel to check out our latest videos here:
Hybrid Fitness YouTube Channel
Brandon started working out as an athlete in high school, striving to push his limits and reach his full athletic potential. As he spent more and more time working on his own goals, he found a passion in the science of strength & conditioning, and using that new-found knowledge to help others. Brandon is exceptional at giving his clients the extra push to get stronger in a safe manner, while going above and beyond to making sure they feel comfortable and safe.
January 6, 2021
Good Posture is Your Partner for Mobility
Why is Good Posture Your Friend For Mobility?
If you’re a busy adult who’s committed to staying active (maybe you hike or kayak on the weekends) and you want to be healthy to keep doing those activities…you must have good posture. Good posture is your ally for mobility by helping your skeletal system stay aligned and your muscles and joints limber. Here’s how to do that with just four simple “posture” tips.
Tip #1 “Who is that sitting over there?”
We’ve all glanced across a crowded room and spied a divine human emanating confidence and grace just by the way they are seated. Keep reading to see how that could be you!
Why seated posture is a big deal
We live in a society where many of us sit while commuting to work, sit at work, and sit again on the way home. Then, we sit to eat dinner and wonder why our backs are sore and stiff. At that point, all we want to do is sit on the couch and watch tv or read.
The truth is, sitting is one of the worst positions for our bodies because it increases the pressure on our backs exponentially and shortens our hip flexors.
You can prevent spine discomfort, avoid poor postural habits and increase your confidence when sitting by:
- Supporting your lumbar spine with a small pillow or a rolled towel.
- Placing your feet flat on the floor with legs at 90 degrees.
- Aligning your head with your spine
- Keeping your chin parallel to the floor
- Pulling your shoulders back by slightly squeezing your shoulder blades together
Commuting in your car
Using the tips above in referring to your daily commute to or from work, place your hands at 4:00 and 8:00 on the steering wheel instead of 10:00 and 2:00. This position is more ergonomically correct because your arms are bent at 90 degrees and your elbows are right by your sides.
Sitting at your desk
The same tips apply if you are sitting at your desk in front of your computer. Keep your arms bent at 90 degrees with fingers on the keyboard and make sure your monitor is at eye level.
Taking a load off
Another option to combat sitting throughout the day is to decompress from gravity. Simply lie down. Why not watch tv while lying on the floor or the couch?
Tip #2 Standing posture for your best first impression
Nothing says confidence like a person standing tall with a smile on their face. Chances are that person is smiling because their posture makes mobility their friend.
You can radiate your own confidence simply by following these standing tips:
- Planting your feet hip width apart
- Evenly distributing your weight in both legs with a natural arch in your back
- Slightly pulling your shoulder blades together and keeping your chin parallel to the floor
- If you have to carry a bag try to choose something where the weight is evenly distributed across your torso and held close to your body, such as a backpack.
Tip #3 Lugging laundry, groceries and children?
Think of the many times during the day when our bodies act as transportation for something or someone.
We can continue to stay limber and safely mobile by following these lifting tips:
- Bending with the legs to pick up the item
- Holding the weight close to your body
- Lifting with your legs without rotating or twisting your body
*For a great core exercise that carries over to rotating your body, check out this video on how to do a Russian twist*
It can be slightly tricky if you need to lift and hold weight on one side of your body, such as lugging a basket filled with laundry, a bag full or groceries or a child on your hip. This creates an uneven bend in the spine and loads the tiny joints of the spine with all the weight on one side.
You can safely carry weight on one side of your body by:
- Shifting the weight from side to side often
- Engaging the abdominal muscles to help support the back.
Tip #4 Who doesn’t want rejuvenating beauty sleep simply by practicing good posture?
Sleeping sounds restful, but our sleeping posture can determine how our skeleton aligns and our muscles and joints stay limber. When you sleep on your stomach the joints in your lower back can jam together by hyperextending. It also doesn’t help the creases on your face caused by the pillow.
How to sleep well rested with crease-free skin
- Sleeping on your back with knees bent slightly
- Or sleeping supported on your side for a straight spine
We spend a third of our lives sleeping, so make sure to rotate that mattress and pretend you’re Goldilocks seeking a mattress that is not too firm nor too soft but just right.
Bonus Tip
Add movement wherever you can, such as choosing the stairs at work and walking at lunch time.
Good posture is your friend for mobility and by following these simple posture tips you’ll stay limber to enjoy your favorite fun activities.
If you found this article helpful, please consider sharing it and check back for more tips from the coaches at Hybrid Fitness…and remember small steps, big results.
To watch the video format of this article, click here:
https://www.youtube.com/watch?v=ATWlf45NlnE
If you’re just getting started on your fitness journey, and not sure where to start, check out our newest article here:
Getting Started with your Health & Fitness Routine
Cathy grew up in NH surrounded by a large, loving family, where she learned generosity and hard work. She now models that for her two children. She was inspired to become a fitness coach when searching for ways to become more healthy herself after a life-threatening illness.