-
Blog
Mobility
May 16, 2023
New Yorkers on the Move!

Coach Cathy recently spent a long weekend in New York City and observed New Yorkers in action.
Walking around the city (Manhattan and Brooklyn), I noticed how many people were huffing it. Whether walking to or from work or the gym, running errands, or walking/running as a form of physical exercise, they were all trucking at an impressive clip—no slow pokes.
I picked up my pace and wondered if city folks exercised more daily than folks in Midcoast Maine. The answer is yes, probably because it’s their way of life. They must walk at least part of the way to their job, school, gym, grocery store, or a night out. We have many places to walk and hike on the coast, but it’s more for recreation and not a necessity.
Over the years, there has been much speculation about how many steps the average American takes daily and how many steps per mile. According to Mayo Clinic research, the average American walks 3,000 to 4,000 steps daily, roughly 1.5 to 2 miles. Other sources, such as verywellfit.com, say the average is 5,000-7,000 steps daily. Either way, it’s still less than the golden rule of 10,000 steps.
Did you know the 10,000 steps recommendation is not grounded in scientific research? Although impressive, 10,000 is a nice round number used in advertising for tracking devices. There are many things to consider when choosing your daily step goal, such as age, height, length of stride, occupation, and fitness goals. The number of daily steps is not one size fits all. Gradually increasing your step goal is more sustainable than jumping from 2,000 to 10,000 overnight.

While I enjoy visiting NYC, I craved greenery versus pavement as I traversed the boroughs. NYC prides itself on the number of parks open to the public. The parks provide safe spaces for small children and pets to burn energy and quiet spots for relaxing away from the hustle and bustle of the city. They are also quite beautiful, with flowers, trees, and boardwalks along the water.
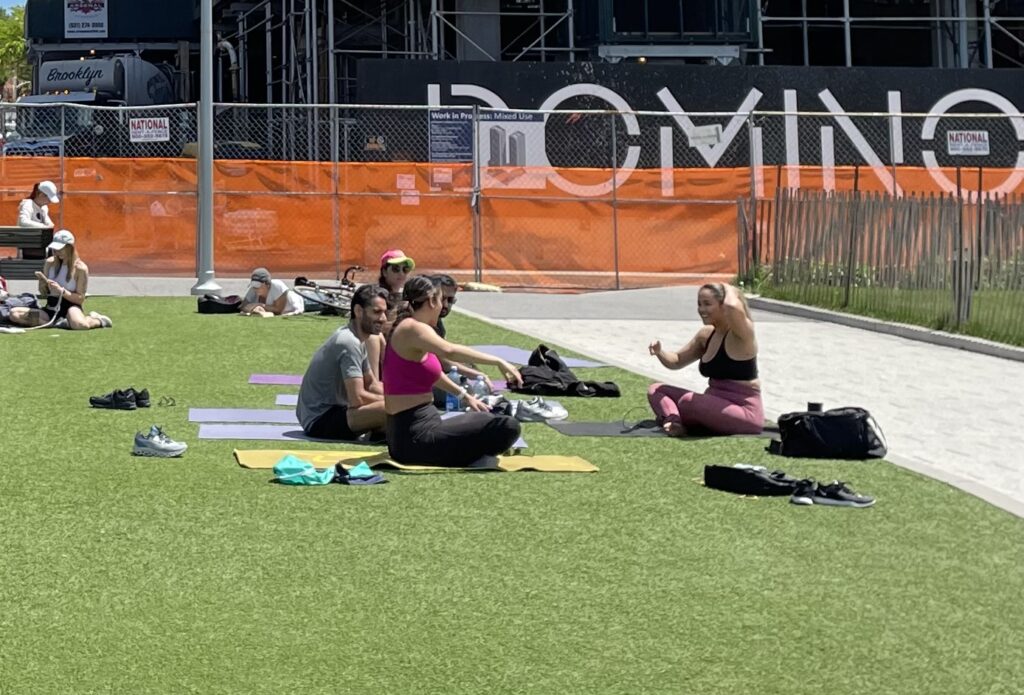
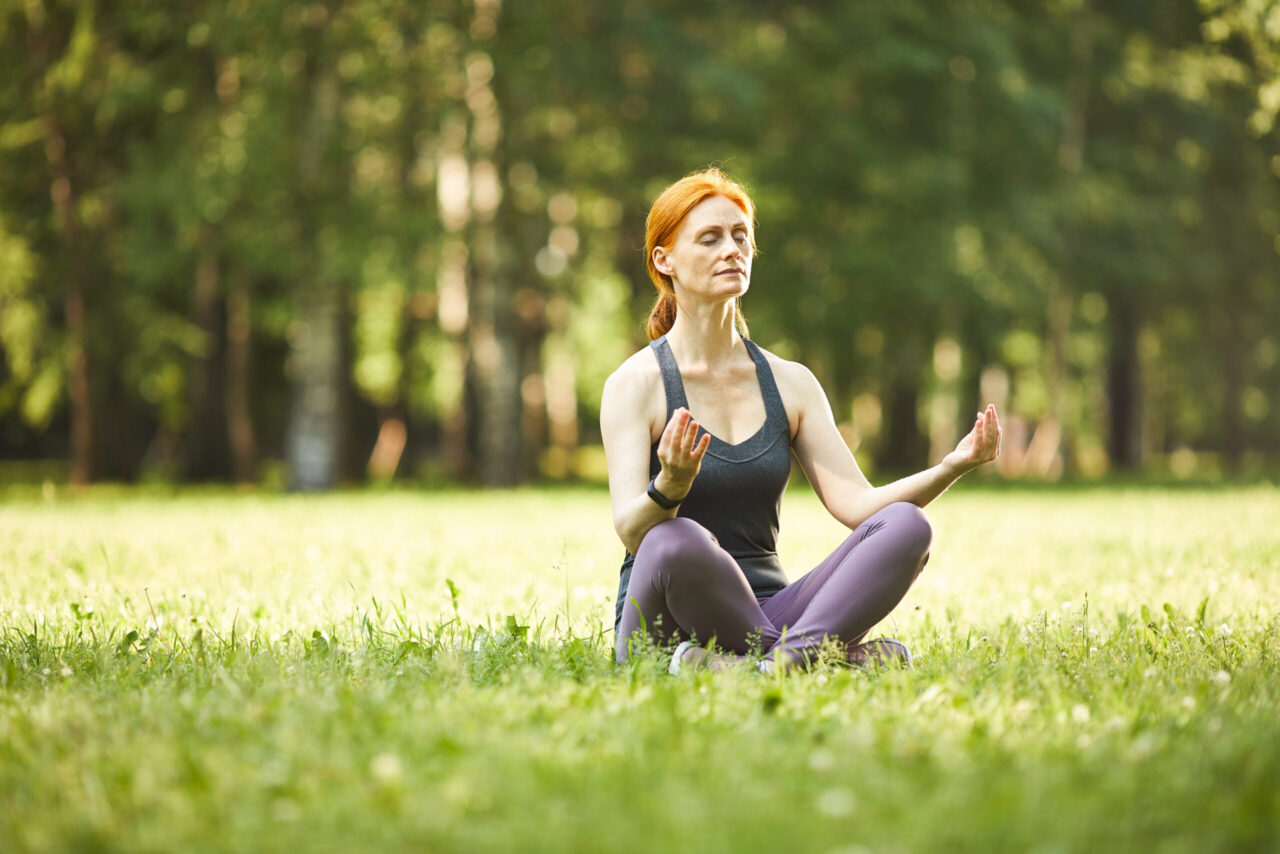
I meandered through one of the parks, searching for a place to sit to eat my chocolate glazed donut from Peter Pan Bakery. Yes, the Brooklyn bakery in Spider-Man where MJ works! Maybe I stood in the exact spot where Zendaya and Tom Holland stood while making the movie. From my comfy bench, I noticed that aside from flying feet, New Yorkers were moving in many ways. I saw yoga classes on the grass, calisthenics on the sidelines, runners everywhere, and an awe-inspiring bike tour.

It was the 45th Anniversary of the TD Five Boro Bike Tour by Bike New York. It’s a 40-mile bike ride through Brooklyn, Queens, Manhattan, The Bronx, and Staten Island. The streets are closed to cars; participants can use their bikes if they own or rent city bikes. It is quite the event uniting 32,000 people to fund building miles and miles of bike-friendly lanes and fundraising for many individual charities.
The takeaway is that New Yorkers certainly know how to get moving and keep moving every day. For the record, I had no guilt about eating my chocolate glazed donut while watching the fury of exercise surrounding me because I had 11,000 steps, including 32 flights of stairs, and it was only 10:00 am—still lots of time for yoga in the park. Even though I am back in Maine, moving like a New Yorker will help me close the rings on my fitness tracker. Time to increase my step goal!

Cathy grew up in NH surrounded by a large, loving family, where she learned generosity and hard work. She now models that for her two children. She was inspired to become a fitness coach when searching for ways to become more healthy herself after a life-threatening illness.
January 10, 2022
Pain Free in 3 Months (New Yoga Classes!)
My back was completely smoked.
Sharp pains shooting down my right leg…
The fear of getting out of bed knowing one wrong move could ruin the entire day.
Stretching always helped (especially since I couldn’t even touch my toes!)…
…but I never was disciplined enough to stretch on my own.
Then one day, I decided to sign up for a yoga class one time a week.
After a few weeks, I saw almost immediate relief.
It was actually crazy how much it helped me.
Try your first yoga class with Hybrid Fitness today!
I wasn’t very flexible to start, but the instructor was very helpful in helping me modify some exercises so it worked for me!
I continued on for 3 months, and for several years the pain was minimal or non-existent.
I can’t say it would do the same for you… but this was just my experience.
Try Yoga for yourself! <<Brand New Classes in Warren, ME!
I had others who took the class beside me who weren’t in pain at all!
They were just looking for a way to have more energy, build strength, & keep themselves in good shape!
Yoga is a fantastic, low impact way to do that!
We want to offer a very individualized program in our new yoga sessions, so we are limiting them to 8 people a class!
You won’t have to worry about getting lost in a big group!
Try Hybrid Yoga out for (1) Month!
Click here to sign up: https://joinhybridfitness.com/yoga
Have a great day,
Love,
Coach Hunter
#SmallStepsBigResults
https://joinhybridfitness.com/yoga

Hunter grew up using fitness as a way to boost his low self-esteem. This led him to later found Hybrid Fitness in 2014, where him and his team create a fun, safe training environment for busy adults looking to better their health without doing crazy crash diets or excessive burpees.
April 30, 2021
Best Exercises To Fix Neck Pain
What a Pain in the Neck!

If it’s not your boss with a last minute request on a Friday afternoon, or your in-laws showing up unexpectedly for the weekend, or even your dog shredding your couch cushions while you’re out on a hot date, then maybe the pain in the neck in your life is just that…pain in the neck.
If your neck is annoyingly sore, especially by the end of each day, let’s dive into why that is, and what you can do about it. This article shares a few simple tips, tricks, and the best exercises to fix neck pain.
Before following any of the suggestions in this article, please consult your physician if your neck pain:
- Is getting significantly worse.
- Exists for more than 6 weeks.
- Comes on sharp and quickly.
- Is accompanied by nausea.
Do You Really Have Rocks in Your Head?

One reason why your neck aches is that it may feel like your head is filled with rocks. Not necessarily true in most cases, but your head is HEAVY!
Weighing in between a whopping 10-12 pounds, your head not only affects your neck, but it also has a significant impact on the rest of your spine. Envision trying to balance a bowling ball at the top of your spine!
Seven small vertebrae in your neck, as well as, muscles, ligaments and tendons all working together support everything you do with your head. It’s a big job and something that most of us take for granted. So, making sure you maintain good posture is key to putting less torque on the neck.
The Impact!
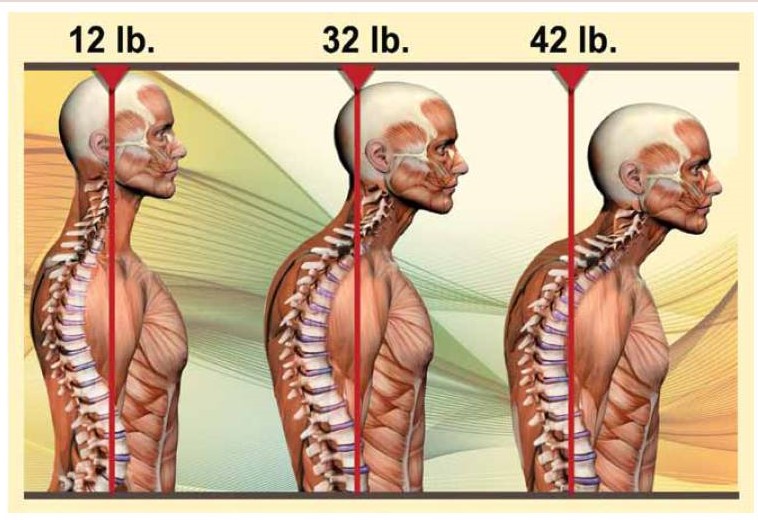
The position of your head impacts the pressure on your spine, meaning that for each inch your head moves forward, an additional 10 pounds of weight is felt on your spine.
So, for example, looking down at your phone (45 degrees) elevates the pressure on your spine from about 11 pounds (neutral) to 48 pounds. That’s huge!
If your neck and back are painful, what is happening at the top of your spine may be a contributor.
Let’s talk about perfect posture:
- Hold your phone up in front of your face instead of looking down
- Make sure you are looking straight at your computer monitor with your head neutral over your shoulders
- Ears over the shoulders by pulling chin in slightly and lengthening the back of the neck
- Shoulder blades pulled together and down slightly
- Chin parallel to the floor
Stretching Your Sore Neck Muscles

There are a variety of stretching exercises that you can do to alleviate and avoid neck pain. Here are some of my favorite:
Chin Tuck:
- Standing or sitting tall
- Chin parallel to the floor
- Pull chin in with ears over shoulders
- Hold 1-3 seconds
- Repeat for 10-15 repetitions
Wall Slides:
- Standing against a wall
- Pull chin in and lengthen the back of the neck
- Place arms laterally against the wall bending at the elbow for 90 degree angles
- Keeping your back against the wall by engaging your abs
- Extend arms directly over head by sliding arms up the wall to feel a stretch in your chest
- Return your arms to the starting point
- Repeat for 10-15 repetitions
Shoulder Blade Squeeze:
- Standing or sitting tall
- Ears aligned over your shoulders
- Squeeze shoulder blades together keeping shoulders down
- Hold for 1-3 seconds
- Repeat for 10-15 repetitions
Look Both Ways:
- Standing or sitting tall
- Ears aligned over your shoulders
- Slowly look directly left over your shoulder
- Return to center
- Slowly look directly right over your other shoulder
- Repeat for 5-10 repetitions each side
Beware of Traps!

Is your neck sore because you are holding a lot of tension in your trapezius muscle?
It’s the large triangle shaped muscle that runs from the base of your skull (occipital bone), down the center of your back (thoracic vertebrae), and laterally to your shoulders (scapula).
Simple Suggestions to follow to avoid being tripped by your traps are:
Shoulder shrugs:
- Hold arms down by your sides
- Lift shoulders up and back in a circular motion
- Repeat for about 10-15 repetitions
Trap stretch:
- Interlock fingers behind you and pull your fist to the left side of your waist
- Hold your left elbow out laterally away from your body
- Slowly lean your left ear to your left shoulder toward your elbow.
- Hold for 30 seconds
- Repeat on your right side
If interlocking fingers behind you is a challenge:
- Simply lean your left ear toward your shoulder
- Loop your left hand over your head
- Apply light pressure to the right side of your head, increasing the intensity of the stretch slightly
- Hold for 30 seconds
- Repeat on your right side
The above exercises not only help to increase neck strength and flexibility, but help improve posture, too!
Postural Kyphosis, Say What?

Postural kyphosis is curvature of the spine that forms a hump on the upper back. The hump can be located at the base of the neck, or slightly lower between the shoulder blades. Because of this, the hump is referred to as buffalo hump, round back, hunch back, as well as the outdated and offensive term dowager’s hump.
Accordingly, contributors to the formation of a back hump are:
- Carrying extra weight – extra pounds are a challenge for the skeletal structure of your whole body. However, fat also accumulates on the spine as protection and increases the presence of a hump
- Poor Posture – allowing your body to slouch can create physical misalignment
- Lack of Fitness – keeping your muscles strong and your limbs mobile allows your body to hold it’s frame properly
- Injury or vertebral compression fractures in which part of a vertebrae collapses
- Degeneration of the spine, a.k.a osteoarthritis, in which function and ability are impaired
How You Can Prevent or Correct Your Hump

You can prevent the formation of a back hump or decrease the hump you have by making some changes that involve more than just exercises for your neck and back, such as:
Sitting and standing tall, as well as sleeping with appropriate support – Your posture determines how your tissues support your bones in proper alignment – see the Hybrid Fitness posture article HERE
Stretching the pectoral muscles of your chest to allow the front of your torso to open, and your shoulders to move back and align with your hips. To do this:
-
- Stand in an average doorway
- Place arms at 90-degree angles on either side of the door frame
- Step one foot forward and lean forward with your sternum while relaxing the muscles of your chest
- Keep your head aligned with the spine, with ears over shoulders
- Increase the stretch by leaning forward a little at a time as you inhale and exhale
- If the doorway is too wide, do one side at a time
- If this stretch is easy, raise arms higher against the door frame
- Hold for 30 seconds
Stretching the muscles of your upper back to pull the shoulder blades together broadening the chest. To do this:
-
- Face a wall standing a few feet away with feet at least shoulder width apart
- Place both hands flat against the wall above head height
- Keep your neck and head aligned with your spine
- Slowly push your butt back as you lean into the wall
- Inhale and with each exhale sink a little deeper into the stretch
- Hold 30 seconds
Building strength in your back, shoulders and arms by doing a variation of a push-up.
*Note – before you discount this exercise thinking it’s too hard and no fun, see the Hybrid Fitness article on how to get your first push-up and variations of push-ups HERE.
The Miracle of Massage

Another option is to receive a massage from a licensed therapist in order to help target muscle “knots” specifically. It’s beneficial to relax as much as possible while the therapist is massaging the muscle. Slow inhales and exhales can help here.
In a pinch, an alternative to a massage:
- Place a tennis ball in a long sock and hang the ball over your shoulder
- Stand with your back to the wall with the ball between your body and the wall
- Locate the ball just below your neck to left side of your spine
- Bend your knees to roll your back over the ball in a vertical line between your shoulder blades on the left side of your spine.
- Then, move the ball to the right side of your spine and roll vertically again.
- Concentrate longer on areas where you have muscle soreness or pain until the muscle relaxes.
Be sure to hydrate with water after any massage in order to help your body flush toxins that have been released into your bloodstream. As if you needed another benefit to drinking more water!
The Next Step!
There you have it! The best exercises to fix neck pain.
These exercises will help you stretch parts that are sore, and build strength in your neck and back muscles to prevent the pain from returning.
You don’t need to large chunks our of your day to do these. Implement them slowly, and one at a time. Build a habit of doing them, and I promise, you’ll see relief!
I would even recommend adding them into your routine even if you don’t experience any pain currently. This will help prevent any soreness or pain from even starting!
If you found this article helpful, please check out the other articles from Hybrid Fitness coaches HERE
Hybrid Fitness YouTube Channel
Cathy grew up in NH surrounded by a large, loving family, where she learned generosity and hard work. She now models that for her two children. She was inspired to become a fitness coach when searching for ways to become more healthy herself after a life-threatening illness.
March 3, 2021
Easy Tips To Help Low-Back Pain
(From the Comfort of Your Own Home)
Are you in search of more easy tips to help low-back pain? Your requests for MORE tips prompted the creation of this article. And here at Hybrid Fitness, we give the people what they want!
Not only are we going to provide you with suggestions that will help alleviate low-back pain that are within your control, we’re also going to dive into the risk factors of low-back pain. Warm up those heating pads, here’s Part II!
DISCLAIMER: Before following any of these easy tips to help low-back pain, please refer out to a doctor or other medical professional.
When is Your Low-Back Pain Just Too Much to Address with Easy Tips at Home?
It’s probably time to seek the advice of a medical professional if you have:
- Low-back pain that comes on sharp and quick
- Pain that does not diminish within 6 weeks by performing strengthening and stretching exercises consistently
- Pain that flows down one or both legs
- Other symptoms that need medical attention that may be related to your low-back pain, such as if you have a fever accompanying back-pain that may indicate an infection of some kind in your body
- Experienced serious trauma from a fall or another kind of accident
- Any numbness or tingling
- Bouts with incontinence
- Pain at night that wakes you up from sleep
- Limbs not functioning properly
- Unexplained weight loss
- That feeling you get deep down in your center when your body tells you it’s trying to deal with something serious that needs professional medical attention.
What is Within My Control in Regards to Alleviating Low-Back Pain?
Your chance of having low-back pain at some point in your life is based on the following risk factors:
- Age – our strength and flexibility wanes as we get older
- Stress – our bodies physically hold stress, and give us signs that it needs to be addressed through pain
- Fitness level – as the saying goes, “use it or lose it”, a sedentary lifestyle is not your friend!
- Prolonged poor posture
- Disease, such as arthritis or cancer
- Pregnancy – carrying another human inside your body is nothing short of a miracle in more ways than one!
- Parenting – lugging not only young children, but all that goes along with them, can take its toll on your low-back
- Weight gain – it’s a big ask of your spine and hips to carry more weight than is healthy for your body frame
- Genetics – thank mom and dad for this one!
- Occupational risk factors – work demands, including heavy lifting and repetitive motion
- Smoking – People who smoke have more back pain as compared to those who do not smoke ~ maybe it’s from coughing?
- People who experience depression, anxiety, or other psychological conditions tend to have more back pain than those without these conditions
Obviously, some of these things listed are out of your control (genetics), but others you have the power to address in order to eradicate pain and discomfort in your low-back.
Here’s a few ways to alleviate that low back pain before even getting out of bed in the morning.
Remember ~ if any exercise increases your pain, dial back the exercise or stop entirely. Preferably, you want to challenge your body in a pain-free way to right itself.
Easy Tip #1 From the Comfort of Your Own Bed
The “not-so-high” leg lift – To engage the abdominals for support of the low-back
- Lying on your back, bend one leg so the sole of the foot is on the bed
- Keep the other leg extended and muscles engaged
- Engage your abdominal muscles (Think laughing, or tensing up as if somebody is going to punch you in the stomach)
- Keep your back on the bed (no arching)
- Gently and slowly lift and lower the extended leg no higher than the knee of the bent leg
- Start with a few repetitions, and increase to 15
- Repeat with the other leg
If you can easily perform the above exercise, then try the next one. If not, stick with the one above, and check out the previous Hybrid Fitness article including easy tips to help low-back pain here – How To Improve Low-Back Pain
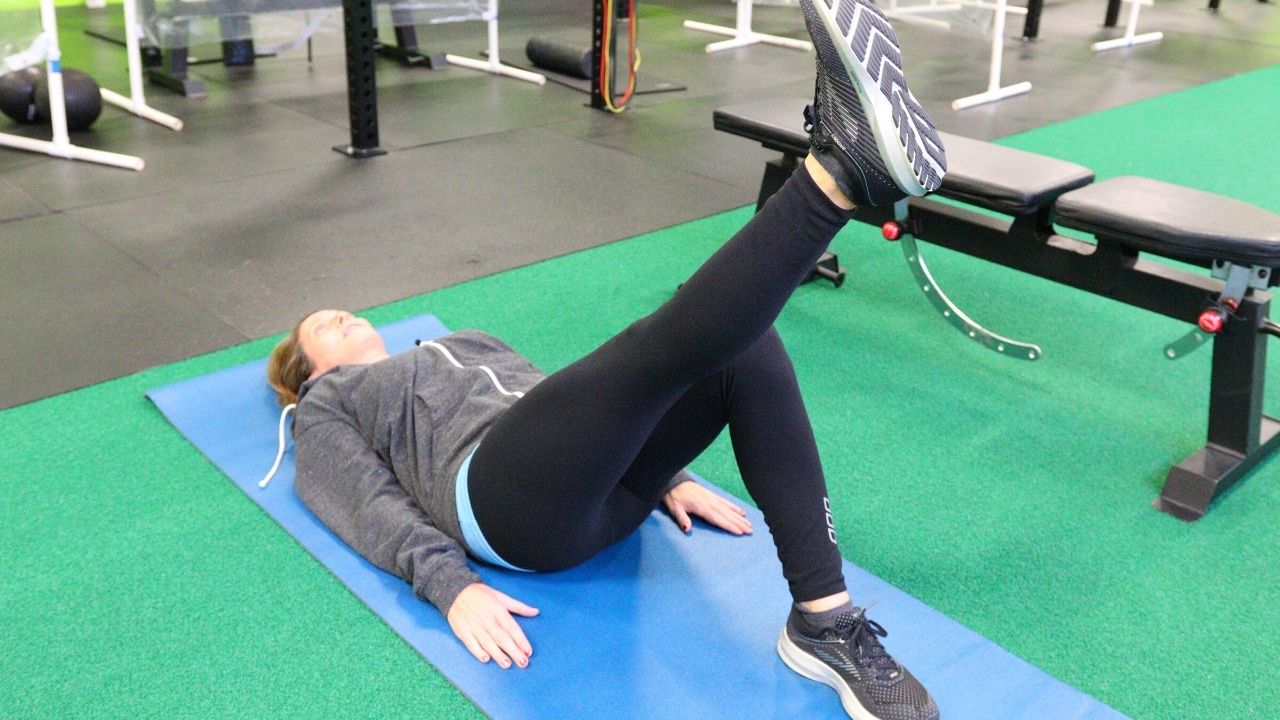
Heels to the Heavens – To stretch the hamstrings and calves on the back side of your leg
- Lying on your back, fully extend your legs
- Lift one leg toward the ceiling, while supporting with hands (other leg can be straight or bent with the sole of the foot on the bed)
- Try to pull the toes down toward your body
- Push through the heels toward the ceiling
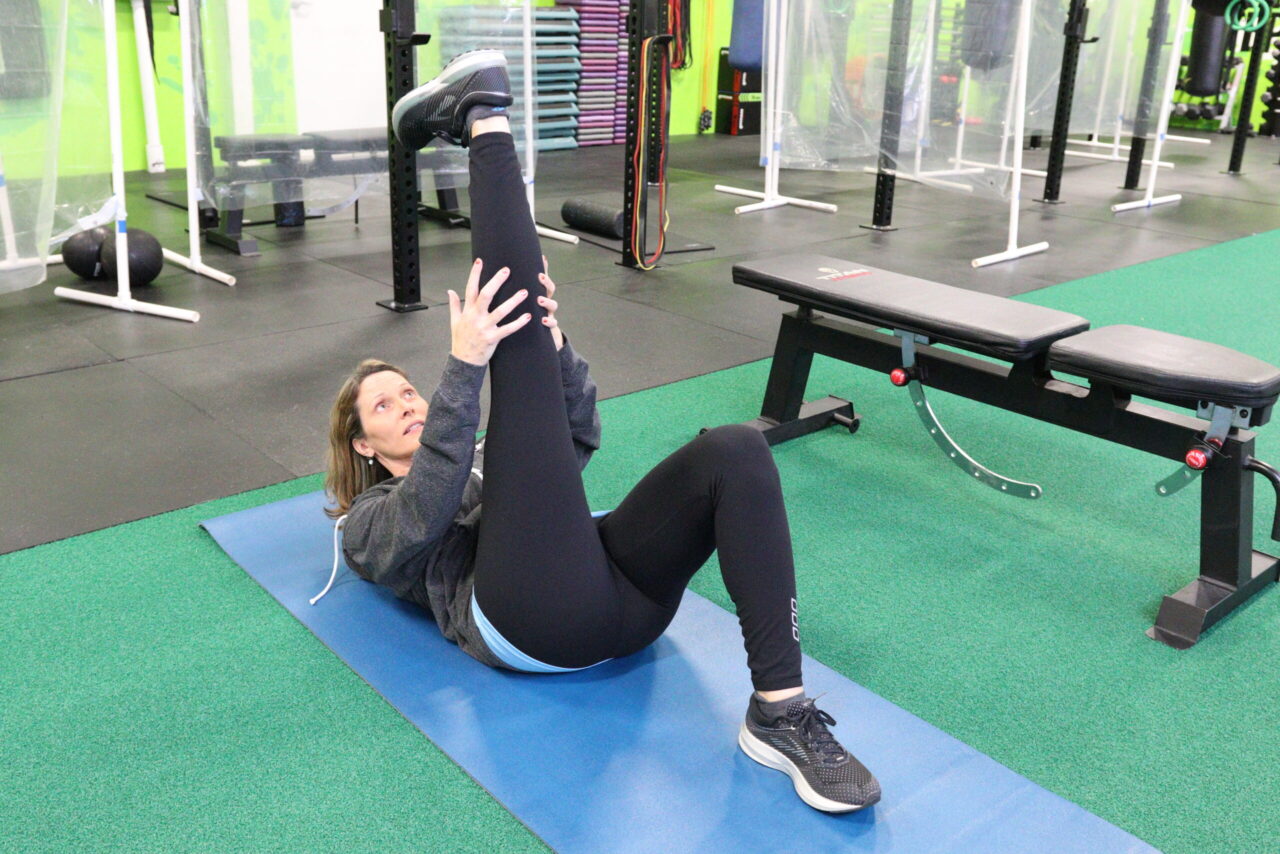
- For more flexible folks, you can either lift both legs together, or
- Using both hands on one leg at a time, slightly pull the leg toward the face
- Keep your back on the bed (again, no arching)
Keeping the Hip Flexors “Hip” – To decrease the pull on your pelvis in the front of your body
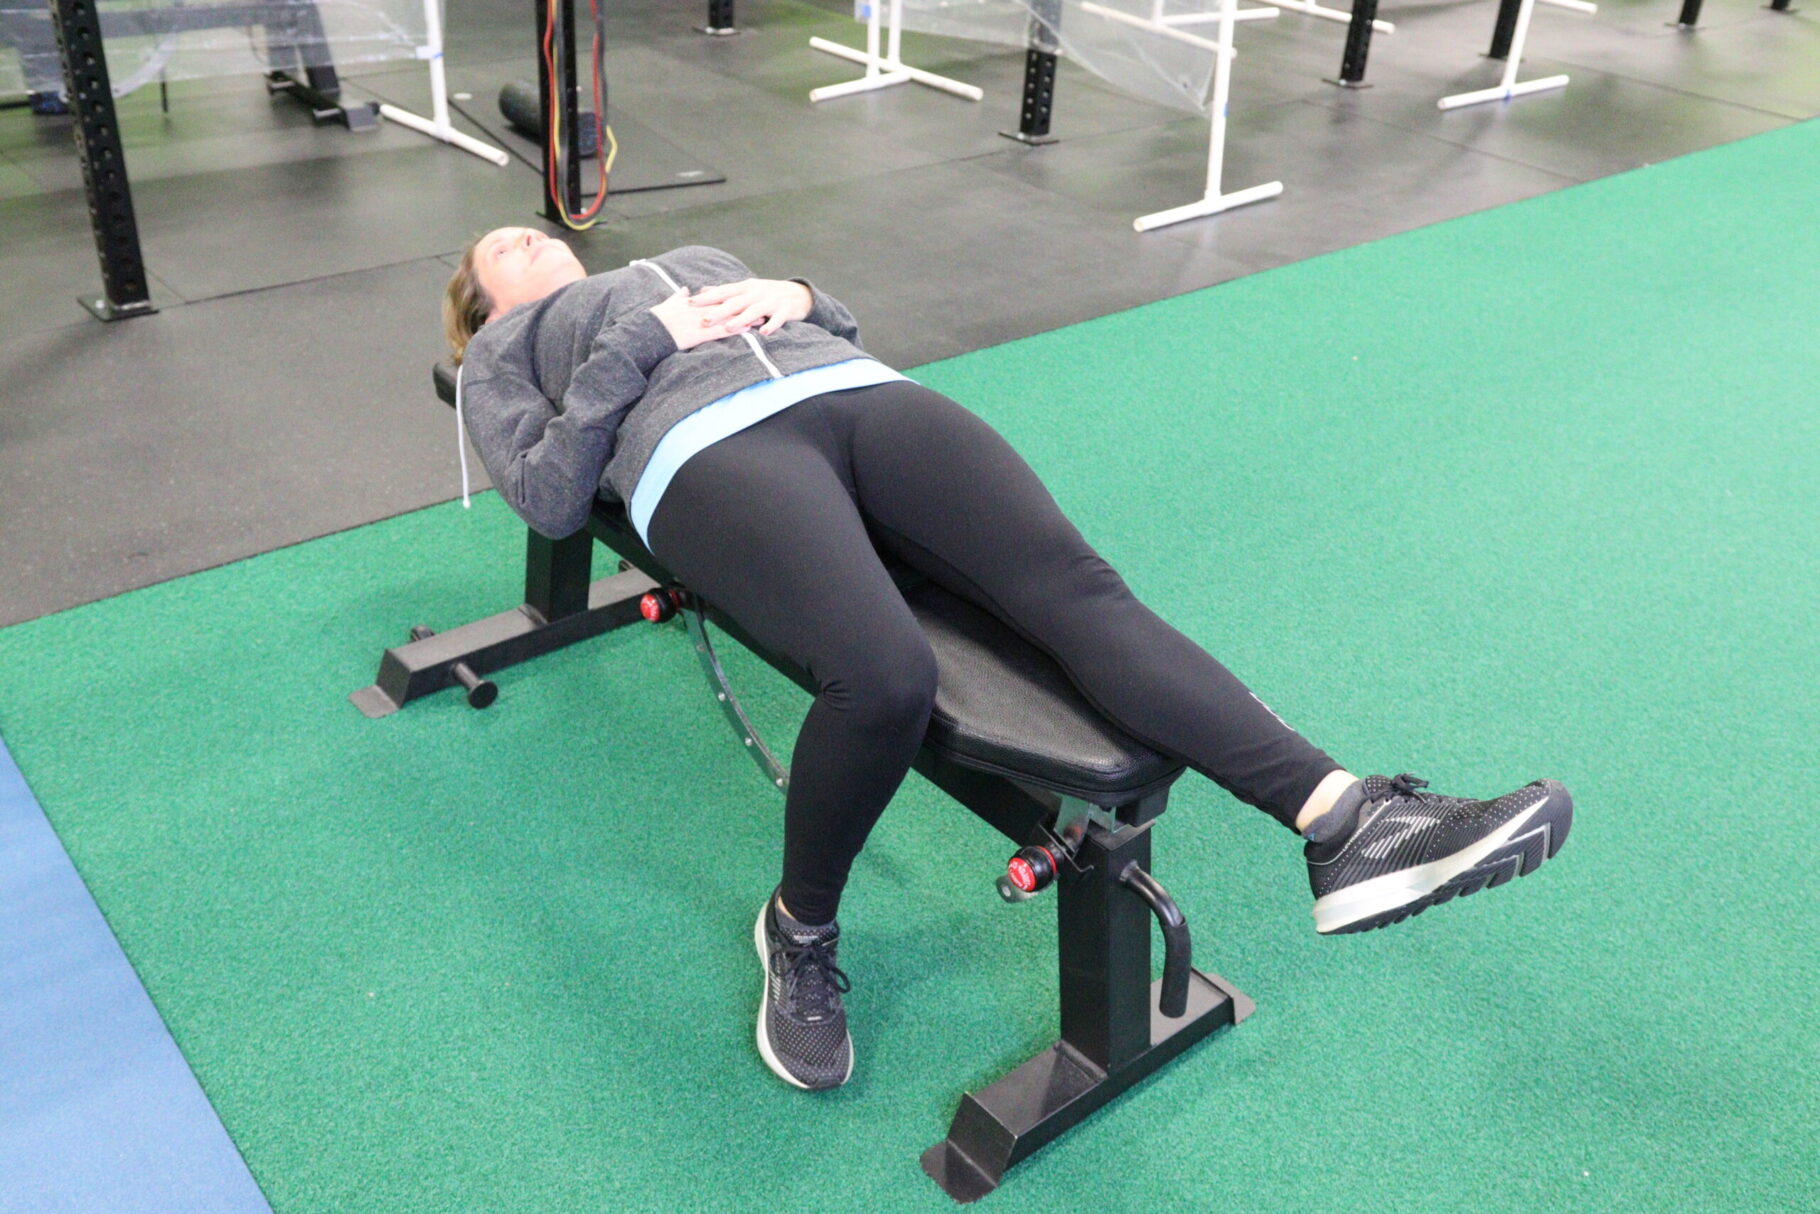
- Lying on your back on the edge of your bed
- Slide one leg off the edge so the lower leg and foot hang down
- Lift your other knee toward your chest and hold
- Start holding for even 10 seconds and ideally increasing up to 30 seconds based on your comfort level
- Repeat on the other side
Be patient with your body as you get up and move about your day. Here are a few more exercises to stretch a tiny but mighty muscle.
Easy Tip #2 – Priming Your Piriformis – The petite muscle that covers your sciatic nerve
The Figure 4 Stretch
This the most versatile and effective stretch for your piriformis, because there are 3 ways to perform the stretch depending on what works for your body.
Sitting
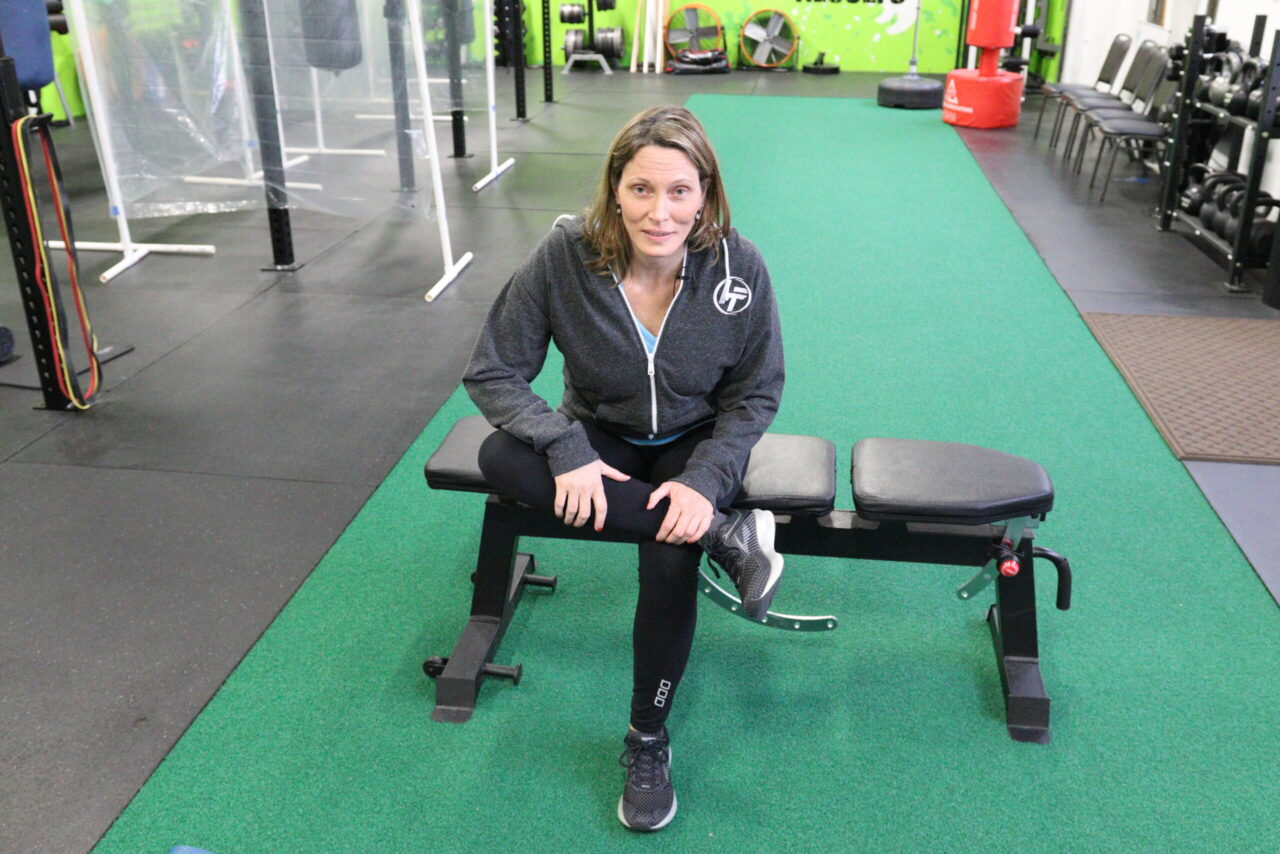
- Sit near the edge of your chair/bed/couch with a straight back
- Legs hip width apart and feet on the floor
- Cross one ankle over the opposite knee
- Be sure to have your shin aligned under your knee of the leg that is touching the floor
- Slowly lean forward slightly with a straight back toward your crossed leg
- Feel the stretch along the side of your crossed leg and in your hips and buttocks
- Hold for 30 seconds, rescind if painful
- Repeat on the other side
Lying
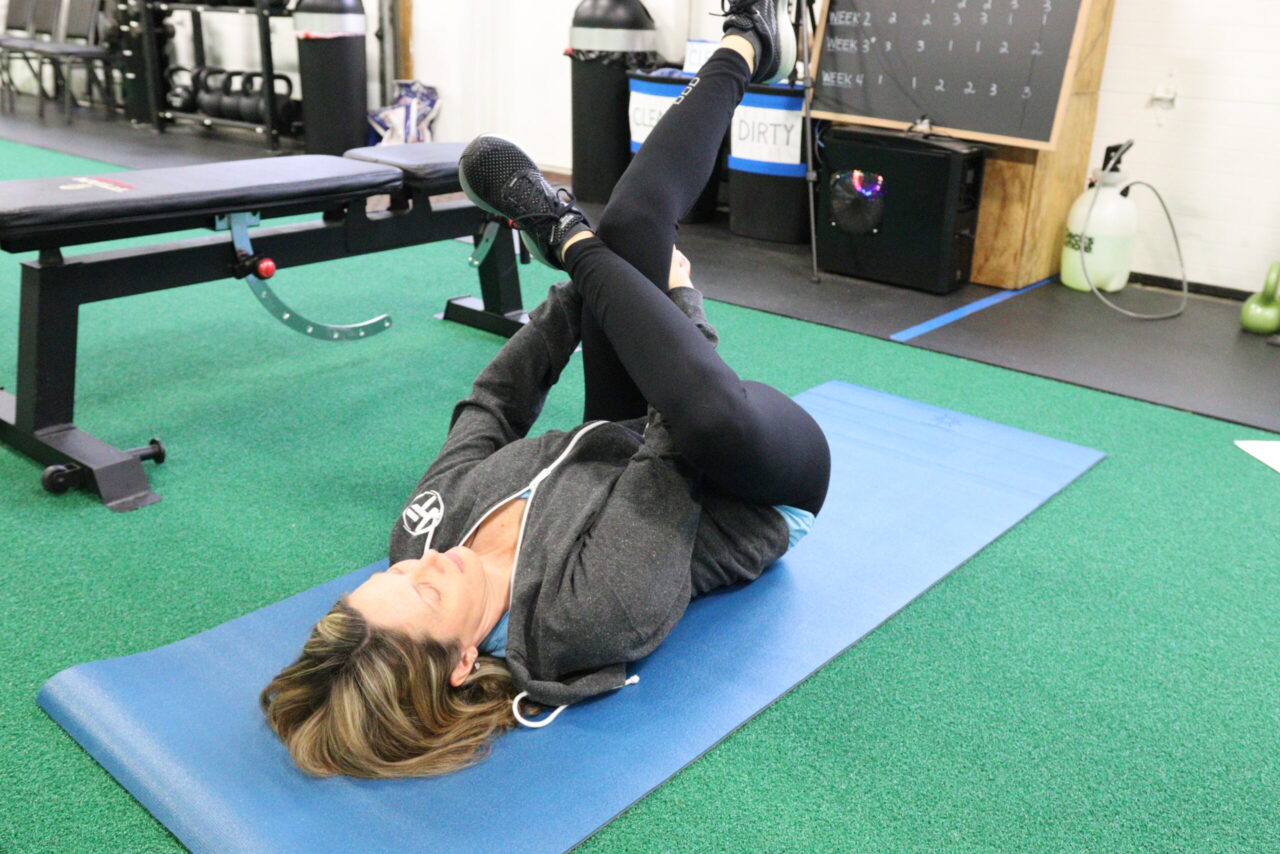
- Lay on your back on a mat or floor
- Bend one knee with the sole of the foot on the floor
- Bend the other knee and place ankle on top of opposite knee
- Gently grasp both hands behind the knee of the bottom leg
- Using arms lift the bottom leg towards your chest
- Feel the stretch in your glute of the top leg
- Hold for 30 seconds, rescind if painful
- Repeat on the other side
Standing
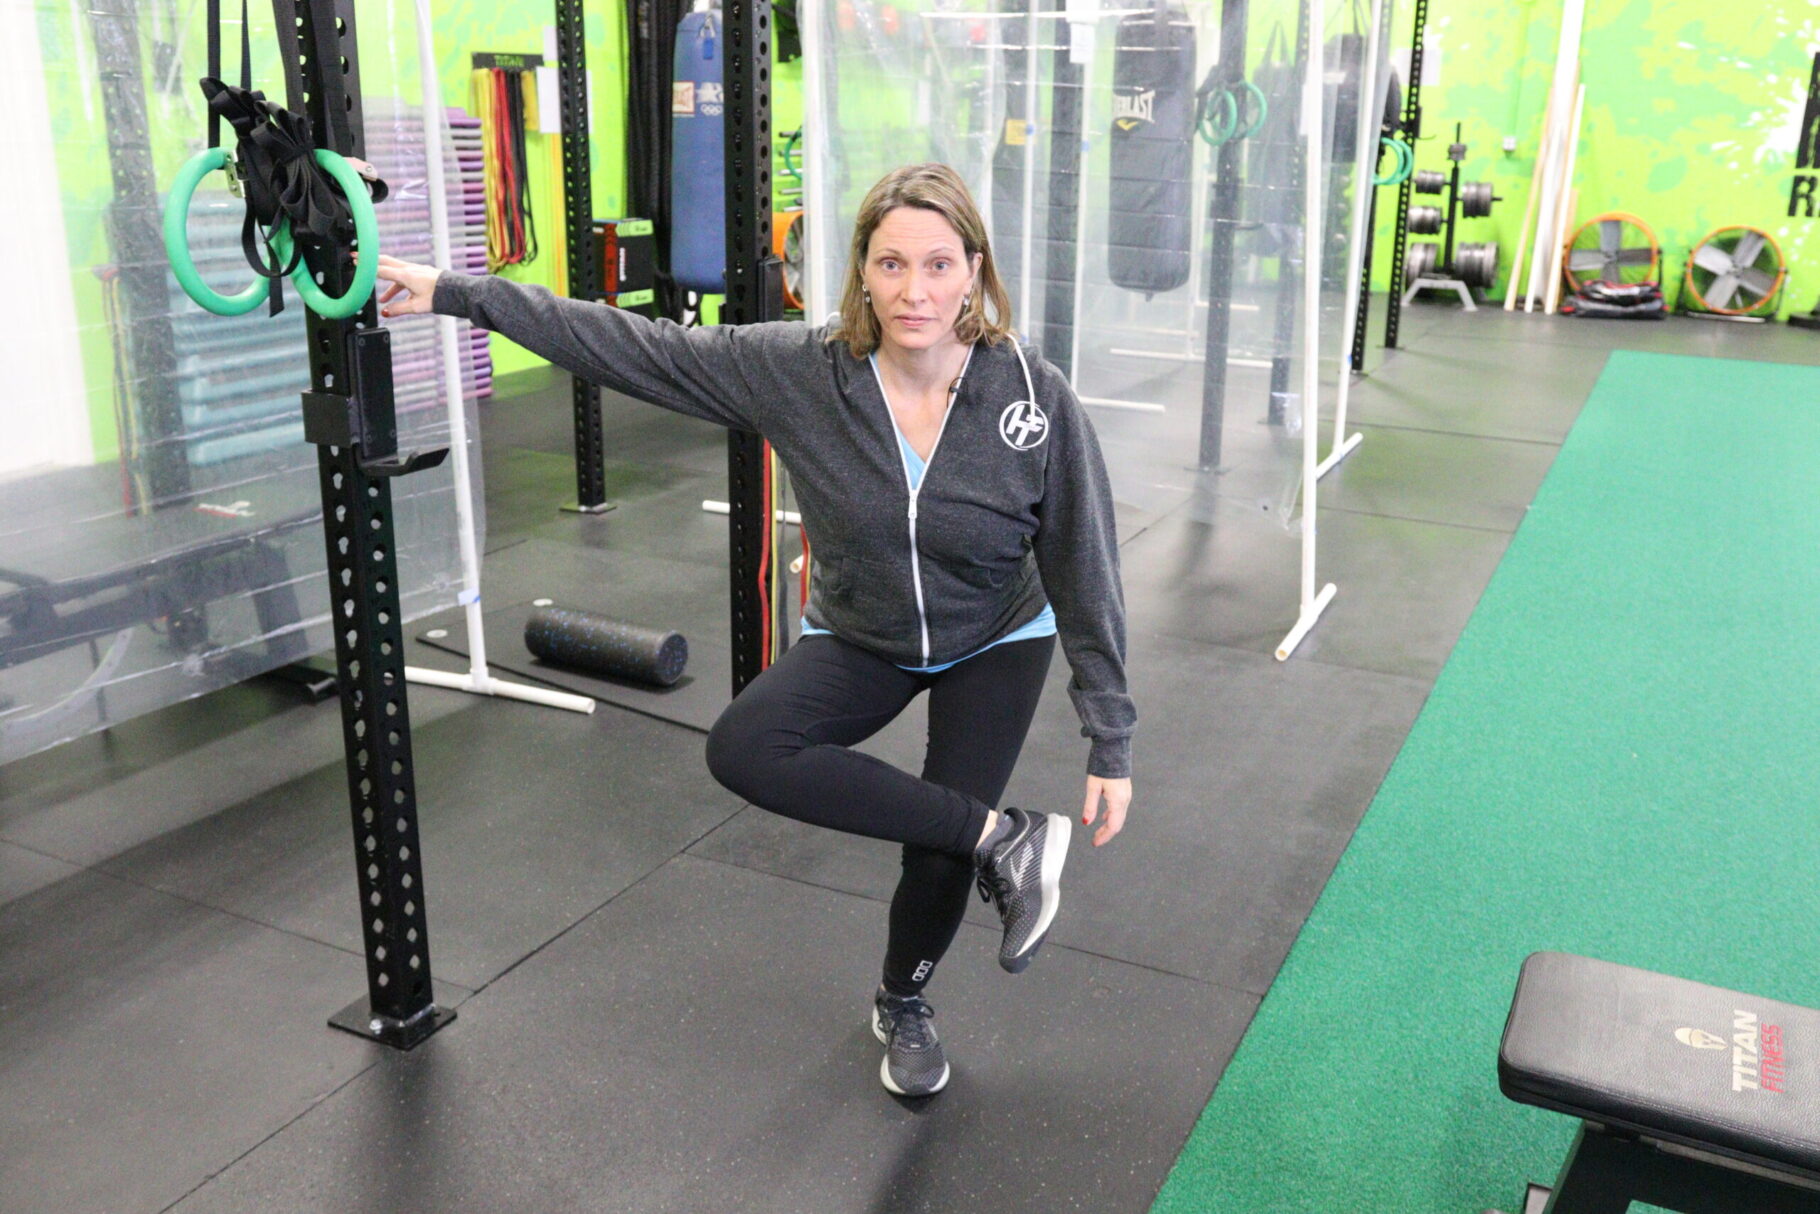
- Stand where you can hold onto something
- Place one ankle above the knee of the opposite leg
- Brace yourself on something with your hands for balance
- Try to keep your back straight and your chest upright while slowly lowering toward the floor by bending the grounded leg
- Bend down until you feel the stretch in the side of the leg and glute of the top leg
With any of these exercises make sure you are breathing. That’s right. Do NOT hold your breath. Your body needs fresh oxygen to move. Instead, start with an inhale and as you exhale try to increase the stretch.
Following one of these Figure 4 stretches can help stretch the piriformis so it doesn’t aggravate the sciatic nerve, and cause pain in your low back or down your legs.
Another option is to get a deep muscle massage from a qualified professional to help muscles release tension.
Easy Tip #3 – Breathe!
Yes, breathe to relax your body, including the tense muscles that may be contributing to your low-back pain. Believe it or not, a lot of us do not breathe fully, especially when stress is present. If we are not mindful of our breathing we tend to hold our breath or take shallow breaths.
To release stress, relax muscles and cleanse your body with essential oxygen you can:
- Focus on taking slow, deep breaths for a few minutes a few times per day wherever you are in those moments; the car, washing dishes, folding laundry, raking leaves, etc.
- Use a square breathing technique where you inhale to the count of 4 (or whatever # works for you), hold for a count of 4, exhale to the count of 4, hold for a count of 4 and repeat for a few minutes.
- Breathe from your diaphragm by placing your hand on your abdomen and taking slow, deep inhales focusing on your abdomen expanding followed by a longer exhale. This stimulates your parasympathetic nervous system to calm your body and reduce your heart rate and blood pressure.
- Meditate while focusing only on your breath. Be mindful of the oxygen entering your body and the carbon dioxide leaving your body. Closing your eyes can help you keep focus on your breath.
Commit to Relieve Your Low-back Pain
Physical therapists hear some of their patients say that they are not getting better by doing the exercises prescribed only to find out they weren’t really doing those exercises enough at home to make progress.
To recap, for a pain-free low-back keep these guidelines in mind:
- Do your exercises! Faithfully everyday, even more than once a day if prescribed by a medical professional.
- Whatever exercise you do for one side of your body make sure to do the same for the other side of your body. Don’t just lift one leg, unless there is a medical reason for doing so.
- Don’t sabotage your efforts with poor posture. Make sure your work space is ergonomically correct. View the Hybrid Fitness Posture article for tips – Good Posture is Your Partner For Mobility.
- Breathe! Handle your stress and get your lymph system flowing to cleanse your system. You can do that just by breathing properly and you will feel better. Lymph fluid that is stagnant is not your friend.
- Be social! Why? Because humans are social creatures and connecting with others makes us smile and increases our chances to see the bright side of any situation.
- Keep Going! Healing, recovery and realignment of your low-back takes time (weeks, months, and even years!). Be patient with yourself. Your body is doing the best it can with what it has to work with to relieve your low-back pain.
It’s Time
Now that you have all of the tools you need, it’s time to put them to work! Take 1 or 2 of these easy tips to help low-back pain, and implement them on a consistent basis! Once you’ve done that, you should start seeing progress, and can trickle in additional tips over time!
If you’re looking for more easy tips to help low-back pain, check out one of our most popular YouTube videos here.
If you found this helpful, please consider subscribing to the Hybrid Fitness YouTube channel, and be sure to check out all the other articles from our coaches.
And remember…Small Steps, Big Results.
Cathy grew up in NH surrounded by a large, loving family, where she learned generosity and hard work. She now models that for her two children. She was inspired to become a fitness coach when searching for ways to become more healthy herself after a life-threatening illness.
March 2, 2021
How To Stay Active With A Desk Job
The Covid pandemic has impacted everyone, including myself. Since November of 2020 I have been working remotely from home. Some will say “that’s great!”. However, with working from home comes long hours of sitting at a desk and being indoors. Sure, I’ll get up from the desk every now and then, but definitely not as much as I did when I went to the office. Finally, I decided that enough was enough, and I needed to find ways to stay active with a desk job.
So, if you’re working remotely like me, or if you are in an office all day, these 4 tips are for you. Make sure and read until the end! The last tip is one of the most important, and should be implemented inside and outside of the office!
Put It In Motion

When we sit for long periods of time it can cause tightness in the hips, back pain, and a general feeling of tiredness from being in the same position.
The tips below will give you more energy, increased productivity, and better concentration. They are super simple to follow, and are guaranteed to make you feel more active throughout your work day.
Without further ado, let’s MOVE on to the tips! (see what I did there?)
Tip # 1: Move On The Hour
Take a walk to the water cooler or the break room, grab some coffee or a snack. Go over and talk to your coworker in the next cubicle or office. Wherever you choose to go, be sure to do it every hour.
Set a timer on your phone as a reminder to get up from your chair and away from your desk for even 5 minutes. You will come back refreshed and ready to keep working.
When we move our bodies, it helps to get our circulation going, increases our heart rate, and stretches out our muscles.
When we sit for long periods of time our bodies will feel it! Being too sedentary can come with aches and pains, feelings of fatigue, and it can even pose a risk of blood clots.
So, make moving throughout the day a priority for yourself and stick to it by doing the following:
- Make movement a daily habit
- Set a timer for every hour
- Commit to staying active
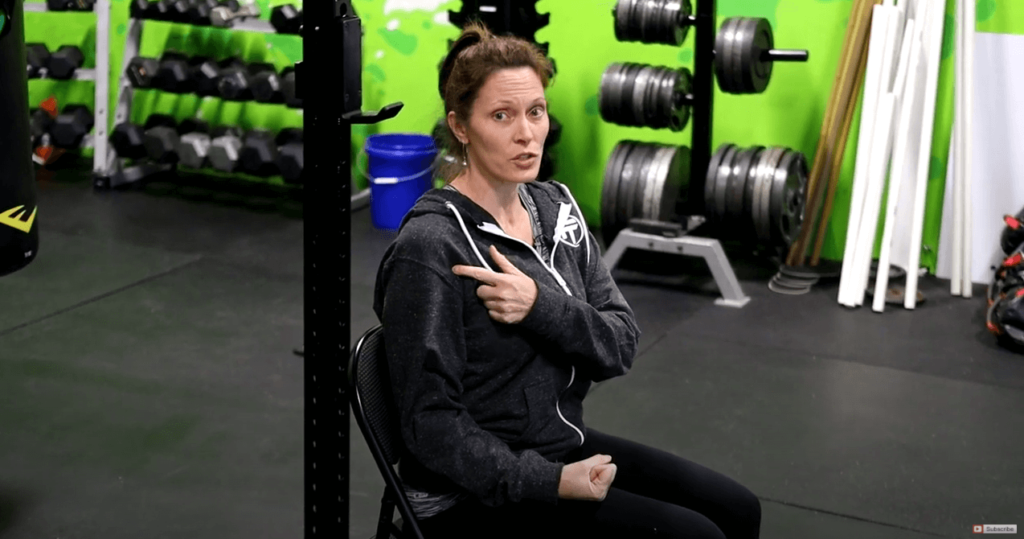
Tip # 2: Do Chair Exercises & Stretches
Although you’re in a chair and at a desk all day, there are still exercises and stretches that you can do that are not only beneficial, but simple, and don’t take a lot of time. This is a great way to get your heart rate up, and to stretch out your legs and hips!
Chair Marches
- Bring one knee slowly towards chest
- Slowly lower leg back down
- Repeat with the other side
- Complete 20-30 times total
Elevated Push-ups
- Place your hands on a chair or desk and get into a high plank position
- Don’t let your hips sag
- Lower body by bending at the elbows and bring chest to desk
Standing Toe Touch
- Take a deep breath in while you bring your arms straight overhead
- Exhale and slowly try to touch your toes while keeping your legs straight
- Repeat 10-15 times
Correct Posture
- Sit with a straight back, shoulders down
- Feet flat on the floor
- Knees at a ninety degree angle
For more on posture, check out coach Cathy’s article here – Why Good Posture is Your Friend For Mobility
Tip # 3: Walk During Your Lunch Break
Get outside and soak up some vitamin D! Bring a coworker with you for some company. 15 minutes of brisk walking a day will help you stay alert and focused for the remainder of the work day.
Studies have shown that walking during a lunch break can boost concentration, productivity, and happiness. So go ahead and get outside! You won’t regret it.
Vitamin D is so beneficial, and can help promote better mood, helps to regulate the absorption of calcium, and assists with reducing the risks of heart disease.
Getting outside during your lunch break will help break up the monotony of the work day, as well. You will return to your desk refreshed and renewed!
Speaking of walking, let’s talk about my next tip for staying active with a desk job.
Tip # 4: Take The Long Way
When you get to work, park in the furthest spot from the building.. This will help you get those steps in before you get to work, and once the work day is done. It’s an easy way to burn extra calories, and can really add up! You can burn an extra 10 calories every time you walk from your car to the office.
Another way to add in steps throughout the work day, is to use the bathroom that is furthest away from your desk. Think of how many times you use the restroom in a day!
In fact, anytime you get up from your desk, whether it’s to go to the printer, get supplies, or going to a meeting, take the long way. If there are stairs in your office, even better. Keep on moving and keep on adding steps.
There you have it, four tools to throw in your toolbox to help you stay active with a desk job. Implementing these will make all the difference! To recap: :
- Move away from your desk frequently
- Do some exercises and stretching at different times of the day
- Get outside during your lunch break for some sun and fresh air
- Take the long way, and easily burn some extra calories.
Following these tips will help you to experience increased mental clarity and more energy, while decreasing feelings of fatigue. Who knows, maybe your work day will go by a lot quicker!
And remember…
Small Steps, Big Results!
If you enjoyed this article, swing over to our YouTube channel to check out our latest videos here – Hybrid Fitness YouTube Channel
Danielle lives in mid-coast Maine after growing up in Boston, MA. She’s a nursing school graduate, and is currently working towards becoming a certified grief counselor. She also has her personal training certification through ASFA.
Danielle has run multiple half marathons, and has even completed 2 full marathons, including the Boston and Des Moines marathons.
Danielle loves to create a comfortable, fun, and relaxed environment in the gym, and is dedicated to making a positive impact on others, and helping people feel good about themselves while reaching their goals.
January 28, 2021
How To Improve Low-Back Pain
Let’s be honest, if you’ve got lower back pain, you’re probably missing out on a lot of fun in life. Fortunately, here are a few simple tricks you can do at home, without any equipment, to improve, and hopefully, eliminate your low-back pain.
DISCLAIMER: Before following any advice given here, please refer out to a doctor or other medical professional.
What Causes Low-Back Pain?
Aggravation of the low-back usually occurs due to improper alignment, or if our mobility has been disrupted. Usually misalignment is caused by a previous injury, or by improper repetitive movement over time. As many of you know, it takes only one vertebra to be out of alignment to experience pain.
Discomfort also occurs if two or more vertebrae are stuck together. Consider that each vertebra has 4 joints/facets that are held together with tiny ligaments. That’s 20 joints that can be sprained or fixated potentially leading to aches and pains!
3 Tips to Reduce or Eliminate Low-Back Pain
You can resolve low-back pain at home by taking the proper steps. First, you’ll want to reduce any inflammation, if possible. This is beneficial to remedy joints, nerves, and soft tissue that are irritated, raw, and swollen, causing discomfort and/or aggravation. In particular, your doctor or chiropractor may recommend oral anti-inflammatory medication, applying ice and/or stretching.
Here are 3 tips that you can do in the comfort of your own home to try and remedy that pesky low-back pain!
Tip #1 – Your Low-back Wake-up Call

How you start your morning contributes to the flow of the rest of your day. Your initial actions when you wake up prepare your body for sitting, standing and moving about your day.
Here’s an example of how to stretch your low-back before you even get out of bed each morning:
- Lying on your back with legs bent, gently pull one knee toward your chest
- Relax your low-back muscles while holding this position for 3-5 seconds, or longer if desired.
- Slowly switch legs.
- Now, do the same thing, but bring both knees toward your chest.
- Repeat 5-10 times to wiggle free from stiffness
Tip #2 – Your Core is Key to Resolve Low-back Pain
Strengthening your back is obviously important, but it’s just as important to strengthen your entire core. All the muscles extending from your head to your pelvis deep within your trunk provide support for your spine.
Exercises to aid with low-back pain are those that provide simple, low-impact movement of the whole body. The more you move, the more your lymph and circulatory systems flow. This increases the delivery of oxygen and nutrients to the joints keeping them healthy and removes waste products from your body.
Examples of Exercises for Mobility:
- Walking
- Swimming
- Biking
Specific Exercises for Building Core Strength:
- Pelvic tilts to create movement in the pelvis.
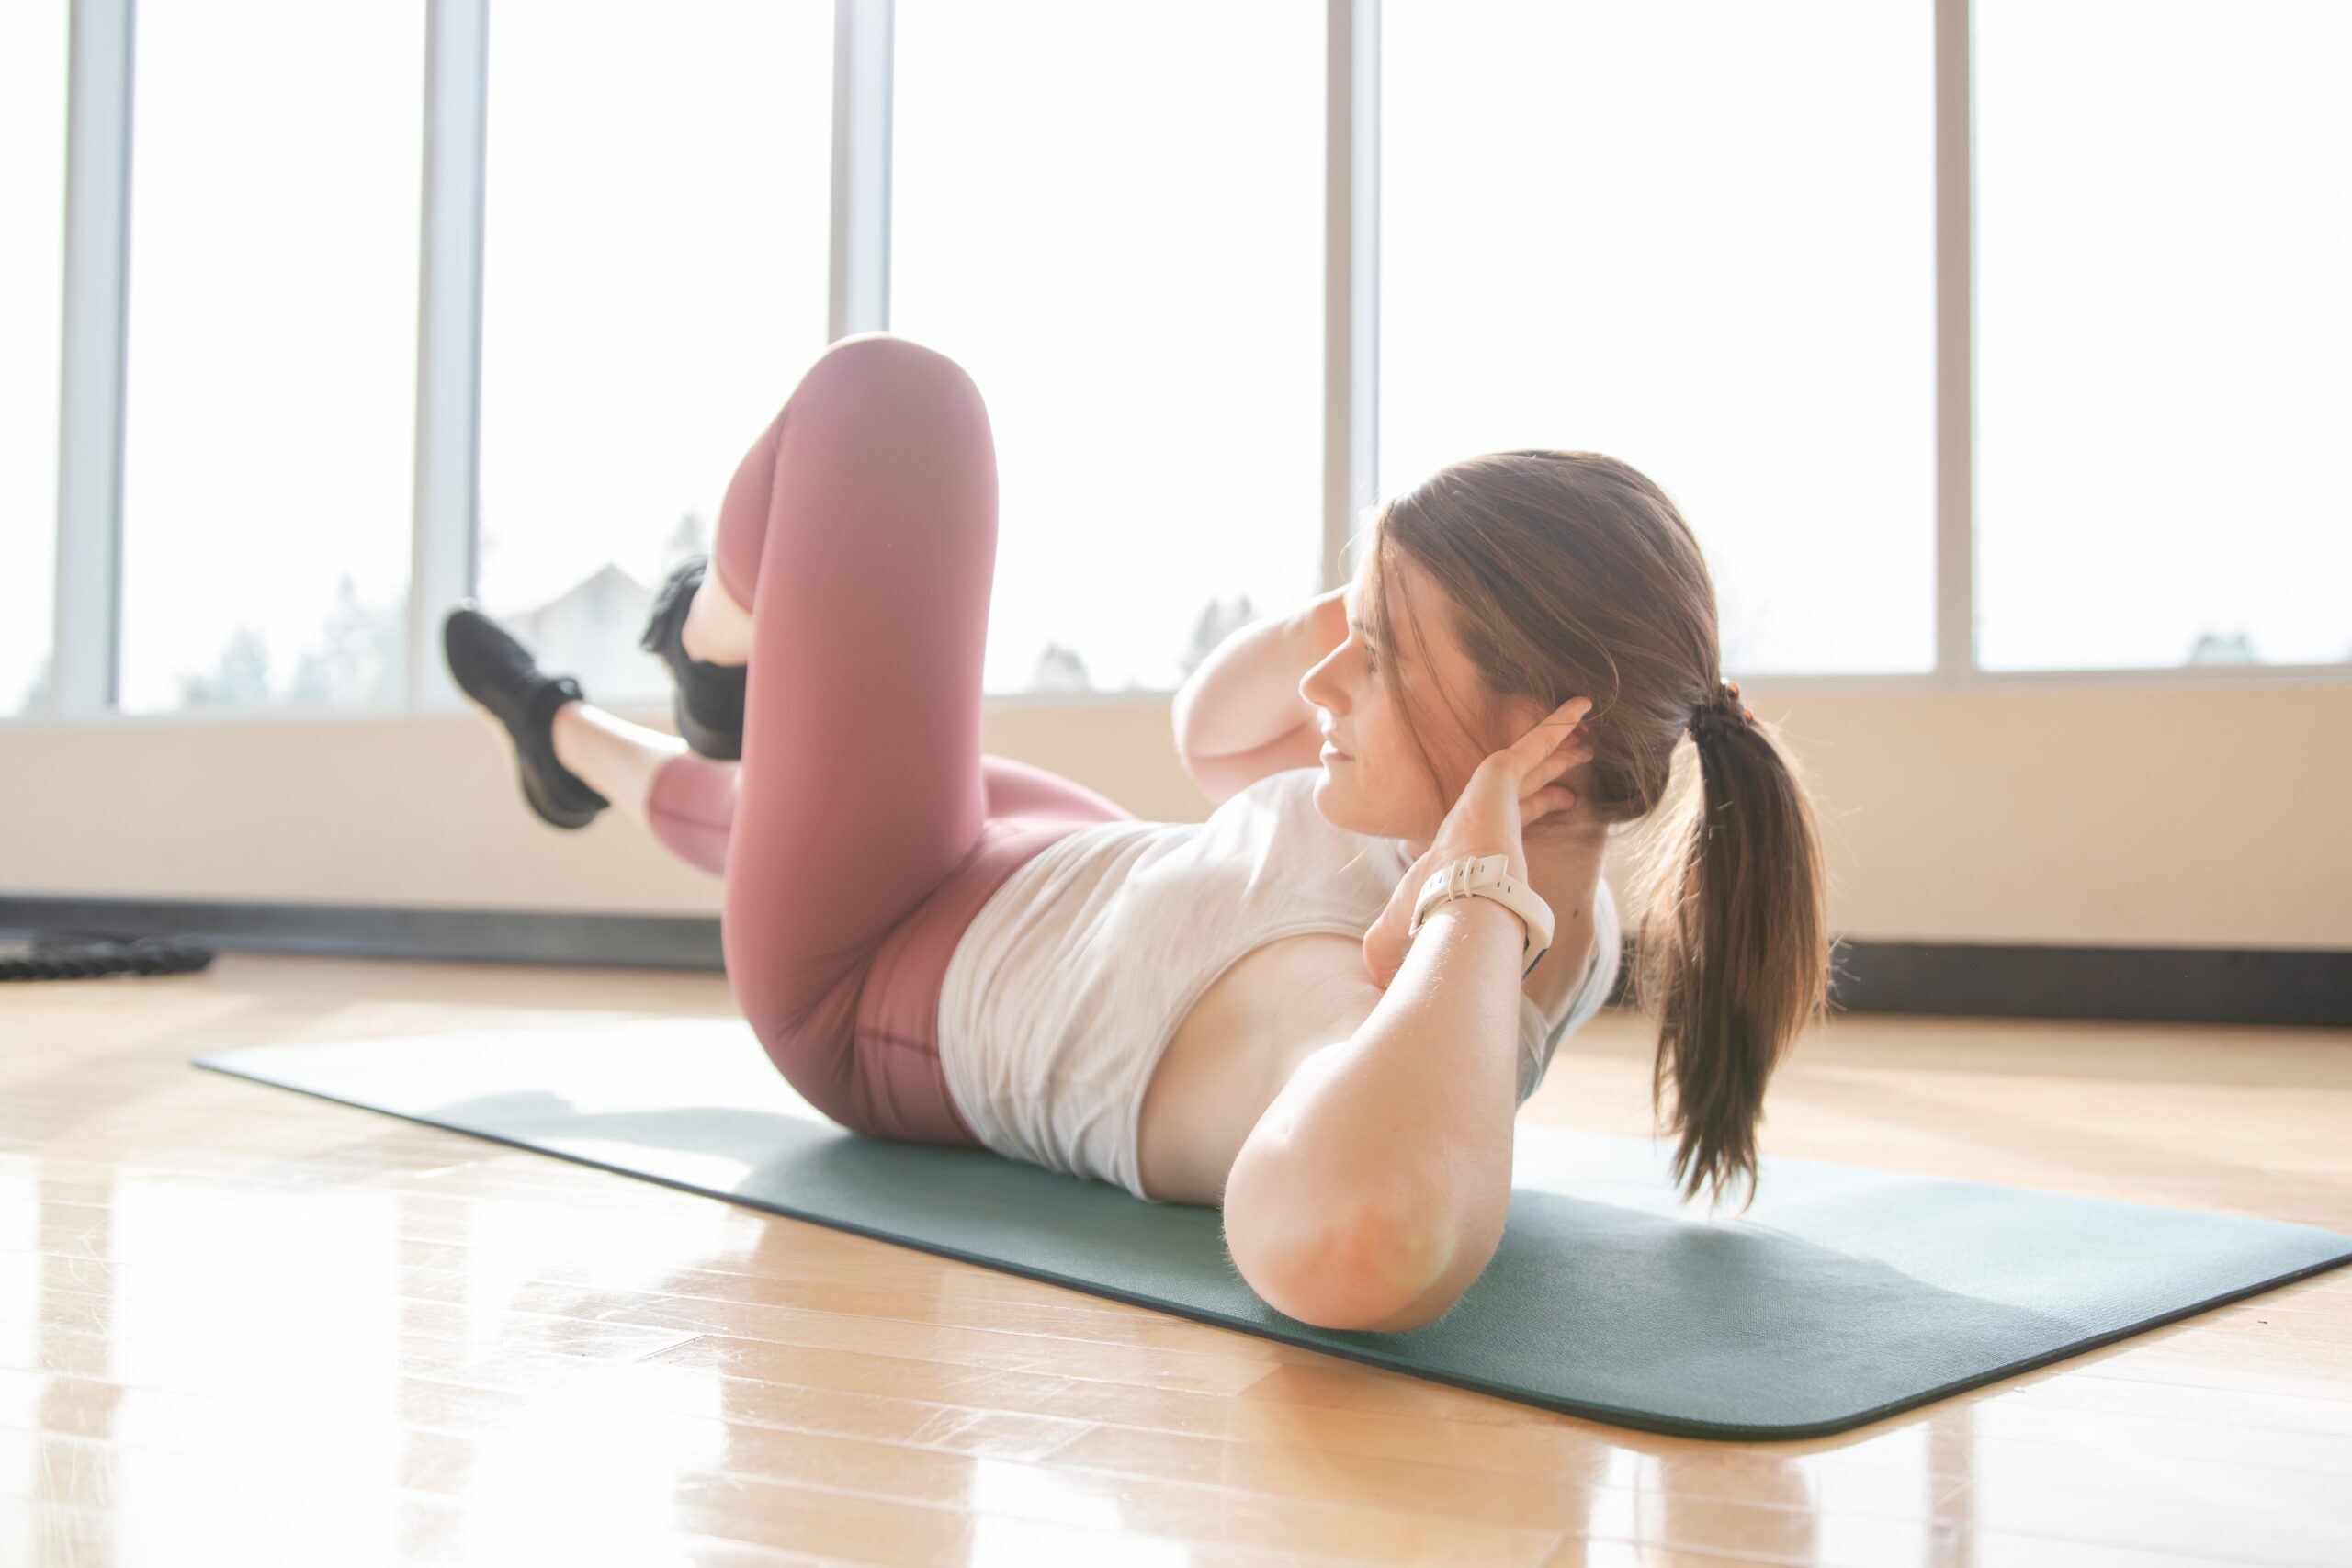
- Partial abdominal crunches lifting the head and shoulder blades off the mat.
- Crisscross, also referred to as Bicycles to strengthen the obliques
Give the core a hand by strengthening the glutes, quads and hamstrings with these exercises:
- Glute bridges to activate the glutes & hamstrings.
- Step-ups
- Walking lunges
- Single leg deadlift
- Elevated split squat
On the other hand, if lying on your back to exercise is not comfortable, then perhaps getting down on all fours for:
- Cat-cows
- Bird-dogs
- Planks, either low planks on your forearms or high planks with arms extended
Many exercises are beneficial and improve low-back pain but only if they are performed properly. Please be mindful when involved in the following to make sure your form is correct. If an exercise is too difficult to hold proper form, then modify the exercise appropriately.
Here are some exercises & behaviors you may want to be cautious of when dealing with low-back pain:
Planks
I know this may sound contradictory since I mentioned planks as a beneficial strengthening exercise above, however, ensure that you have proper plank form. To do this, align your body in a straight line from your head to your toes. If your low back sags or if you experience pain, try planks on your knees, elevated on a bench/chair or against a wall.
Prone positions
Although prone positions are beneficial for building core muscles, please use caution. Prone positions, such as Superman, can compress the spine by lifting your upper body and lower body too high off the floor. Instead, focus on making your body as long as possible by reaching with your fingertips and toes or lift only the upper body or lower body independently.
Excessive bending
Exercises that pull on the low-back such as, trying to pick something up off the floor without bending your knees. This movement can strain your low-back, especially if you cannot comfortably touch your toes with straight legs and/or if your hamstrings are tight. In other words, the low-back tries to provide the slack necessary to bend farther and could increase the chance of injury.
Quick twisting movements
Remind yourself to engage your core to support the low-back before slowly rotating the torso.
Contact or high-impact sports
Even though these sports may be fun, there is a risk of injury to your low-back if your core is weak. Low-impact exercises where there is always a grounded body part (whether it be a hand, foot or even a behind) can build muscle for more strenuous activities.
Heavy lifting that compresses the spine
Lifting heavy weight can increase the chance of low-back injury, even with proper precautions. In fact, it is possible to build muscle using body weight or light weight exercises.
Tip #3 – Strike a Pose to Relieve low-back pain

Posture! Posture! Posture!
Be mindful of your posture whether sitting, standing or lying down by:
- Engaging the core to support the low-back
- Aligning your head with your spine by lengthening through the back of the neck and pulling your chin back so your ears are over your shoulders
- Slightly pulling your shoulders back and shoulder blades together
- Using lumbar support when needed
Granted, nobody enjoys a moment of “Ouch! My back!”, as it impacts our enjoyment of life. Starting with the wake-up call exercise above and following through with these simple tips will help improve your low-back pain by keeping your joints mobile and your core strong.
For more on posture, check out this article!
If you found this article helpful, please consider sharing it with someone suffering from low-back pain.
Swing over to our YouTube channel to check out our latest videos here:
Hybrid Fitness YouTube Channel
And remember…small steps, big results.
Cathy grew up in NH surrounded by a large, loving family, where she learned generosity and hard work. She now models that for her two children. She was inspired to become a fitness coach when searching for ways to become more healthy herself after a life-threatening illness.
January 6, 2021
Good Posture is Your Partner for Mobility
Why is Good Posture Your Friend For Mobility?
If you’re a busy adult who’s committed to staying active (maybe you hike or kayak on the weekends) and you want to be healthy to keep doing those activities…you must have good posture. Good posture is your ally for mobility by helping your skeletal system stay aligned and your muscles and joints limber. Here’s how to do that with just four simple “posture” tips.
Tip #1 “Who is that sitting over there?”
We’ve all glanced across a crowded room and spied a divine human emanating confidence and grace just by the way they are seated. Keep reading to see how that could be you!
Why seated posture is a big deal
We live in a society where many of us sit while commuting to work, sit at work, and sit again on the way home. Then, we sit to eat dinner and wonder why our backs are sore and stiff. At that point, all we want to do is sit on the couch and watch tv or read.
The truth is, sitting is one of the worst positions for our bodies because it increases the pressure on our backs exponentially and shortens our hip flexors.
You can prevent spine discomfort, avoid poor postural habits and increase your confidence when sitting by:
- Supporting your lumbar spine with a small pillow or a rolled towel.
- Placing your feet flat on the floor with legs at 90 degrees.
- Aligning your head with your spine
- Keeping your chin parallel to the floor
- Pulling your shoulders back by slightly squeezing your shoulder blades together
Commuting in your car
Using the tips above in referring to your daily commute to or from work, place your hands at 4:00 and 8:00 on the steering wheel instead of 10:00 and 2:00. This position is more ergonomically correct because your arms are bent at 90 degrees and your elbows are right by your sides.
Sitting at your desk
The same tips apply if you are sitting at your desk in front of your computer. Keep your arms bent at 90 degrees with fingers on the keyboard and make sure your monitor is at eye level.
Taking a load off
Another option to combat sitting throughout the day is to decompress from gravity. Simply lie down. Why not watch tv while lying on the floor or the couch?
Tip #2 Standing posture for your best first impression
Nothing says confidence like a person standing tall with a smile on their face. Chances are that person is smiling because their posture makes mobility their friend.
You can radiate your own confidence simply by following these standing tips:
- Planting your feet hip width apart
- Evenly distributing your weight in both legs with a natural arch in your back
- Slightly pulling your shoulder blades together and keeping your chin parallel to the floor
- If you have to carry a bag try to choose something where the weight is evenly distributed across your torso and held close to your body, such as a backpack.
Tip #3 Lugging laundry, groceries and children?
Think of the many times during the day when our bodies act as transportation for something or someone.
We can continue to stay limber and safely mobile by following these lifting tips:
- Bending with the legs to pick up the item
- Holding the weight close to your body
- Lifting with your legs without rotating or twisting your body
*For a great core exercise that carries over to rotating your body, check out this video on how to do a Russian twist*
It can be slightly tricky if you need to lift and hold weight on one side of your body, such as lugging a basket filled with laundry, a bag full or groceries or a child on your hip. This creates an uneven bend in the spine and loads the tiny joints of the spine with all the weight on one side.
You can safely carry weight on one side of your body by:
- Shifting the weight from side to side often
- Engaging the abdominal muscles to help support the back.
Tip #4 Who doesn’t want rejuvenating beauty sleep simply by practicing good posture?
Sleeping sounds restful, but our sleeping posture can determine how our skeleton aligns and our muscles and joints stay limber. When you sleep on your stomach the joints in your lower back can jam together by hyperextending. It also doesn’t help the creases on your face caused by the pillow.
How to sleep well rested with crease-free skin
- Sleeping on your back with knees bent slightly
- Or sleeping supported on your side for a straight spine
We spend a third of our lives sleeping, so make sure to rotate that mattress and pretend you’re Goldilocks seeking a mattress that is not too firm nor too soft but just right.
Bonus Tip
Add movement wherever you can, such as choosing the stairs at work and walking at lunch time.
Good posture is your friend for mobility and by following these simple posture tips you’ll stay limber to enjoy your favorite fun activities.
If you found this article helpful, please consider sharing it and check back for more tips from the coaches at Hybrid Fitness…and remember small steps, big results.
To watch the video format of this article, click here:
https://www.youtube.com/watch?v=ATWlf45NlnE
If you’re just getting started on your fitness journey, and not sure where to start, check out our newest article here:
Getting Started with your Health & Fitness Routine
Cathy grew up in NH surrounded by a large, loving family, where she learned generosity and hard work. She now models that for her two children. She was inspired to become a fitness coach when searching for ways to become more healthy herself after a life-threatening illness.