-
Blog
April 30, 2021
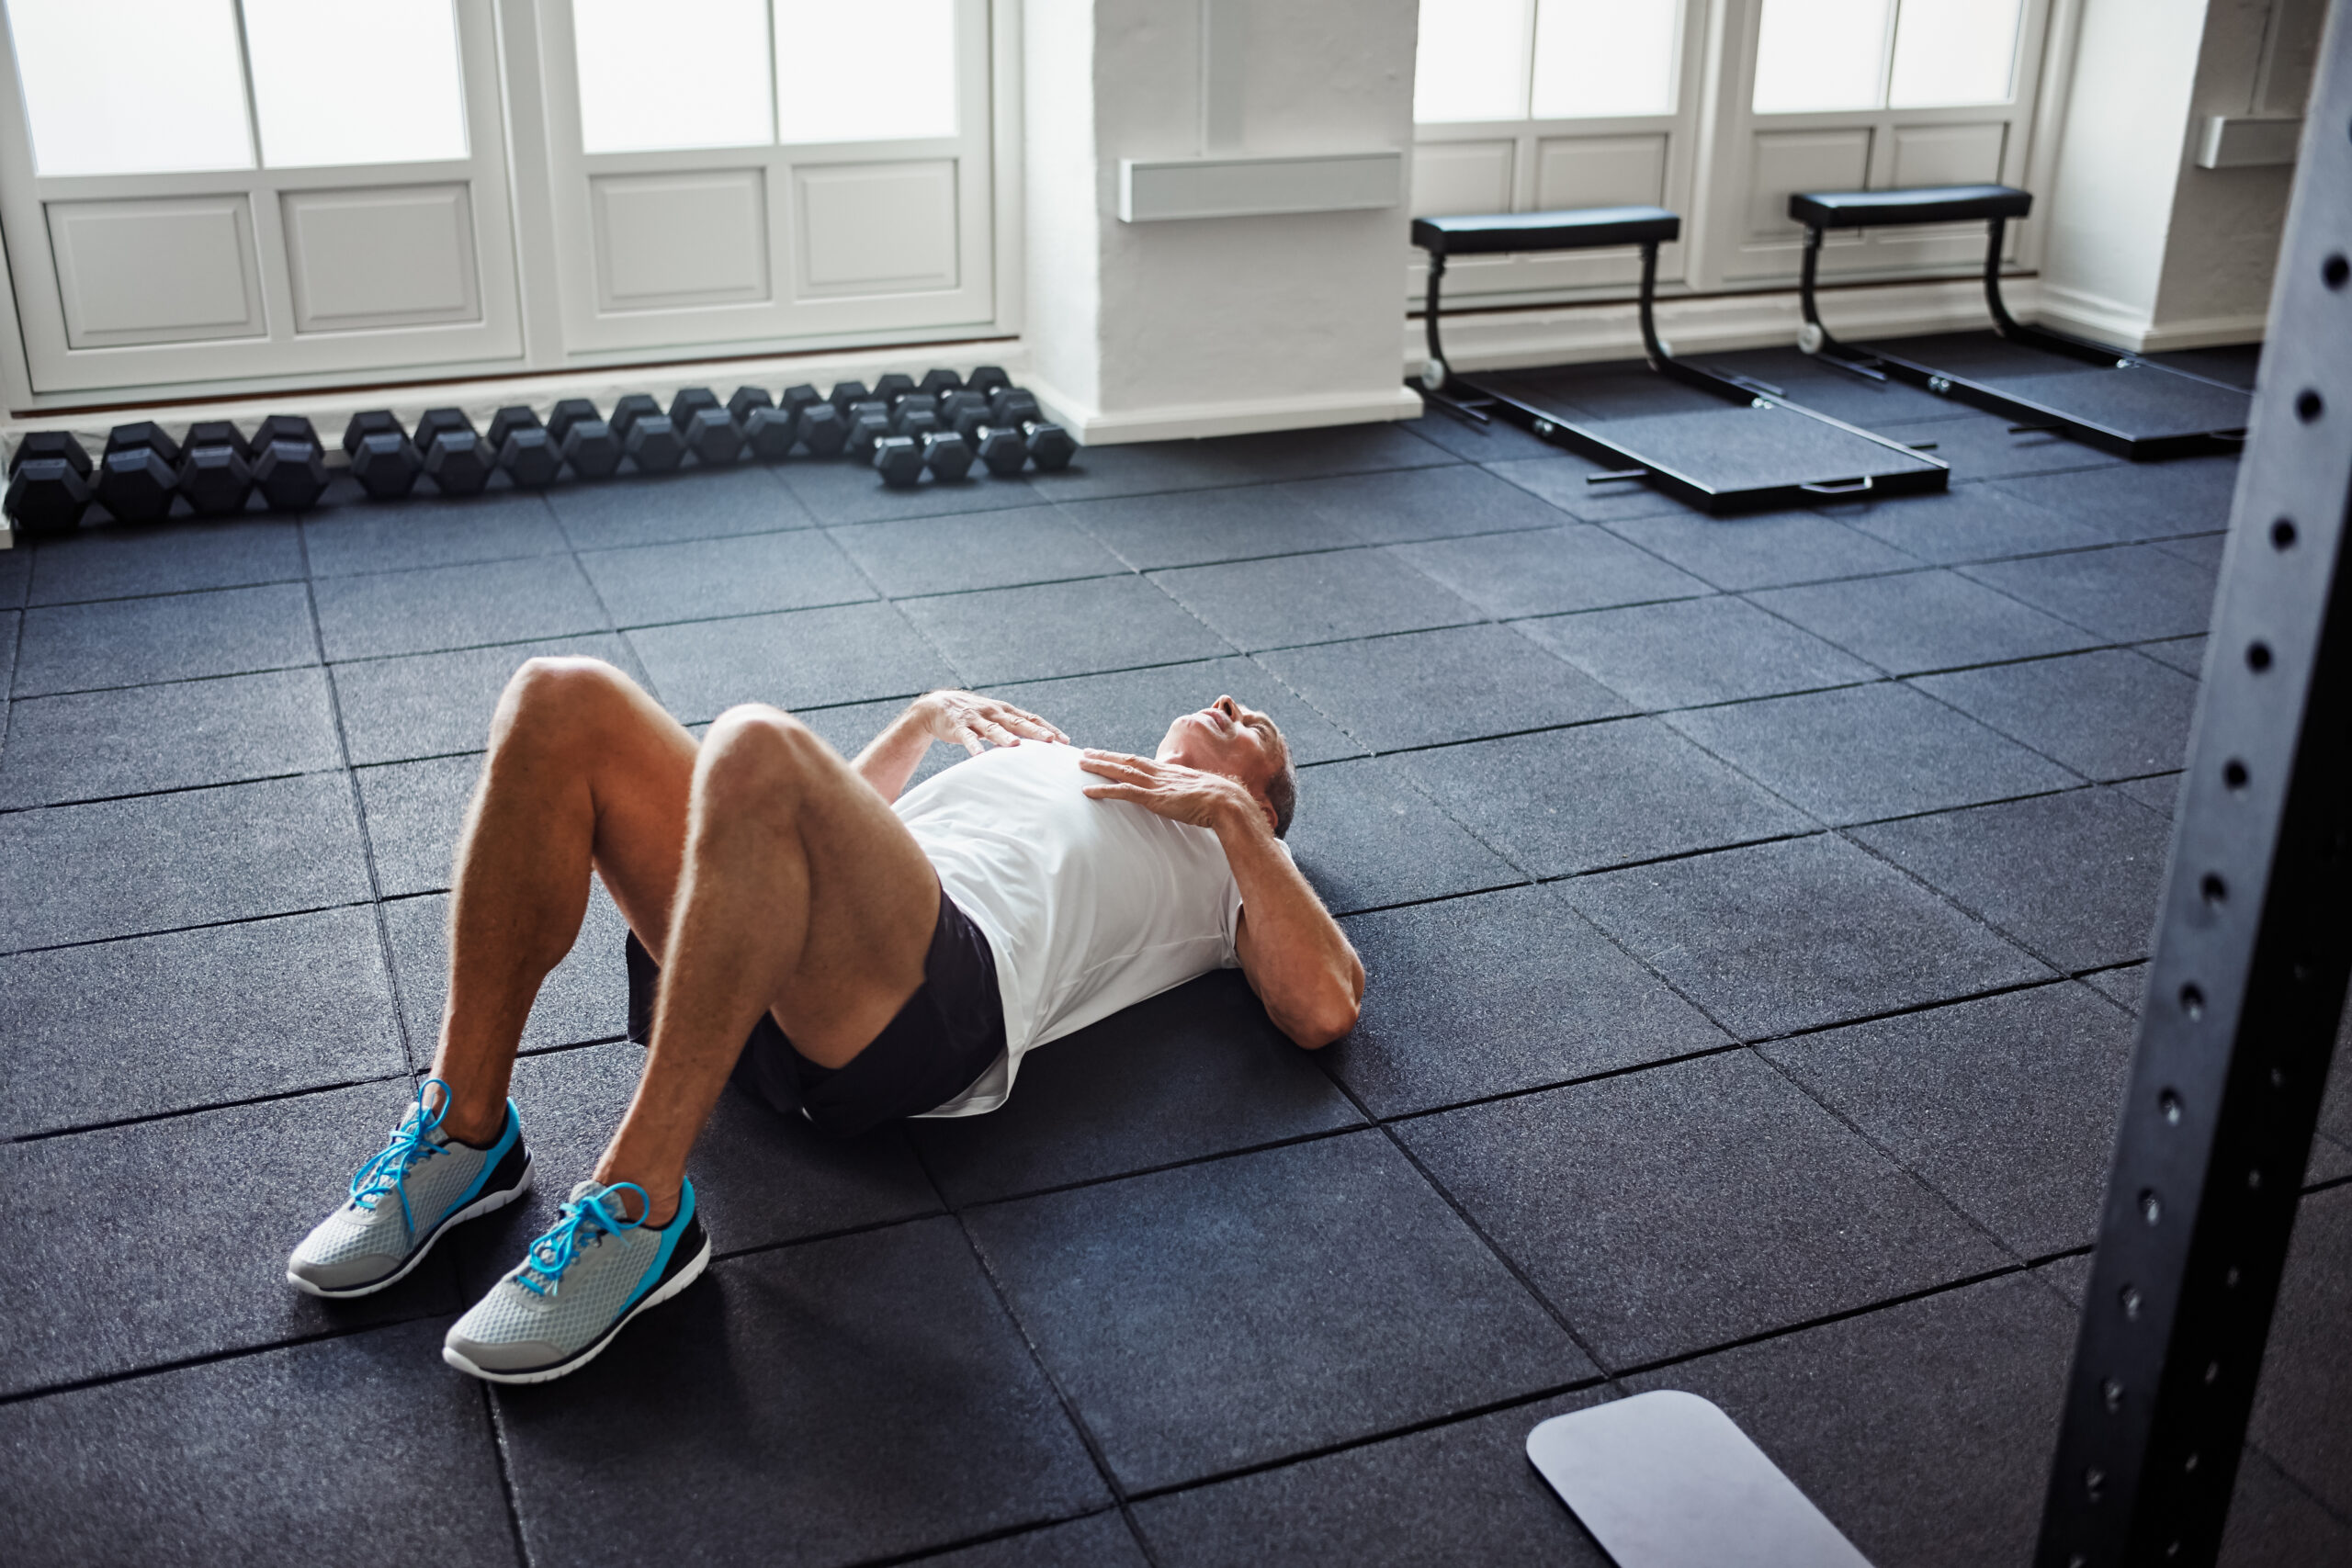
Best Exercises To Fix Neck Pain
What a Pain in the Neck!

If it’s not your boss with a last minute request on a Friday afternoon, or your in-laws showing up unexpectedly for the weekend, or even your dog shredding your couch cushions while you’re out on a hot date, then maybe the pain in the neck in your life is just that…pain in the neck.
If your neck is annoyingly sore, especially by the end of each day, let’s dive into why that is, and what you can do about it. This article shares a few simple tips, tricks, and the best exercises to fix neck pain.
Before following any of the suggestions in this article, please consult your physician if your neck pain:
- Is getting significantly worse.
- Exists for more than 6 weeks.
- Comes on sharp and quickly.
- Is accompanied by nausea.
Do You Really Have Rocks in Your Head?
One reason why your neck aches is that it may feel like your head is filled with rocks. Not necessarily true in most cases, but your head is HEAVY!
Weighing in between a whopping 10-12 pounds, your head not only affects your neck, but it also has a significant impact on the rest of your spine. Envision trying to balance a bowling ball at the top of your spine!
Seven small vertebrae in your neck, as well as, muscles, ligaments and tendons all working together support everything you do with your head. It’s a big job and something that most of us take for granted. So, making sure you maintain good posture is key to putting less torque on the neck.
The Impact!
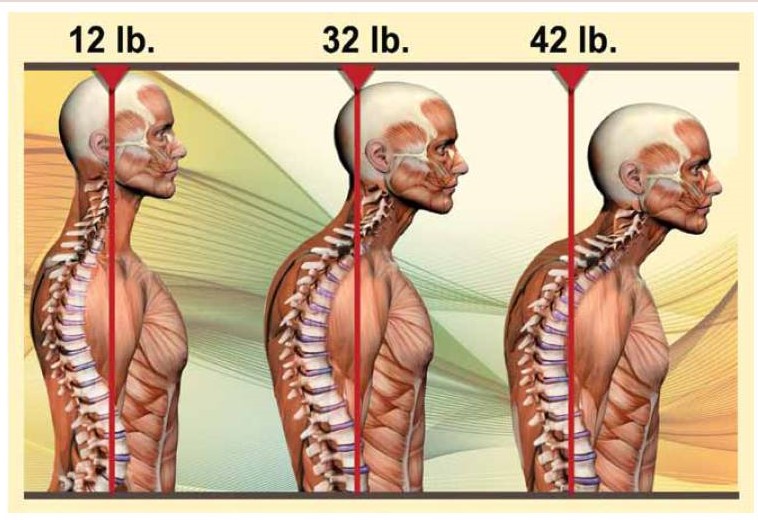
The position of your head impacts the pressure on your spine, meaning that for each inch your head moves forward, an additional 10 pounds of weight is felt on your spine.
So, for example, looking down at your phone (45 degrees) elevates the pressure on your spine from about 11 pounds (neutral) to 48 pounds. That’s huge!
If your neck and back are painful, what is happening at the top of your spine may be a contributor.
Let’s talk about perfect posture:
- Hold your phone up in front of your face instead of looking down
- Make sure you are looking straight at your computer monitor with your head neutral over your shoulders
- Ears over the shoulders by pulling chin in slightly and lengthening the back of the neck
- Shoulder blades pulled together and down slightly
- Chin parallel to the floor
Stretching Your Sore Neck Muscles

There are a variety of stretching exercises that you can do to alleviate and avoid neck pain. Here are some of my favorite:
Chin Tuck:
- Standing or sitting tall
- Chin parallel to the floor
- Pull chin in with ears over shoulders
- Hold 1-3 seconds
- Repeat for 10-15 repetitions
Wall Slides:
- Standing against a wall
- Pull chin in and lengthen the back of the neck
- Place arms laterally against the wall bending at the elbow for 90 degree angles
- Keeping your back against the wall by engaging your abs
- Extend arms directly over head by sliding arms up the wall to feel a stretch in your chest
- Return your arms to the starting point
- Repeat for 10-15 repetitions
Shoulder Blade Squeeze:
- Standing or sitting tall
- Ears aligned over your shoulders
- Squeeze shoulder blades together keeping shoulders down
- Hold for 1-3 seconds
- Repeat for 10-15 repetitions
Look Both Ways:
- Standing or sitting tall
- Ears aligned over your shoulders
- Slowly look directly left over your shoulder
- Return to center
- Slowly look directly right over your other shoulder
- Repeat for 5-10 repetitions each side
Beware of Traps!

Is your neck sore because you are holding a lot of tension in your trapezius muscle?
It’s the large triangle shaped muscle that runs from the base of your skull (occipital bone), down the center of your back (thoracic vertebrae), and laterally to your shoulders (scapula).
Simple Suggestions to follow to avoid being tripped by your traps are:
Shoulder shrugs:
- Hold arms down by your sides
- Lift shoulders up and back in a circular motion
- Repeat for about 10-15 repetitions
Trap stretch:
- Interlock fingers behind you and pull your fist to the left side of your waist
- Hold your left elbow out laterally away from your body
- Slowly lean your left ear to your left shoulder toward your elbow.
- Hold for 30 seconds
- Repeat on your right side
If interlocking fingers behind you is a challenge:
- Simply lean your left ear toward your shoulder
- Loop your left hand over your head
- Apply light pressure to the right side of your head, increasing the intensity of the stretch slightly
- Hold for 30 seconds
- Repeat on your right side
The above exercises not only help to increase neck strength and flexibility, but help improve posture, too!
Postural Kyphosis, Say What?

Postural kyphosis is curvature of the spine that forms a hump on the upper back. The hump can be located at the base of the neck, or slightly lower between the shoulder blades. Because of this, the hump is referred to as buffalo hump, round back, hunch back, as well as the outdated and offensive term dowager’s hump.
Accordingly, contributors to the formation of a back hump are:
- Carrying extra weight – extra pounds are a challenge for the skeletal structure of your whole body. However, fat also accumulates on the spine as protection and increases the presence of a hump
- Poor Posture – allowing your body to slouch can create physical misalignment
- Lack of Fitness – keeping your muscles strong and your limbs mobile allows your body to hold it’s frame properly
- Injury or vertebral compression fractures in which part of a vertebrae collapses
- Degeneration of the spine, a.k.a osteoarthritis, in which function and ability are impaired
How You Can Prevent or Correct Your Hump

You can prevent the formation of a back hump or decrease the hump you have by making some changes that involve more than just exercises for your neck and back, such as:
Sitting and standing tall, as well as sleeping with appropriate support – Your posture determines how your tissues support your bones in proper alignment – see the Hybrid Fitness posture article HERE
Stretching the pectoral muscles of your chest to allow the front of your torso to open, and your shoulders to move back and align with your hips. To do this:
-
- Stand in an average doorway
- Place arms at 90-degree angles on either side of the door frame
- Step one foot forward and lean forward with your sternum while relaxing the muscles of your chest
- Keep your head aligned with the spine, with ears over shoulders
- Increase the stretch by leaning forward a little at a time as you inhale and exhale
- If the doorway is too wide, do one side at a time
- If this stretch is easy, raise arms higher against the door frame
- Hold for 30 seconds
Stretching the muscles of your upper back to pull the shoulder blades together broadening the chest. To do this:
-
- Face a wall standing a few feet away with feet at least shoulder width apart
- Place both hands flat against the wall above head height
- Keep your neck and head aligned with your spine
- Slowly push your butt back as you lean into the wall
- Inhale and with each exhale sink a little deeper into the stretch
- Hold 30 seconds
Building strength in your back, shoulders and arms by doing a variation of a push-up.
*Note – before you discount this exercise thinking it’s too hard and no fun, see the Hybrid Fitness article on how to get your first push-up and variations of push-ups HERE.
The Miracle of Massage

Another option is to receive a massage from a licensed therapist in order to help target muscle “knots” specifically. It’s beneficial to relax as much as possible while the therapist is massaging the muscle. Slow inhales and exhales can help here.
In a pinch, an alternative to a massage:
- Place a tennis ball in a long sock and hang the ball over your shoulder
- Stand with your back to the wall with the ball between your body and the wall
- Locate the ball just below your neck to left side of your spine
- Bend your knees to roll your back over the ball in a vertical line between your shoulder blades on the left side of your spine.
- Then, move the ball to the right side of your spine and roll vertically again.
- Concentrate longer on areas where you have muscle soreness or pain until the muscle relaxes.
Be sure to hydrate with water after any massage in order to help your body flush toxins that have been released into your bloodstream. As if you needed another benefit to drinking more water!
The Next Step!
There you have it! The best exercises to fix neck pain.
These exercises will help you stretch parts that are sore, and build strength in your neck and back muscles to prevent the pain from returning.
You don’t need to large chunks our of your day to do these. Implement them slowly, and one at a time. Build a habit of doing them, and I promise, you’ll see relief!
I would even recommend adding them into your routine even if you don’t experience any pain currently. This will help prevent any soreness or pain from even starting!
If you found this article helpful, please check out the other articles from Hybrid Fitness coaches HERE
Hybrid Fitness YouTube Channel

Cathy grew up in NH surrounded by a large, loving family, where she learned generosity and hard work. She now models that for her two children. She was inspired to become a fitness coach when searching for ways to become more healthy herself after a life-threatening illness.
April 22, 2021
Boxing Basics: Knowing Your Punches!
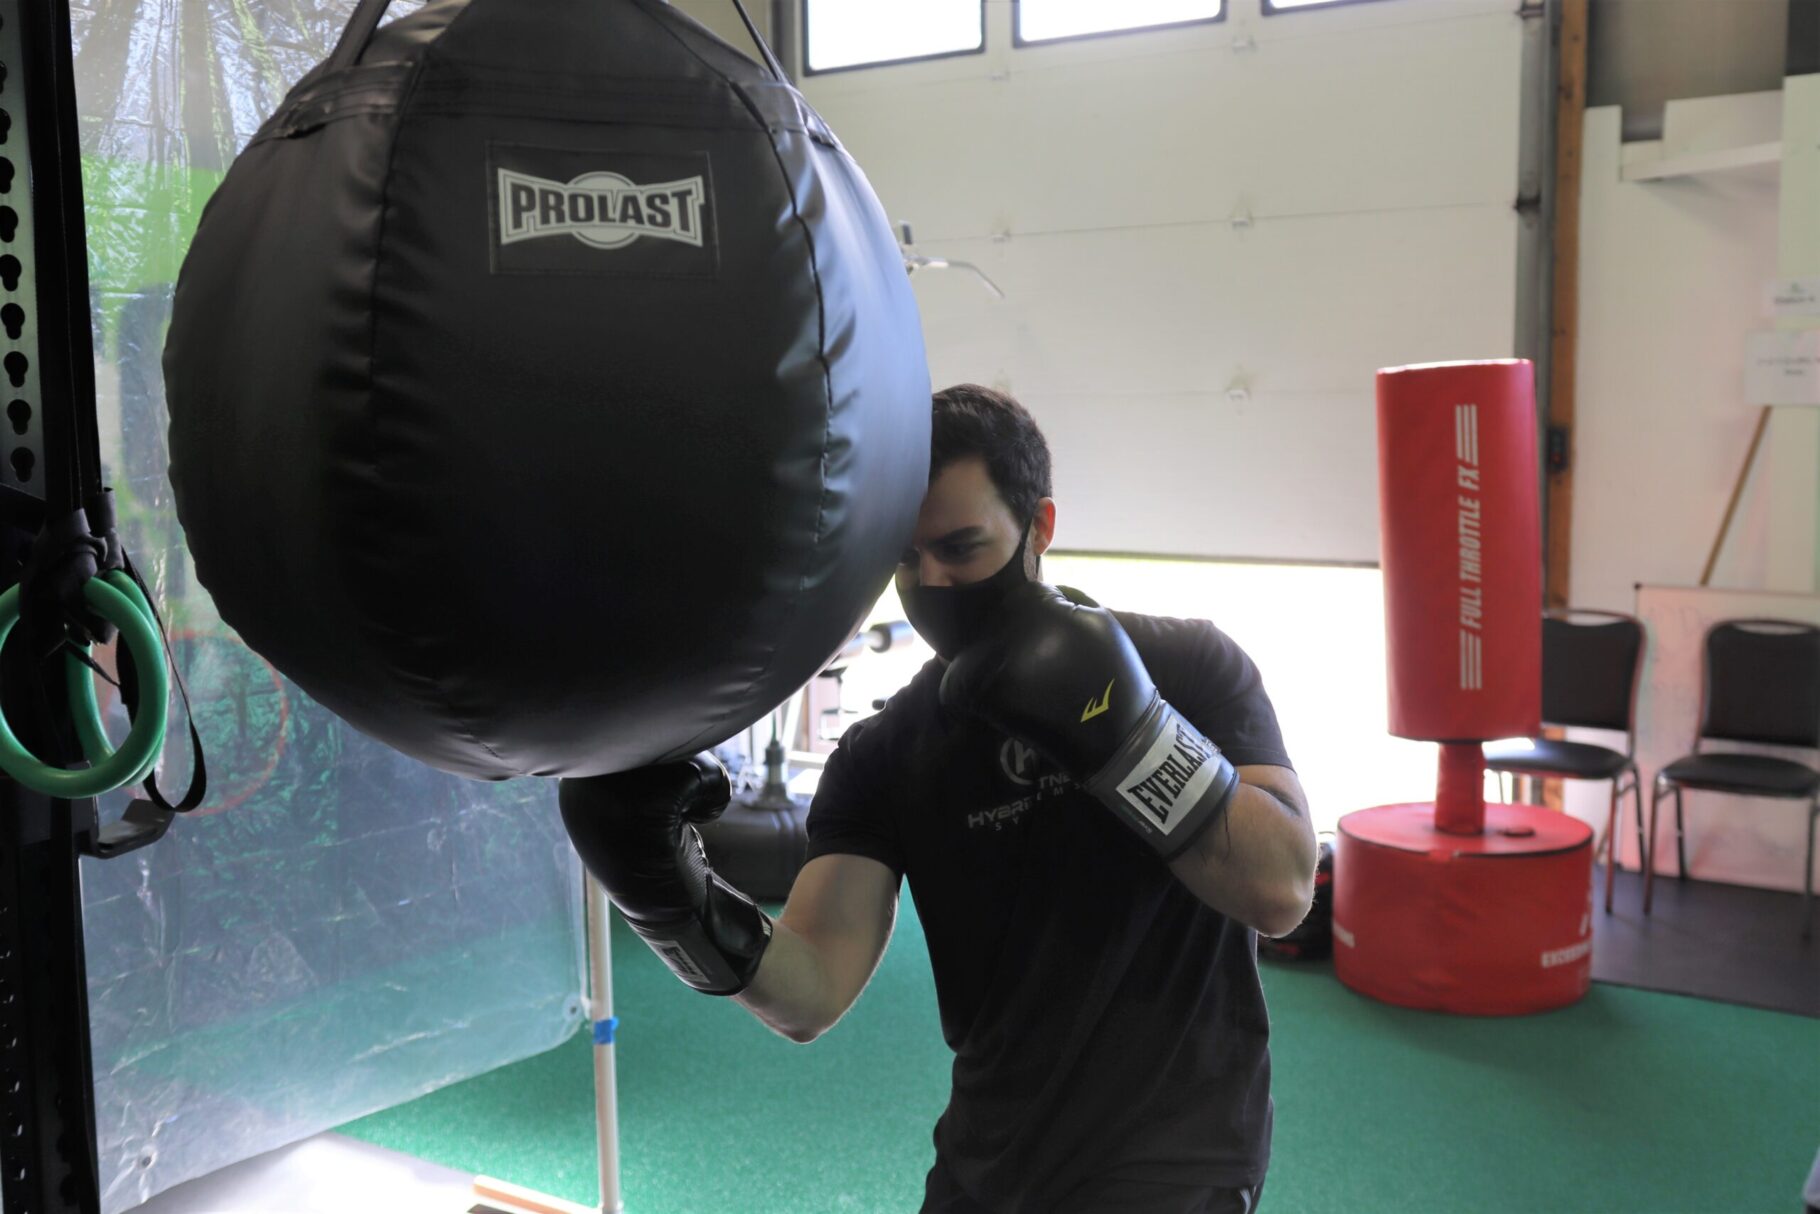
You’ve learned how to wrap your wrists to protect your hands, you’ve learned about setting up your boxing stance and you saw the video about how our Hybrid boxing class works… As you’re walking into your first class, you see all these stations with random numbers and have no idea what they mean. This article is going to dive into the 6 main boxing punches and how they’re integrated into each station we offer here.
Left Handed vs Right Handed
There are 6 basic punches we use in boxing class here at Hybrid. Each punch corresponds with a number and each station has a combination of those numbers to form a boxing combo you use to workout with.
If you’re right handed, any odd numbered punches are thrown with your left hand. Even numbered punches are thrown with the right.
If you’re left handed, any odd numbered punches are thrown with your right hand. Even numbered punches are thrown with the left.
Think about your non-dominant hand matching up with odd numbered punches. Dominant hand matches up with any of the even numbered punches.
The Punches
1- The Jab
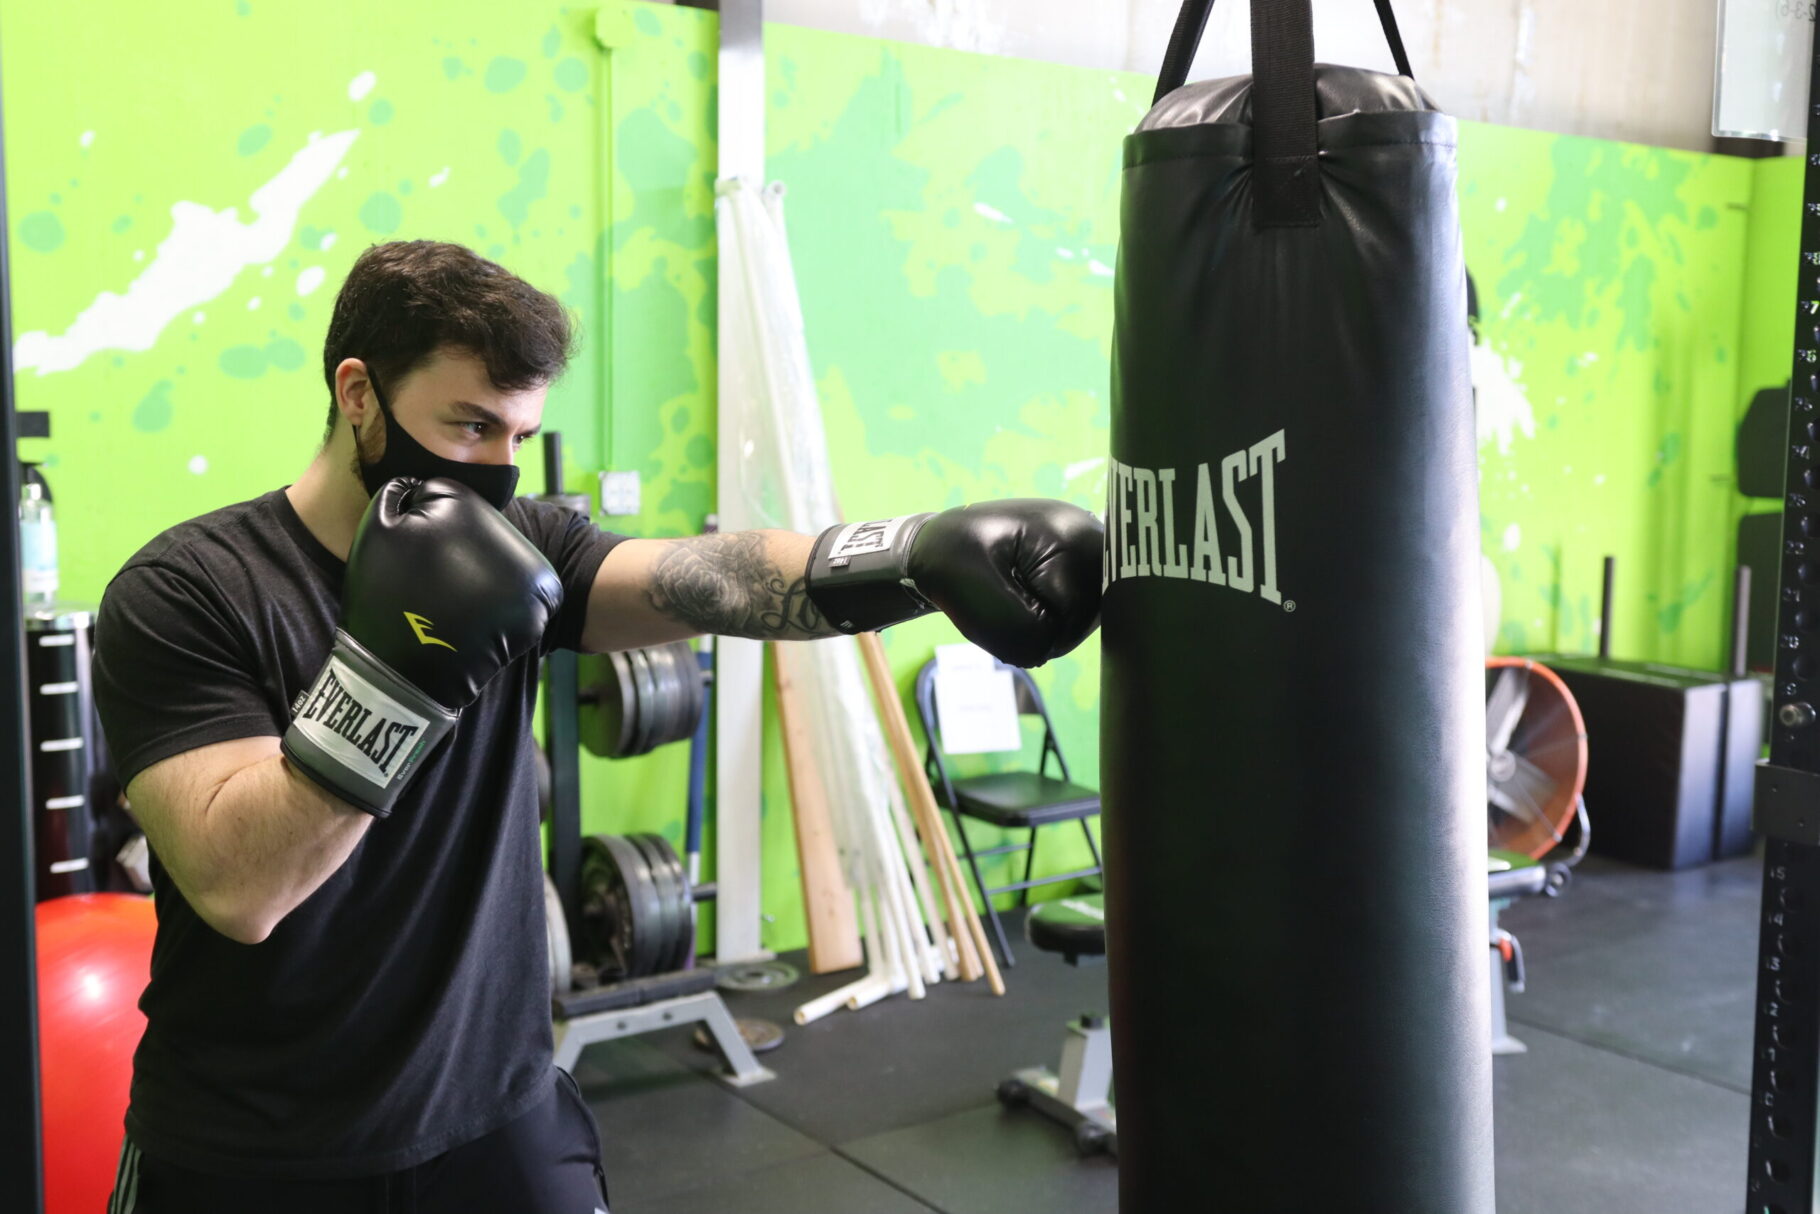
The jab is a light punch that will be thrown with the non-dominant hand. It’s the first of the punches that are straight out and should be lighter.
2- The Cross
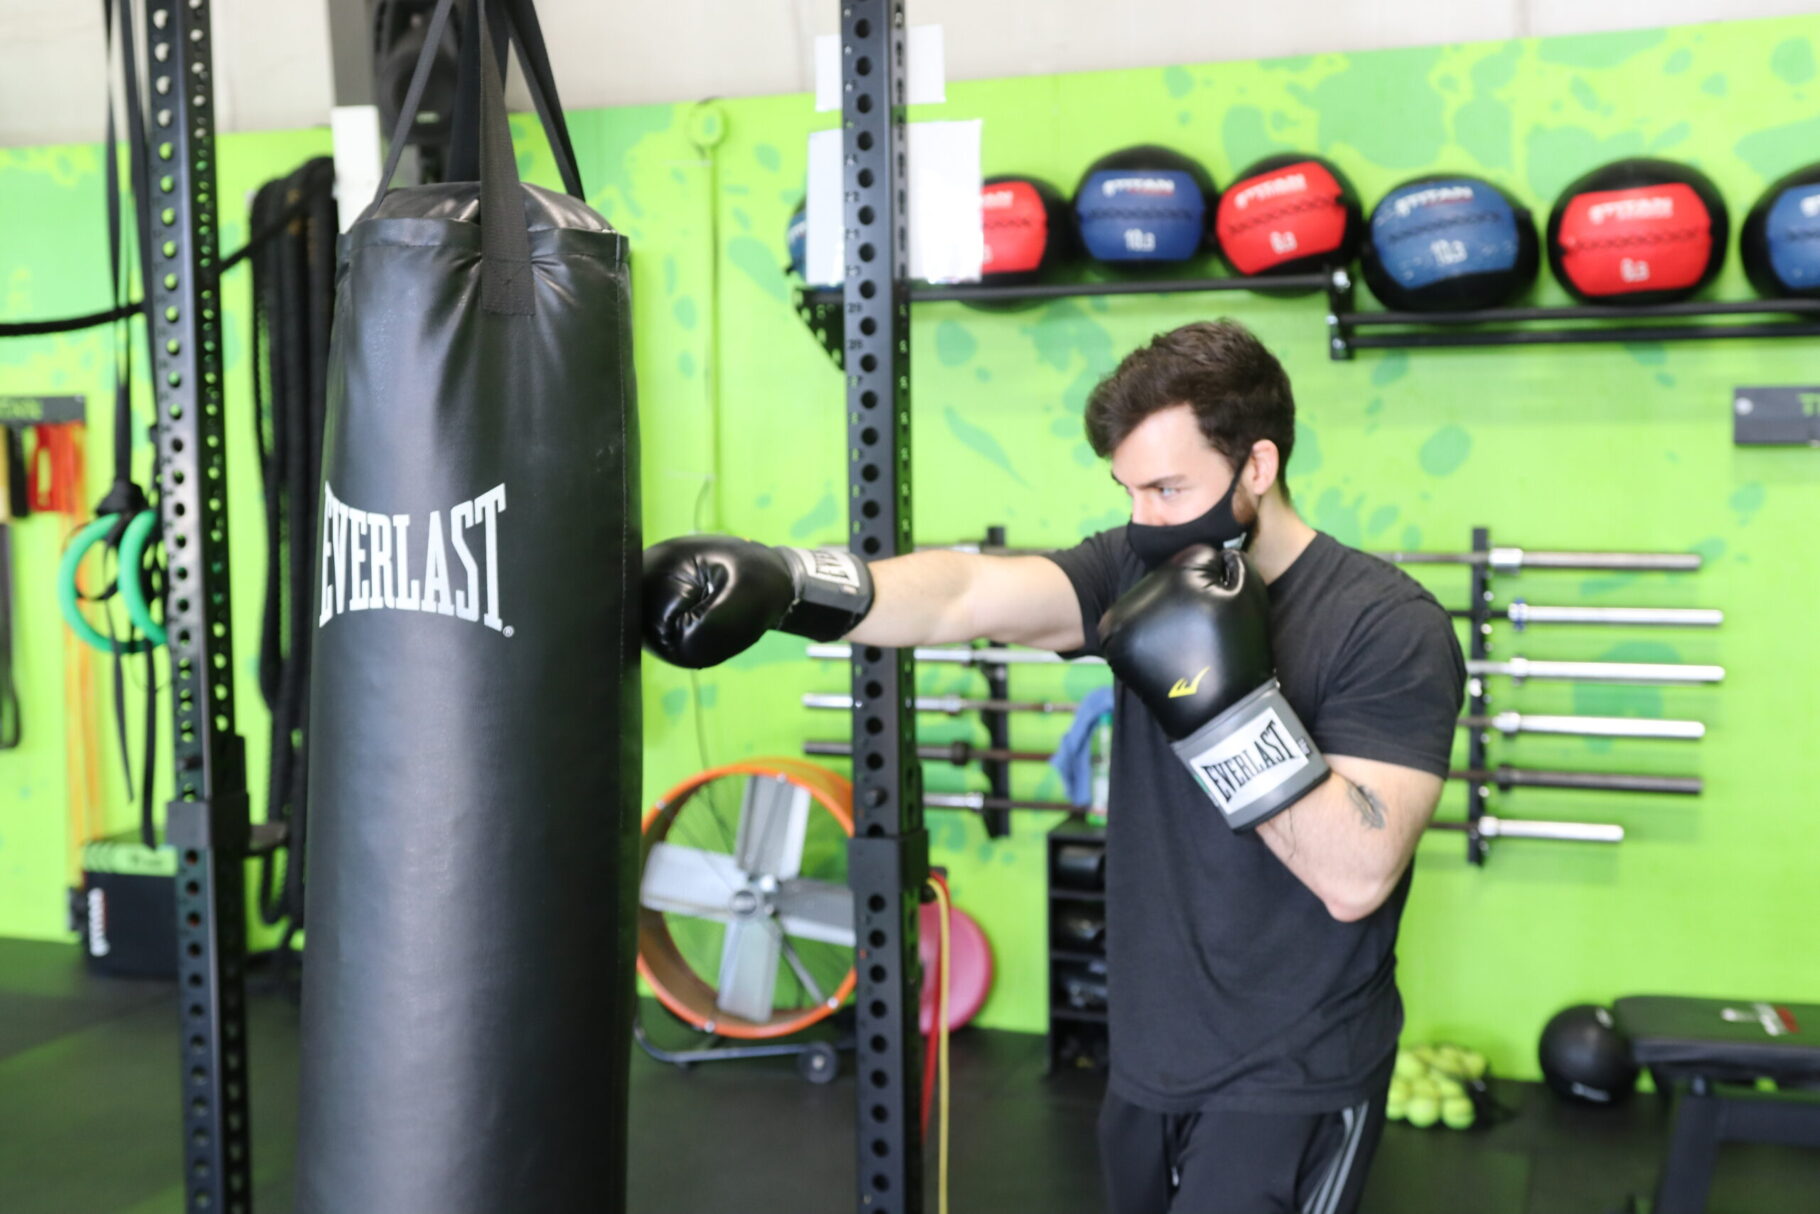
Next is the cross! A powerful punch that is thrown with the dominant hand and the second punch that is thrown straight out.
(Straight out punches are quick and need to be snapped back to the chin after. Kind of like a towel whip)
3- Non-Dominant Hook

This punch is thrown with the non-dominant hand and comes in from the side. Think about cutting the bag completely horizontally. Elbow & forearm stay parallel to the ground. Palm face down or face in towards yourself (whichever feels better to you, doesn’t make a big difference)
4- Dominant Hook

This punch is thrown with the dominant hand and comes in from the side (same as above).
5- Non-Dominant Uppercut
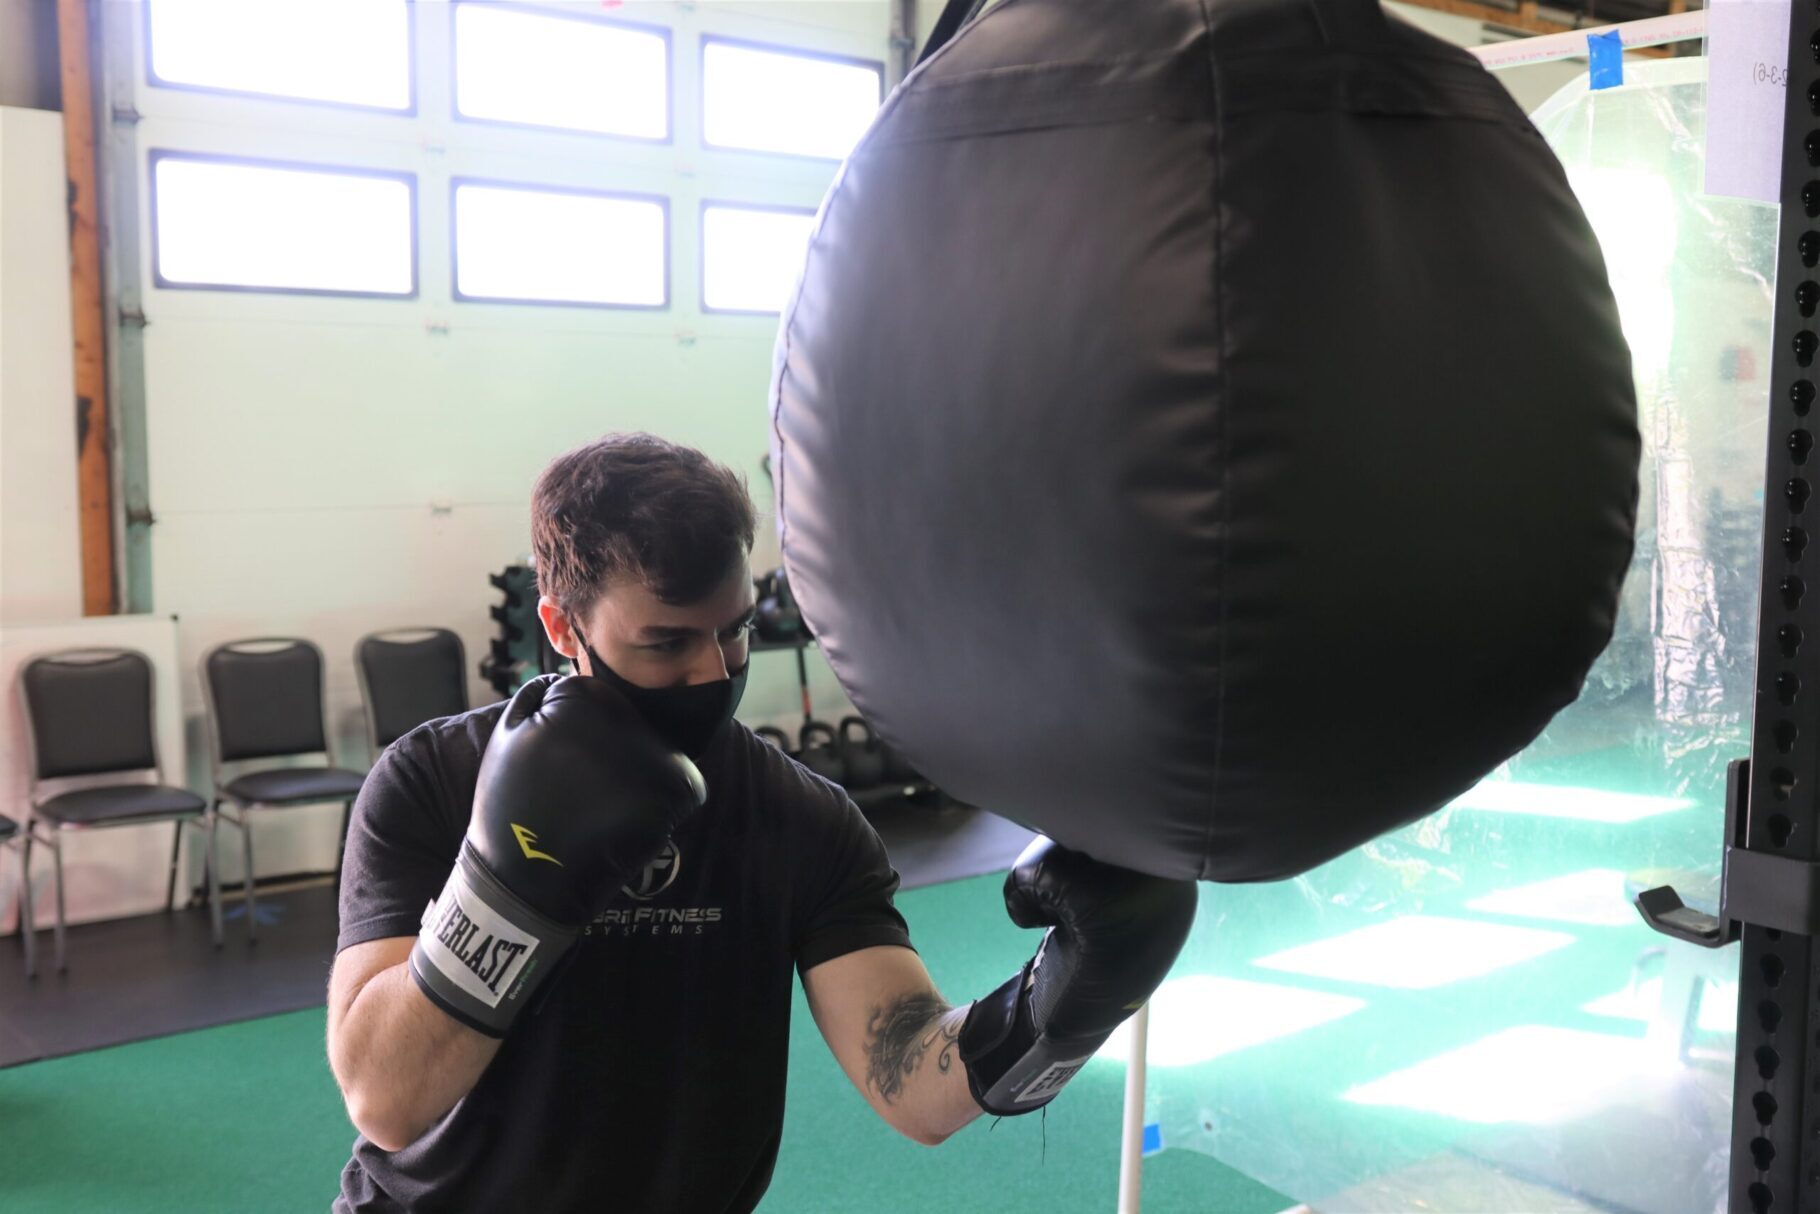
This punch is thrown with the non-dominant hand and is thrown straight upwards. Elbow/forearm should be perpendicular to the ground. You can get underneath the bag with our wrecking ball bag (Station 3) but if you’re throwing an uppercut on a regular heavy bag, think about cutting the bag diagonally from low to high.
6- Dominant Uppercut
This punch is the same as above except with the dominant side.
Four Things To Watch Out For When Throwing A Punch!
-No hyperextended elbows!! Also, always assess your distance from the bag before you throw a punch.
-Make sure to keep wrists tight and don’t let them extend when making contact with the bag.
-Step in to get underneath the wrecking ball bag.
-Make sure to take a short quick breath every time you punch so you don’t get winded!
Practicing these 6 punches, and using the combinations of them will help you remember which number matches up with which punch. Shadowboxing, or boxing and throwing the punches in the air (not on a bag) is a great way to practice the punches and help memorize them. Now the more you practice them, the easier they will flow and once you’ve mastered the six basic punches you can start to work on adding more power to your punches, harder combinations and adding things like kicking in!
Check out all of our other boxing, fitness, and health articles here!
Check out our YouTube channel here!
And remember….
Small Steps, Big Results!
Mike grew up as a multi-sport athlete and received his Bachelors in Kinesiology (Exercise Science) and also received his Personal Training Certification from the American Council of Sports Medicine.
Mike has worked with a wide range of ages and abilities and is an expert at working around injuries and helping those individuals reach their health goals.
In his time in college, he also worked with D1 Athletes (specifically the UMASS Amherst Men and Women’s Basketball teams) helping them get stronger, faster, and more athletic.
April 21, 2021
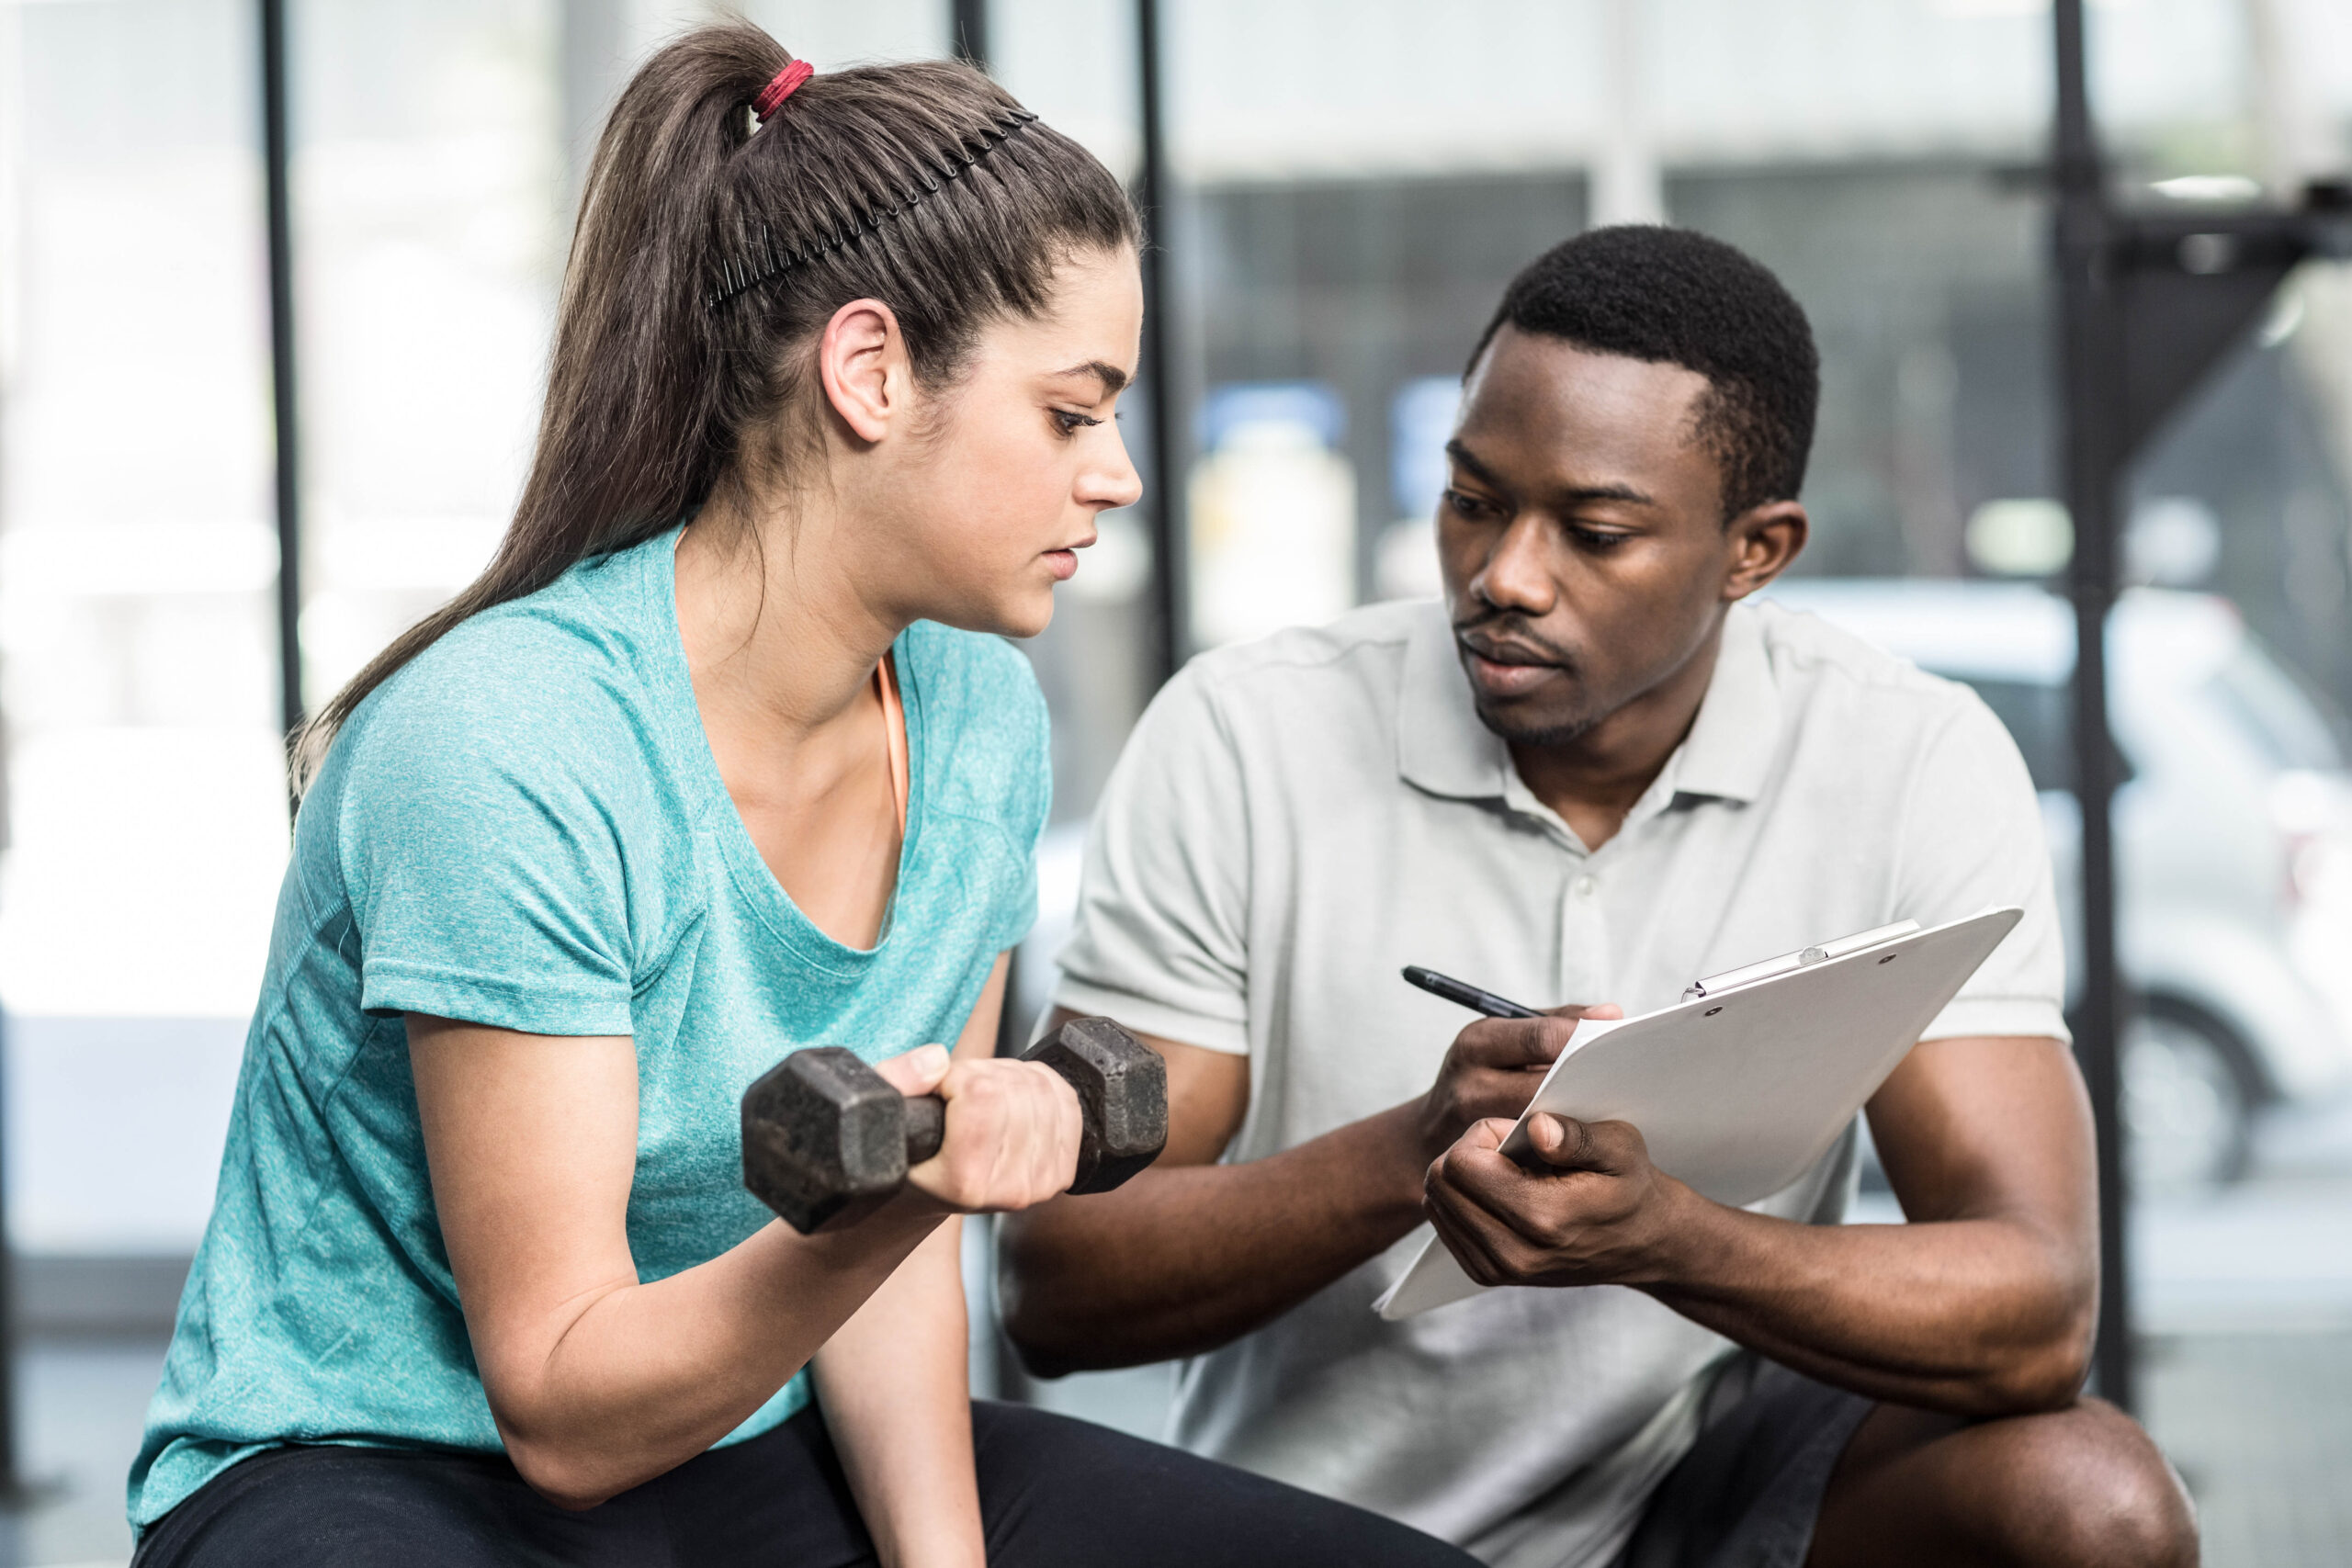
Top Tips for Beginner Weightlifters
The first time you step into a gym can be very intimidating and confusing. Free weights everywhere, Machines that look like death traps, and a lot of people with headphones in that obviously don’t want to be bothered.
Where do you start?
How do you do it safely?
How do you not look like a newbie?
These are questions that every person ponders when they first start weightlifting.
Looking back to when I first started lifting, I realize that there are a lot of things that make me shake my head at, and wonder to myself “What was I thinking!?”. Clearly, I wasn’t
I usually come to the same conclusion that I simply just didn’t know what I was doing. I made a lot of mistakes, and it makes me think of all the people that are starting out who may be making those same mistakes.
Below are my top tips for beginner weightlifters influenced by my mistakes as a beginner, and if I had a time machine, would go back and do differently.
Tip #1: Forget Everything You Think You Know
There are a lot of people in gyms who believe they have enough knowledge to do it for a living. Usually, they are wrong. Because of this, a lot of bad information tends to seep into peoples minds, and gets stuck there.
Over time it turns into concrete, and you find people all throughout gyms doing things they shouldn’t be. If you want to see changes in the gym, and become stronger and healthier, it’s sometimes best to forget everything you’ve been told, and seek advice from someone who has the knowledge and experience to help you reach your goals.
Always going into something new with an open mind is going to give you an advantage later on down the road. This is applicable to almost anything in life!
Tip #2: Learn the Basics and Progress Them Slowly

This has got to be the number one thing that keeps people from being consistent over a long period of time. If you are brand new to weightlifting, and are starting out with Barbell Back Squats, or Barbell Deadlifts like so many people do, then there is a massive problem here. While I am a huge advocate of the big barbell movements, they should only be performed after you’ve learned how to properly squat, hinge, and press.
There are great alternative exercises to all of the big barbell movements that will keep you safe, and lifting for a long time to come.
Below are just a few of my favorite moves to perfect before someone moves on to the barbells.
Back Squat: 4 Point Squat, Goblet Squat, Split Squats
Barbell Deadlift: Good Mornings, RDL, SL RDL
Barbell Bench Press: Push-Ups, Floor Press, Flat DB Press,
Tip #3: Forget about your Ego
This is a tough one for me personally, and really hits home. I was the biggest ego lifter out there. Each workout was about getting more and more weight on the bar.
After time, the extreme stress I was constantly putting my body under began taking its toll. This is because I was never giving my body the rest it required. As a result, all of my lifts started getting weaker and weaker, even though I was working harder and harder.
The human body is incredible at adapting to stress, but at a certain point it just can’t keep up. This is where intensity sometimes has to take a back seat in order to allow your body to recover properly. This is also when the risk of injury can be significantly higher than normal.
Deload!
The term “deload” gets tossed around a lot in training circles, but most people are either unsure how to properly program one, or they just don’t understand the importance of them.
Deloads give your body a chance to recover from the constant stress that working out places on it. A common mistake made while deloading is going too far in the other direction, and putting your body under almost no stress. They should still have a certain level of toughness.
An example of a good deload could simply be doing less sets than normal. If you normally do 4 sets of Squats per workout, do only three on your deloads. What you don’t want to do is something like 60% of your one rep max for 3 sets of 3-5 reps. Generally, 60% of one rep max can be completed for 10-15 reps per set.
Although, it may seem like good idea, you’re mostly just wasting time. A deload should still be challenging but not to the degree your typical workouts are.
Tip #4: Ask for Advice
One thing I have found in gyms is that most people don’t mind helping out. Even the “gym bros” I mentioned earlier who always have headphones in, generally don’t mind answering questions. Most people would prefer a “newbie” ask for advice instead of just going with what they think they know, and getting hurt.
The training community is generally very accepting and willing to help. Be careful who you take advice from, though. Just because someone may have a good physique doesn’t mean they necessarily should be giving advice to others.
And on the flip side, I’ve met casual gym goers who have more knowledge than professional trainers. Find people you trust, and soak in all the knowledge you can.
Take Action!
There are many things I wish I could go back and do differently. Learning these lessons earlier on in life would be one of my first do overs if I were given the chance. I could’ve avoided injuries, frustration, and wasted time.
If you are just starting out in the gym, or have been working out for years, these top tips for beginner weightlifters will aid you for many more years of training to come.
If you found this article helpful or informative, please check out our other articles HERE
For more fitness, health, and lifestyle tips, check out our YouTube channel HERE
And, as always…
Small steps, BIG results!

Brandon started working out as an athlete in high school, striving to push his limits and reach his full athletic potential. As he spent more and more time working on his own goals, he found a passion in the science of strength & conditioning, and using that new-found knowledge to help others. Brandon is exceptional at giving his clients the extra push to get stronger in a safe manner, while going above and beyond to making sure they feel comfortable and safe.
April 2, 2021
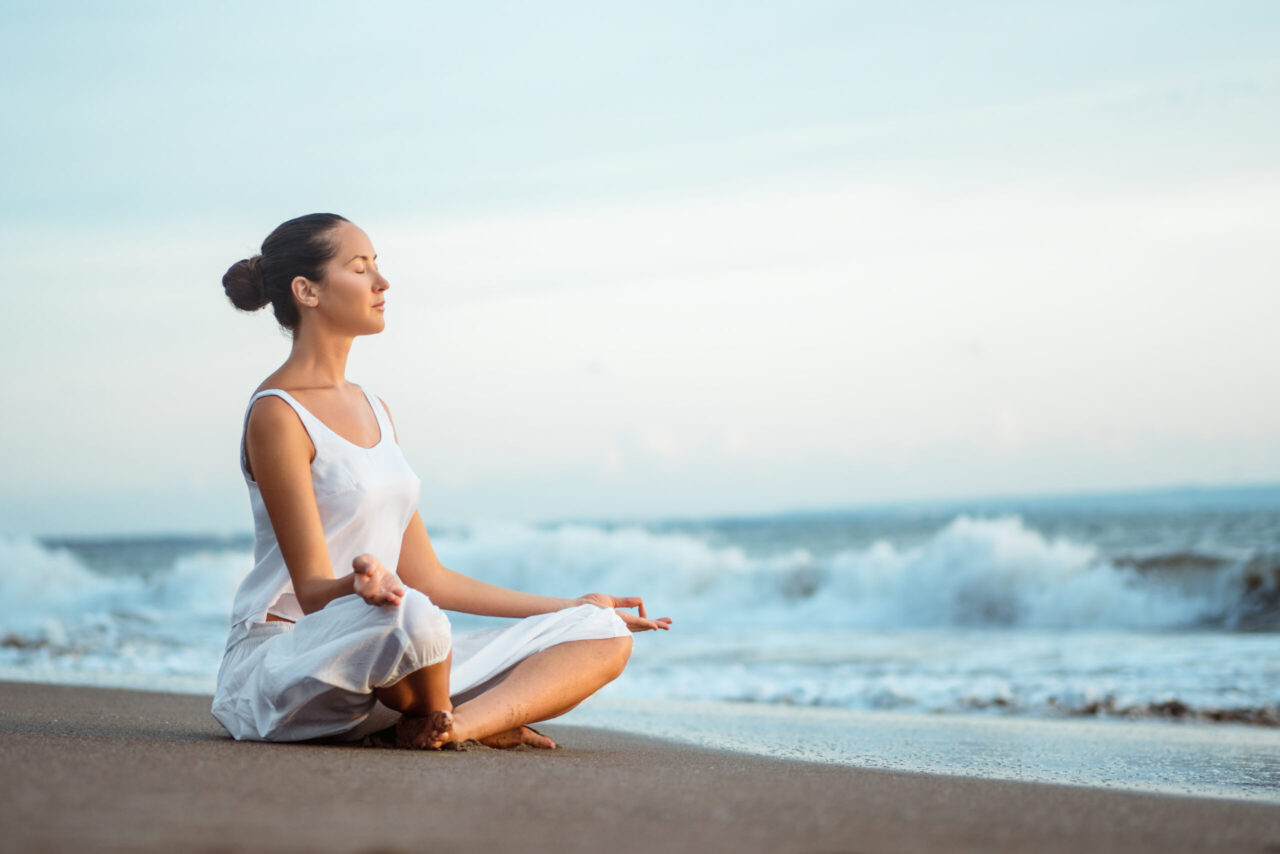
Ideas for Relaxation to Use Anywhere
Incorporating ideas for relaxation in your busy life is simple.
How many times have you heard someone say that they just want to chill out and relax? Why do we crave relaxation? Because, when we are relaxed we feel calm, well, mentally settled, and comfortable. Keep reading to find out how you can be relaxed in your daily life.
The Benefits of Relaxation
The benefits of relaxation go above and beyond just being comfortable. Moments of relaxation in our fast-paced world actually make us healthier humans.
Just to name a few, relaxation has physical and mental benefits for your whole being by:
- Lowering blood pressure & heart rate
- Decreasing anxiety
- Aiding digestion
- Brightening your mood
- Reducing aches and pains
- Improving concentration
- Enhancing sleep
- Reducing negative feelings (anger, frustration)
Let’s move on to find out how to apply ideas for relaxation to your life to get these benefits.
Exercise!
As a matter of fact, you do not have to become an athlete to reap the relaxation benefits of exercise. To begin with, simply moving your body in some way every day will get you in the groove of relaxation. Exercise can be low- or high-impact depending on what creates that feeling of relaxation for you.

Examples of aerobic and anaerobic exercise to reach a state of relaxation are:
- Walking – Preferably outside, but even around your house or up and down stairs works
- Biking – Preferably outside, but a stationary bike gets the job done, too
- Dancing – In your living room, while washing dishes, anywhere, just shake it!
- Yoga – All you need is a mat and an app with follow along guidance
- Tai chi – Google ‘tai chi for beginners’ and choose a video to follow
- Qigong – Google to find a video that calls to you
- Pilates – Start with a mat class or join a Pilates studio to use equipment
- Stretching – Check out theflexibilityguru.com, Hilery Hutchinson and her 10-minute stretching book
If attending a class in person is not your thing right now, have no fear. The web is exploding with fitness classes to fit anyone’s preference.
You can choose a previously recorded program to practice whenever you choose, or a live practice where you interact with instructors and participants in real time. Furthermore, being part of a community online or in person will encourage you to stay consistent in keeping this idea of relaxation in your daily life.
Tense and Release
Another technique to activate your muscles is progressive muscle relaxation. It’s a practice involving tensing muscle groups, and then releasing the tension by relaxing the muscles.
Here is how you can use the tense and release technique:
- Start from your toes, move to your calves, then your thighs, working your way up to your head. Don’t forget your face!
- By focusing on each muscle group individually, it is easier for you to target areas that may be more tense or sore than others.
- Tense for 5 seconds
- Relax for 30 seconds
- Repeat
While this idea for relaxation is easy, in order for any relaxation technique to work fully you must be MINDFUL.
What does being mindful have to do with relaxation?
Being mindful is a mental state of being consciously aware of what is happening in the present moment.
Mindfulness is created by focusing on, calmly acknowledging and accepting:
- How you are feeling
- What you are thinking
- Physical sensations of your body
Focusing on your breath is one way to create mindfulness, because you are paying attention to what is happening to your body as you breathe. This focus makes it easier to notice if you have shallow breathing, if you are holding your breath, or if your breathing is faster than normal.
Breathe!
Yes, breathe to relax your body. It’s that simple. Believe it or not, a lot of us do not breathe fully, especially when stress is present. If we are not mindful of our breathing we tend to hold our breath or take shallow breaths.
Options to release stress, relax muscles and cleanse your body with essential oxygen are:
- Focusing on taking slow, deep breaths for a few minutes, a few times per day. Be it in the car, washing dishes, folding laundry, raking leaves, etc.
- Using a square breathing technique where you inhale to the count of 4 (or whatever # works for you), hold for a count of 4, exhale to the count of 4, hold for a count of 4, and repeat for a few minutes.
- Breathing from your diaphragm by placing your hand on your abdomen and taking slow, deep inhales focusing on your abdomen expanding followed by a longer exhale. This stimulates your parasympathetic nervous system to calm your body and reduce your heart rate and blood pressure.
- Meditating while focusing only on your breath by being mindful of the oxygen entering your body and the carbon dioxide leaving your body. Closing your eyes can help keep the focus on your breath.
Transferring this mindful practice to other things in your life by focusing on one thing at a time will make it easier to be present in the moment instead of allowing your mind to be scattered.
Need a visual to be mindfully present?
Use your imagination. Yes, the game of pretend from when you were young.
Envision calm and serene images. Many people find it helpful to include nature in their visualizations.
Ideas to consider are:
- Sitting in a comfortable lounge chair on the beach with the sun shining and the temperature is perfect. Watch a wave swelling toward the shore as you inhale expanding your abdomen and every time you exhale imagine the wave breaking slowly across the shore.
- Gently swinging in a hammock on a fall day with the leaves floating down around you. With each sway of the hammock your body is sinking deeper into relaxation as you inhale and exhale.
- Hiking on a trail in the woods meandering between the trees, hearing the birds chirping, the squirrels chattering and the sun’s rays peeking through the leaves and branches.
- Choosing your favorite place surrounded by all the things that make you feel calm, happy, and whole. Wherever that may be, how do you feel when you are in your favorite place?
You can have a lot of fun with these ideas for relaxation because you can let your imagination run wild and transport yourself anywhere.
Relaxation made easy
There’s an app for that! Consider choosing from the plethora of apps for download, free and otherwise, that provide ideas for relaxation. They offer everything from listening to music or nature sounds to hearing a voice guiding you by story or through visualization and much more.
A few internet favorites are:
- Calm
- 10% Happier
- Insight Timer
- Headspace
It is easy to see that these apps take the thinking out of the practice allowing you to just follow along.
To Recap
Practicing these ideas for relaxation will:
- Keep your mental state balanced
- Keep you physically fit
- Improve your inclination to see the bright side
- Manage your fight-or-flight response in stressful situations
In short, the trick is to choose a relaxation technique that works for you, and not one that will add to your stress by trying to accomplish it in your busy day. Consequently, you may have to try a few to find the one that works easily.
If you enjoyed this article please check out other helpful articles by our coaches here:
Hybrid Fitness You Tube Channel
Remember…small steps, big results.
Cathy grew up in NH surrounded by a large, loving family, where she learned generosity and hard work. She now models that for her two children. She was inspired to become a fitness coach when searching for ways to become more healthy herself after a life-threatening illness.